
Machine learning based line following using TurtleBot3 with ROS2 Jazzy and Gazebo Harmonic
[//]: # (Image References)
[image1]: ./assets/starter-package.png "Starter package" [image2]: ./assets/terminator.png "Terminator" [image3]: ./assets/windows-terminal.png "Terminal" [image4]: ./assets/rqtgraph1.png "rqt_graph" [image5]: ./assets/rqt_1.png "rqt" [image6]: ./assets/turtlesim_1.png "turtlesim" [image7]: ./assets/rqtgraph2.png "rqt_graph" [image8]: ./assets/rqt_2.png "rqt" [image9]: ./assets/rqtgraph3.png "rqt_graph" [image10]: ./assets/rqtgraph4.png "rqt_graph" [image11]: ./assets/rqtgraph5.png "rqt_graph" [image12]: ./assets/gazebo.png "Shapes.sdf" [image13]: ./assets/gazebo-1.png "Gazebo GUI" [image14]: ./assets/gazebo-2.png "Gazebo models" [image15]: ./assets/turtlebot.png "Turtlebot" [image16]: ./assets/turtlebot-1.png "Turtlebot" [image17]: ./assets/turtlebot-2.png "Turtlebot" [image18]: ./assets/slam.png "SLAM" [image19]: ./assets/navigation.png "Navigation" [image20]: ./assets/navigation-slam.png "Navigation" [image21]: ./assets/line-following.png "Line following" [image22]: ./assets/line-following-1.png "Line following" [image23]: ./assets/line-following-2.png "Line following" [image24]: ./assets/line-following-3.png "Line following" [image25]: ./assets/saving-images.png "Saving images" [image26]: ./assets/training.png "Training" [image27]: ./assets/training-1.png "Training" [image28]: ./assets/training-2.png "Training" [image29]: ./assets/trajectory.png "mogitrajectoryserver" [image30]: ./assets/line-following-4.png "Line following" [image31]: ./assets/smaller-cnn.png "CNN for the robot"
Week 1-8: Cognitive robotics
This is how far we will get by the end of this lesson:
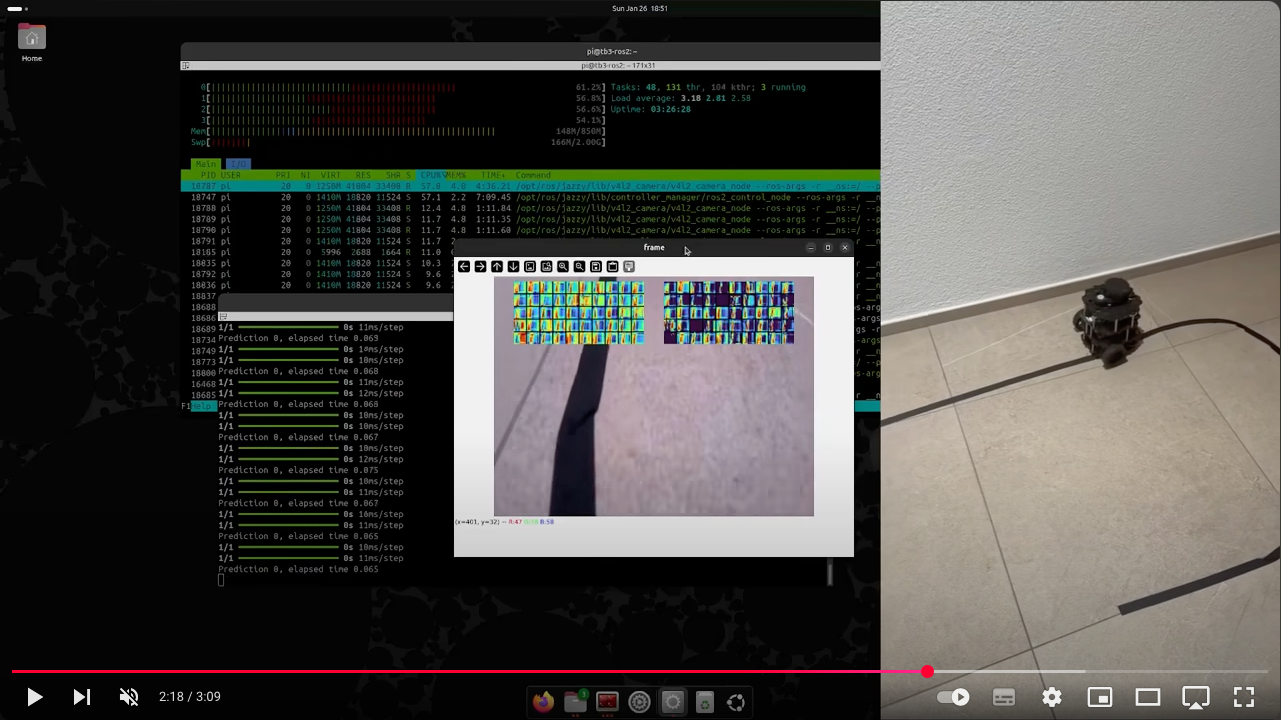
Here you can see a short video about the final projects from the previous years:
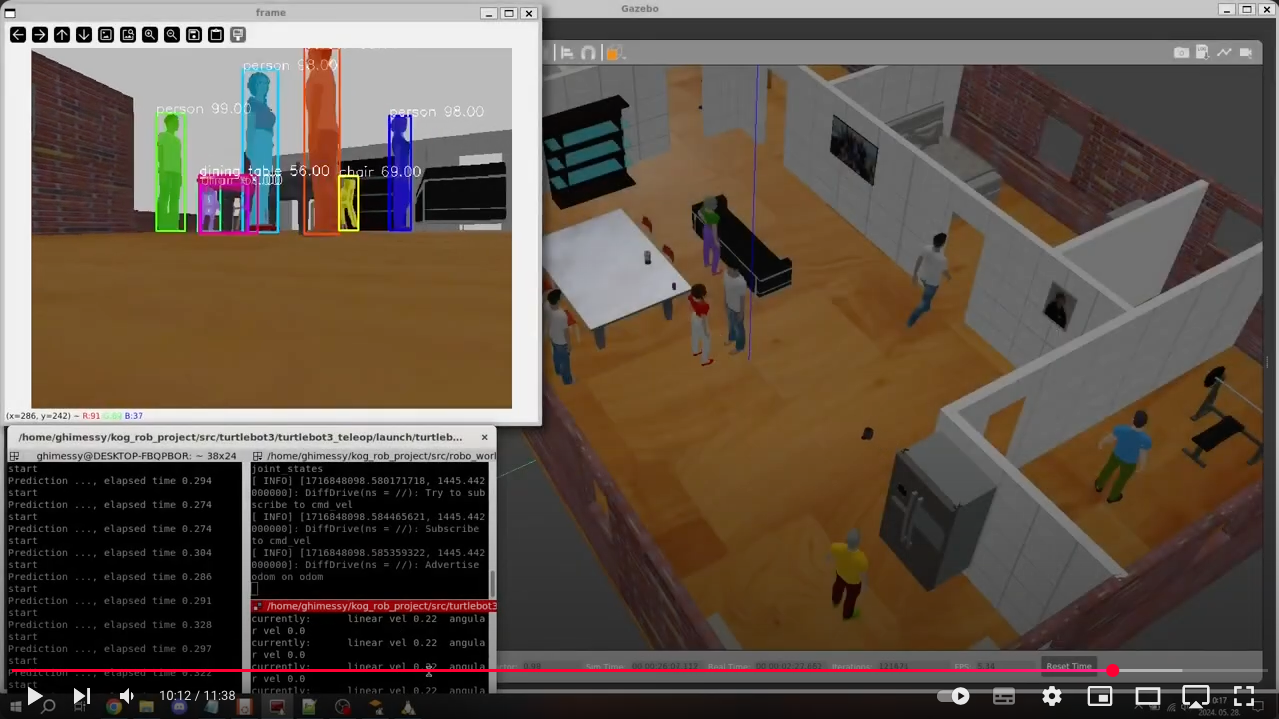
Table of Contents
- ROS basics
- Gazebo basics
- Turtlebot3 simulation
- Test on the real Turtlebot3
- Turtlebot3 MOGI
- Line following
- Neural network
- Test on the real robot
ROS basics
What is ROS(2)?
ROS, or Robot Operating System, is an open-source framework designed to facilitate the development of robotic applications. It provides a collection of tools, libraries, and conventions that simplify the process of designing complex robot behaviors across a wide variety of robotic platforms.ROS was initially developed in 2007 by the Stanford Artificial Intelligence Laboratory and continued by Willow Garage, with the goal of providing a common platform for research and development in robotics. The primary motivation was to create a standard framework that could support a broad range of robotic applications, promote code reuse, and foster collaboration within the robotics community.
Key reasons for ROS development include:
- Standardization: Creating a common platform that simplifies the integration of different hardware and software components.
- Modularity: Enabling the development of modular and reusable software components (nodes) that can be easily shared and adapted for various robotic systems.
- Community Collaboration: Encouraging collaboration among researchers and developers, resulting in a vast collection of tools and libraries.
Transition to ROS 2
ROS 2 was developed to address the limitations of ROS 1 and meet the growing demands for industrial and commercial robotics applications. The development began around 2014 and aimed to enhance the capabilities of ROS, particularly in areas such as security, real-time performance, and support for multi-robot systems. In practice, the biggest difference is in the underlying middleware, ROS1 uses a custom transport layer and message-passing system that was not designed for real-time or distributed applications (see ROS1's roscore).
The latest ROS1 release is ROS Noetic which was intended to be used on Ubuntu 20.04. It goes to EOL in May, 2025 together with Ubuntu 20.04.
Required softwares
Ubuntu 24.04 LTS
In the course we'll use ROS2 Jazzy Jalisco, which requires Ubuntu 24.04 for the smoothest operation.
You have a couple of options, but the most recommended is the native installation of the operating system - external SSD, dual boot, etc.
1) Native install, the most recommended way. You will learn how to set up the environment, there won't be difficulties with GPU acceleration and many more advantages. 2) Windows 11 WSL2 (Windows Subsystem Linux), see instructions. It's a straightforward way if you want to use within Windows environment. You can still learn how to set up the environment but can be more challenging with GUI applications and 3D acceleration. 3) Virtual machine, VMware fusion is now free for personal use. Less flexible than WSL2 on Windows 11 but works well on macOS. 3D acceleration can be challenging. 4) Docker container. First it might look an easy way to use any ROS distribution on any host operating system, but it's getting more and more challenging if we need GUI applications, 3D acceleration and can be confusing for beginners how to work within the container. You might miss some important experience with setting up the environment if using a pre-configured container image. I only recommend this way for experienced Docker users. 5) Using an online environment e.g. The Construct. It looks promising that you don't have to install any special software, but you won't gain experience with setting up the environment. It can be difficult to cherry pick the software versions you need and accessing GUI applications through the web interface is a poor experience.
The options 1 and 2 are the most practical and preferred ways to use ROS. In an exotic case, if you want to run Ubuntu 24.04 and ROS2 Jazzy on macOS and Apple silicon this is a very good tutorial.
>Pro tip if you want to mount directories from your host system into your guest Ubuntu 24.04 running in VMware fusion, more details on this link: >
>/usr/bin/vmhgfs-fuse .host:/BME/ROS2-lessons /home/david/ros2ws/src/ROS2-lessons -o subtype=vmhgfs-fuse,allowother >Visual Studio Code
The recommended code editor during the course is Visual Studio Code, but it's up to your choice if you want to go with your different editor. Depending on your Ubuntu install method you might install it natively on Ubuntu, in your virtual environment or on your host operating system.
Recommended extensions to install:
- Markdown All in One
- C/C++
- Python
- CMake Tools
- Remote - SSH - if you work on physical robots, too
- Remote - WSL - if you do the course using WSL2
GitHub and a git client
The course materials are available on GitHub, and the submissions of your final projects shall also use GitHub. You'll need a very good excuse why to use alternative git solutions like GitLab.
So I encourage everyone to register your GitHub accounts, and if you are there don't forget to sign up for the GitHub Student Developer Pack which gives you a bunch of powerful developer tools for free.
I recommend to use a graphical git client that can boost your experience with git, in my optinion the best one is GitKraken, which is not a free software, but you get the pro version as part of the GitHub Student Developr Pack! If you prefer using git as a cli tool then no worries, it's absoluetely all right.
Markdown
Markdown is not a standalone software but rather a lightweight, plain-text formatting language used to create formatted documents. It was created by John Gruber in 2004 with the goal of being easy to read and write, using simple syntax to style text, create lists, links, images, and more. It is widely used for writing documentation, readme files, and content for static websites.
Basic Markdown Syntax
- Headings:
#Heading 1,##Heading 2, etc. - Bold:
bold textorbold text - Italic:
italic textoritalic text - Lists:
- Item or * Item
- Ordered: 1. Item
- Links: Link text
- Images: 
)
GitHub Flavored Markdown (GFM)
GitHub Flavored Markdown (GFM) is a variant of Markdown used by GitHub to provide additional features and syntax that are not available in standard Markdown. It includes:
- Tables:
- Task lists:- Strikethrough: strikethrough text- Syntax highlighting in a specific language:
def hello_world():
print("Hello, world!")- Tables of Contents
- @mentions for users, references to issues, and pull requests using #number
A good terminal
It's up to your choice which terminal tool would you like to use, but I strongly recommend one that support multiple split windows in a single unified window, because we will use a lot of terminals! On Linux, I can recommend terminator: ![alt text][image2]
In case you use WSL2, the built-in Windows terminal also support multiple panes and works really well! ![alt text][image3]
And finally, install ROS2 Jazzy
ROS always had very good and detailed installed guides, it's not anything different for ROS2's Jazzy release. The installation steps can be found here, with Ubuntu 24.04 it can be installed simply through pre-built, binary deb packages.
After installing it we have to set up our ROS2 environment with the following command:
source /opt/ros/jazzy/setup.bashBy default, we have to run this command in every new shell session we start, but there is a powerful tool in Linux for such use cases. .bashrc file is always in the user's home directory and it is used for user-specific settings for our shell sessions. You can edit .bashrc directly in a terminal window with a basic text editor, like nano:
david@david-ubuntu24:~$ nano .bashrcHere, you can add your custom user-specific settings in the end of the file, that will be executed every time you initiate a new shell session. I created an example gist that you can add to the end of your file and use it during the course.
ROS2 Jazzy has an even more detailed tutorial about setting up your environment, you can check it out, too!
Running some examples
Your ROS2 install comes with a couple of good examples as you can also find it on the install page.
Let's try them!
The following command starts a simple publisher written in C++. A publisher is a node that is responsible for sending messages with a certain type over a specific topic (in this example the topic's name is chatter and the type is a string). A topic is a communication pipeline in the publish-subscribe communication model where a single message is sent to multiple subscribers, unlike message-queues that are point-to-point models, where a single message is sent to a single consumer. Publishers broadcast messages to topics, and subscribers listen to those topics to receive a copy of the message.
Publish-subscribe models are asynchronous, one-to-many or many-to-many interactions where the publishers don't know how many subscribers there are (if any). Therefore publisher never expects any response or confirmation from the subscribers.
Now, let's run the demo publisher written in C++:
ros2 run demonodescpp talkerYour output should look like this:
david@david-ubuntu24:~$ ros2 run demonodescpp talker [INFO] [1727116062.558281395] [talker]: Publishing: 'Hello World: 1' [INFO] [1727116063.558177802] [talker]: Publishing: 'Hello World: 2' [INFO] [1727116064.558010534] [talker]: Publishing: 'Hello World: 3' [INFO] [1727116065.557939861] [talker]: Publishing: 'Hello World: 4' [INFO] [1727116066.557849645] [talker]: Publishing: 'Hello World: 5'Let's start a subscriber - written in Python - in another terminal window, which subscribes to the chatter topic and listens to the publisher node's messages:
david@david-ubuntu24:~$ ros2 run demonodespy listener
[INFO] [1727116231.574662048] [listener]: I heard: [Hello World: 170]
[INFO] [1727116232.560517676] [listener]: I heard: [Hello World: 171]
[INFO] [1727116233.558907367] [listener]: I heard: [Hello World: 172]
[INFO] [1727116234.560768278] [listener]: I heard: [Hello World: 173]
[INFO] [1727116235.559821377] [listener]: I heard: [Hello World: 174]
[INFO] [1727116236.559993767] [listener]: I heard: [Hello World: 175]
Useful cli and graphical tools
Now both nodes are running we can try a few useful tools. The first on let us know what kind of nodes are running in your ROS2 system:ros2 node listWhich gives us the following output:
david@david-ubuntu24:~/ros2_ws$ ros2 node list /listener /talkerIf we want to know more about one of our nodes, we can use the ros2 node info /node command:
david@david-ubuntu24:~/ros2_ws$ ros2 node info /listener  /listener   Subscribers:     /chatter: std_msgs/msg/String   Publishers:     /parameterevents: rclinterfaces/msg/ParameterEvent     /rosout: rcl_interfaces/msg/Log   Service Servers:     /listener/describeparameters: rclinterfaces/srv/DescribeParameters     /listener/getparametertypes: rcl_interfaces/srv/GetParameterTypes     /listener/getparameters: rclinterfaces/srv/GetParameters     /listener/gettypedescription: typedescriptioninterfaces/srv/GetTypeDescription     /listener/listparameters: rclinterfaces/srv/ListParameters     /listener/setparameters: rclinterfaces/srv/SetParameters     /listener/setparametersatomically: rcl_interfaces/srv/SetParametersAtomically   Service Clients:
Action Servers:
Action Clients:
At the moment, the most interesting detail we can gather about a node is if it's subscribing or publishing to any topic. In later lessons we'll learn more about parameters and services.
In a very similar way, we can also list all of our topics with ros2 topic list command:
david@david-ubuntu24:~/ros2_ws$ ros2 topic list /chatter /parameter_events /rosoutAnd we can get more details about a certain topic with the ros2 topic info /topic command:
david@david-ubuntu24:~/ros2_ws$ ros2 topic info /chatter Type: std_msgs/msg/String Publisher count: 1 Subscription count: 1Another powerful tool is rqt_graph that helps us visualizing the nodes and topics in a graph. ![alt text][image4]
rqt_graph can be used as a standalone tool, or part of rqt which can be used to build a complete dashboard to mintor and control your nodes. We'll spend a lot of time with it, at the moment let's just see the message monitoring function: ![alt text][image5]
Let's run more examples: turtlesim
Let's see another built in example which is a simple 2D plotter game.In a case it's not automatically installed, you can install it with the following command:
>> sudo apt install ros-jazzy-turtlesim
To run the main node just execute the follwoing command:
ros2 run turtlesim turtlesim_nodeAnd in another terminal start its remote controller, you can simply drive the turtle with the arrows:
ros2 run turtlesim turtleteleopkeyWe can use the same tools as before to see the running nodes and topics, here is how does it look like in rqt_graph. ![alt text][image7]
>We should notice two important things: > >1. turtlesim is more complex than the previous example with multiple services and parameters that we'll check in the end of this lesson. >2. the turtle is controlled with a cmd_vel message which is a 6D vector in space. We'll use this exact same message type in the future to drive our simulated robots.
Now let's move on to create our own nodes!
Create a colcon workspace
To create, build and run custom nodes we need packages, but first we need a workspace where we'll maintain our future packages. There are 2 new terms we must learn about ROS2 workspaces:
amentprovides the underlying build system and tools specifically for ROS2 packages.amentcmakeis a CMake-based build system for C/C++ nodes andamentpythonprovides the tools for packing and installing python nodes and libraries.colcon(COmmand Line COLlectioN) is a general-purpose tool to build and manage entire workspaces with various build systems, including ament, cmake, make, and more.
colcon workspace which - in the backround - will use ament for building the individual packages.
>If you have experience with ROS1, colcon and ament replaces the old catkin tools.
Let's create our workspace inside our user's home directory:
mkdir -p ~/ros2_ws/src cd ~/ros2_ws>A workspace must have a src folder where we maintain the source files of our packages, during building of the workspace colcon will create folders for the deployment of binaries and other output files.
Let's go into the src folder and create our first python package:
ros2 pkg create --build-type amentpython bmeros2tutorialspyDuring package creation we should define if it's a C/C++ (amentcmake) or a python (amentpython) package. If we don't do it, the default is alwaysament_cmake!
We'll put our python scripts under bmeros2tutorialspy which is an automatically created folder with the same name as our package, it already has an empty file init.py, let's add our first node here: helloworld.py.
>We can create files in Linux in several different ways, just a few examples:
- Right click in the folder using the desktop environment
- Through the development environment, in our case Visual Studio Code
- From command line in the current folder using thetouchcommand:touch hello_world.py
At this point our workspace should look like this (other files and folders are not important at this point):
david@david-ubuntu24:~/ros2_ws$ tree -L 4 . └── src └── bmeros2tutorials_py ├── bmeros2tutorials_py │ ├── init.py │ └── hello_world.py ├── package.xml └── setup.pyIt's always recommended to fill thedescription,maintainerwith your name and email address andlicensefields in yourpackage.xmlandsetup.pyfiles. I personally prefer a highly permissive license in non-commercial packages of mine, likeBSDorApache License 2.0.
Let's write the simplest possible hello_world in python:
#!/usr/bin/env python3
Main entry point, args is a parameter that is used to pass arguments to the main function
def main(args=None):
    print("Hello, world!")
Check if the script is being run directly
if name == 'main':
    main()
Although this is a python script that doesn't require any compilation, we have to make sure that ament will pack, copy and install our node. It's important to understand that we are not running python scripts directly from the source folder!
Let's edit setup.py that was automatically generated when we defined that our package will use ament_python.
Add an entry point for our python node. An entry point describes the folder, the filename (without .py) and the main entry point within the script:
...
        entry_points={
            'console_scripts': [
                'pyhelloworld = bmeros2tutorialspy.helloworld:main'
            ],
        },
...
Our first node within our first package is ready for building it! Build must be initiated always in the root of our workspace!
cd ~/ros2_wsAnd here we execute the colcon build command.
After a successful build we have to update our environnment to make sure ROS2 cli tools are aware about of any new packages. To do this we have to run the following command:
source install/setup.bashAs we did with the base ROS2 environment, we can add this to the .bashrc so it'll be automatically sourced every time when we open a terminal:
source ~/ros2_ws/install/setup.bashAnd now we are ready to run our first node:
ros2 run bmeros2tutorialspy pyhello_worldAthough we could run our first node, it was just a plain python script, not using any ROS API. Let's upgrade hello world to a more ROS-like hello world. We import the rclpy which is the ROS2 python API and we start using the most basic functions of rclpy like init(), createnode() and shutdown(). If you already want to do a deep-dive in the API functions you can find everything here.
#!/usr/bin/env python3
import rclpy # Import ROS2 python interface
Main entry point, args is a parameter that is used to pass arguments to the main function
def main(args=None):
    rclpy.init(args=args)                          # Initialize the ROS2 python interface
    node = rclpy.createnode('pythonhello_world') # Node constructor, give it a name
    node.get_logger().info("Hello, ROS2!")         # Use the ROS2 node's built in logger
    node.destroy_node()                            # Node destructor
    rclpy.shutdown()                               # Shut the ROS2 python interface down
Check if the script is being run directly
if name == 'main':
    main()
We don't have to do anything with setup.py, the entrypoint is already there, but we have to re-build the colcon workspace!
After the build we can run our node:
ros2 run bmeros2tutorialspy pyhello_worldCreate a python publisher
Let's make our first publisher in python, we create a new file in the bmeros2tutorials_py folder: publisher.py.
We start expanding step-by-step our knowledge about the ROS2 API with publishing related functions (create_publisher() and publish()).
#!/usr/bin/env python3
import rclpy
from std_msgs.msg import String # Import 'String' from ROS2 standard messages
import time
def main(args=None):     rclpy.init(args=args)     node = rclpy.createnode('pythonpublisher')     # Register the node as publisher     # It will publish 'String' type to the topic named 'topic' (with a queue size of 10)     publisher = node.create_publisher(String, 'topic', 10)
msg = String()                     # Initialize msg as a 'String' instance     i = 0     while rclpy.ok():                  # Breaks the loop on ctrl+c         msg.data = f'Hello, world: {i}' # Write the actual string into msg's data field         i += 1         node.get_logger().info(f'Publishing: "{msg.data}"')         publisher.publish(msg)         # Let the node publish the msg according to the publisher setup         time.sleep(0.5)                # Python wait function in seconds
node.destroy_node()     rclpy.shutdown()
if name == 'main':     main()
We have to edit setup.py, registering our new node as entry point:
... entry_points={ 'console_scripts': [ 'pyhelloworld = bmeros2tutorialspy.helloworld:main', 'pypublisher = bmeros2tutorialspy.publisher:main' ], }, ...Don't forget to rebuild the workspace and we can run our new node:
david@david-ubuntu24:~$ ros2 run bmeros2tutorialspy pypublisher
[INFO] [1727526317.470055907] [python_publisher]: Publishing: "Hello, world: 0"
[INFO] [1727526317.971461827] [python_publisher]: Publishing: "Hello, world: 1"
[INFO] [1727526318.473896872] [python_publisher]: Publishing: "Hello, world: 2"
[INFO] [1727526318.977439178] [python_publisher]: Publishing: "Hello, world: 3"
We can observe the published topic through rqt's topic monitor: ![alt text][image8]
Or we can use a simple but powerful tool, the topic echo:
david@david-ubuntu24:~$ ros2 topic echo /topic data: 'Hello, world: 23'
data: 'Hello, world: 24'
data: 'Hello, world: 25'The publisher node above is very simple and looks exactly how we historically impelented nodes in ROS1. But ROS2 provides more powerful API functions and also places a greater emphasis on object-oriented programming. So let's create another publisher in a more OOP way and using the timer functions (create_timer()) of the ROS2 API. The other important API function is rclpy.spin(node) which keeps the node running until we don't quit it with ctrl+c in the terminal.
#!/usr/bin/env python3
import rclpy
from rclpy.node import Node     # Import ROS2 Node as parent for our own node class
from std_msgs.msg import String
class MyPublisherNode(Node):     def init(self):         super().init("pythonpublisheroop")         self.publisher = self.createpublisher(String, 'topic', 10)         self.timer = self.createtimer(0.5, self.timercallback)     # Timer callback, period in seconds, not frequency!         self.i = 0         self.msg = String()         self.get_logger().info("Publisher OOP has been started.")
def timer_callback(self):                                        # Timer callback function implementation         self.msg.data = f"Hello, world: {self.i}"         self.i += 1         self.get_logger().info(f'Publishing: "{self.msg.data}"')         self.publisher_.publish(self.msg)
def main(args=None):     rclpy.init(args=args)     node = MyPublisherNode() # node is now a custom class based on ROS2 Node     rclpy.spin(node)         # Keeps the node running until it's closed with ctrl+c     node.destroy_node()     rclpy.shutdown()
if name == "main":     main()
As we did previously, add the new script's entrypoint in the setup.py, build the workspace and run our new node:
ros2 run bmeros2tutorialspy pypublisher_oopCreate a python subscriber
Let's create a new file subscriber.py in our python package (bmeros2tutorialspy). First we make a very simple implementation and after that we'll implement a more OOP version of it again. We further extend our knowledge with more API functions related to subscriptions (createsubscription()).
#!/usr/bin/env python3
import rclpy
from std_msgs.msg import String
def main(args=None):     rclpy.init(args=args)     node = rclpy.createnode('pythonsubscriber')
def subscriber_callback(msg):                      # Subscriber callback will be invoked every time when a message arrives to the topic it has subsctibed         node.get_logger().info(f"I heard: {msg.data}")
# Register the node as a subscriber on a certain topic: 'topic' (with a certain data type: String)     # and assign the callback function that will be invoked when a message arrives to the topic     # with a queue size of 10 which determines how many incoming messages can be held in the subscriber’s     # queue while waiting to be processed by the callback function     subscriber = node.createsubscription(String, 'topic', subscribercallback, 10)      node.get_logger().info("Subsciber has been started.")
rclpy.spin(node)
node.destroy_node()     rclpy.shutdown()
if name == 'main':     main()
Add the node to the setup.py file as a new entry point
...
    entry_points={
        'console_scripts': [
            'pyhelloworld = bmeros2tutorialspy.helloworld:main',
            'pypublisher = bmeros2tutorialspy.publisher:main',
            'pypublisheroop = bmeros2tutorialspy.publisheroop:main',
            'pysubscriber = bmeros2tutorialspy.subscriber:main'
        ],
    },
...
Then, build the workspace and we can run our new node!
david@david-ubuntu24:~$ ros2 run bmeros2tutorialspy pysubscriber
[INFO] [1727606328.416973729] [python_subscriber]: Subsciber has been started.
If we don't start a publisher, then our subscriber is just keep listening to the /topic but the callback function is not invoked. The node doesn't stop running because of the rclpy.spin(node) function.
Let's start our C++ publisher in another terminal:
david@david-ubuntu24:~$ ros2 run bmeros2tutorialscpp publishercpp [INFO] [1727606744.184678739] [cpp_publisher]: CPP publisher has been started. [INFO] [1727606744.685934650] [cpp_publisher]: Publishing: 'Hello, world: 0' [INFO] [1727606745.185073828] [cpp_publisher]: Publishing: 'Hello, world: 1' [INFO] [1727606745.686288921] [cpp_publisher]: Publishing: 'Hello, world: 2' [INFO] [1727606746.186169881] [cpp_publisher]: Publishing: 'Hello, world: 3'And let's see what happens with the subscriber! It's subscription callback function is invoked every time when the publisher sends a message onto the /topic.
david@david-ubuntu24:~/ros2ws$ ros2 run bmeros2tutorialspy py_subscriber [INFO] [1727606614.099180007] [python_subscriber]: Subsciber has been started. [INFO] [1727606744.695260304] [python_subscriber]: I heard: Hello, world: 0 [INFO] [1727606745.187956805] [python_subscriber]: I heard: Hello, world: 1 [INFO] [1727606745.689289484] [python_subscriber]: I heard: Hello, world: 2 [INFO] [1727606746.188467429] [python_subscriber]: I heard: Hello, world: 3We can also check it with rqt_graph: ![alt text][image9]
And we can also observe the language agnostic approach of ROS2, without any additional effort this middleware provides interfacing between nodes written in different programming languages.
As before, let's make our subscriber more OOP using our previous template from the publisher. Compared to the publisher we just need to replace the timer callback with a subscription callback and that's all!
#!/usr/bin/env python3 import rclpy from rclpy.node import Node from std_msgs.msg import String
class MySubscriberNode(Node):     def init(self):         super().init("pythonsubsciberoop")         self.subscriber = self.createsubscription(String, 'topic', self.subscriber_callback, 10)         self.get_logger().info("Subsciber OOP has been started.")
def subscriber_callback(self, msg):         self.get_logger().info(f"I heard: {msg.data}")
def main(args=None):     rclpy.init(args=args)     node = MySubscriberNode()     rclpy.spin(node)     node.destroy_node()     rclpy.shutdown()
if name == "main":     main()
Launchfiles
As you noticed with the previous examples we have to use as many terminals as many nodes we start. With a simple publisher and subscriber this isn't really a big deal, but in more complex robotic projects, it's quite common to use ROS nodes in the range of tens or even hundreds. Therefore ROS provides an efficient interface to start multiple nodes together and even re-map their topics to different ones or change its parameters instead of changing the source code itself.
Compared to ROS1 it's a bit more complicated to bundle these launchfiles with our nodes, so as a best practice, I recommend creating an individual pakage only for our launcfiles.
Let's create a new package with amentcmake or simply without specifying the build type (by default it's amentcmake).
ros2 pkg create bmeros2tutorials_bringupNow let's create a launch folder within this new package. We can freely delete include and src folders:
If you want to delete a folder from command line that is not empty you can use the rm -rf folder command
rm -rf include/ src/Add the following to the CMakeLists.txt to install the content of launch when we build the workspce:
install(DIRECTORY launch DESTINATION share/${PROJECT_NAME} )Create a new launch file, and let's call it publisher_subscriber.launch.py. In ROS2 the launchfiles are special declarative python scripts (with some imperative flavours) instead of the xml files we used in ROS1! Actually ROS2 also has the possibility to use xml based launch files, but the general usage and the documentation of this feature is very poor. Initially the python based launch system was intended to be the backend of xml launchfiles but it wasn't ready for the initial launch of ROS2 and the community rather jumped on using the python launch system.
touch publisher_subscriber.launch.pyLet's create our template that we can re-use in the future with only one publisher first. When we add a node to the launch file we must define the the package, the node (executable) and a freely chosen name.
#!/usr/bin/env python3 from launch import LaunchDescription from launch_ros.actions import Node
def generatelaunchdescription():     ld = LaunchDescription()
publisher_node = Node(         package="bmeros2tutorials_py",         executable="py_publisher",         name="my_publisher"     )
ld.addaction(publishernode)     return ld
Build and don't forget to source the workspace because we added a new package!
After it we can execute our launchfile with the ros2 launch command:
david@david-ubuntu24:~$ ros2 launch bmeros2tutorialsbringup publishersubscriber.launch.py [INFO] [launch]: All log files can be found below /home/david/.ros/log/2024-09-29-14-17-29-864407-david-ubuntu24-41228 [INFO] [launch]: Default logging verbosity is set to INFO [INFO] [py_publisher-1]: process started with pid [41231] [pypublisher-1] [INFO] [1727612250.056173684] [mypublisher]: Publishing: "Hello, world: 0" [pypublisher-1] [INFO] [1727612250.559170990] [mypublisher]: Publishing: "Hello, world: 1" [pypublisher-1] [INFO] [1727612251.061618736] [mypublisher]: Publishing: "Hello, world: 2"If we don't write thelaunchword explicitly in the filename of our launch file, theros2 launchcli tool won't be able to autocomplete the filenames.
We can notice that our node is now called mypublisher instead of pythonpublisher as we coded in the node itself earlier. With the launch files we can easily rename our nodes for better handling and organizing as our application scales up.
We can use the node list tool to list our nodes and the output will look like this:
david@david-ubuntu24:~/ros2_ws$ ros2 node list /my_publisherNow let's add the subscriber too:
Every time when we add a node to the launch file we also have to register it with the ld.add_action() function:
from launch import LaunchDescription
from launch_ros.actions import Node
def generatelaunchdescription():     ld = LaunchDescription()
publisher_node = Node(         package="bmeros2tutorials_py",         executable="py_publisher",         name="my_publisher",     )
subscriber_node = Node(         package="bmeros2tutorials_py",         executable="py_subscriber",         name="my_subscriber",     )
ld.addaction(publishernode)     ld.addaction(subscribernode)     return ld
Don't forget to rebuild the workspace so the changed launchfile will be installed, after that we can run it!
david@david-ubuntu24:~$ ros2 launch bmeros2tutorialsbringup publishersubscriber.launch.py [INFO] [launch]: All log files can be found below /home/david/.ros/log/2024-09-29-14-20-15-603371-david-ubuntu24-41380 [INFO] [launch]: Default logging verbosity is set to INFO [INFO] [py_publisher-1]: process started with pid [41383] [INFO] [py_subscriber-2]: process started with pid [41384] [pypublisher-1] [INFO] [1727612415.811451529] [mypublisher]: Publishing: "Hello, world: 0" [pysubscriber-2] [INFO] [1727612415.811459737] [mysubscriber]: Subsciber has been started. [pysubscriber-2] [INFO] [1727612415.811878677] [mysubscriber]: I heard: Hello, world: 0 [pypublisher-1] [INFO] [1727612416.313222973] [mypublisher]: Publishing: "Hello, world: 1" [pysubscriber-2] [INFO] [1727612416.315340170] [mysubscriber]: I heard: Hello, world: 1We can see that both nodes started and their logging to the standard output is combined in this single terminal window.
We can verify this with node list or using rqt_graph visually:
david@david-ubuntu24:~$ ros2 node list /my_publisher /my_subscriberWe can also verify the used topics with the topic list tool:
david@david-ubuntu24:~$ ros2 topic list /parameter_events /rosout /topicGazebo basics
Gazebo is a powerful robotics simulation tool that provides a 3D environment for simulating robots, sensors, and objects. It is widely used in the ROS ecosystem for testing and developing robotics algorithms in a realistic virtual environment before deploying them to real hardware.Gazebo integrates tightly with ROS, enabling simulation and control of robots using ROS topics, services, and actions. In ROS2 with the latest Gazebo releases the integration is facilitated by ros_gz.
Key Features of Gazebo:
- 3D Physics Engine:
- Realistic Sensors:
- Plugins:
- Worlds and Models:
Besides Gazebo, there are many alternative simulation environments for ROS, but usually the setup of these simulators are more complicated and less documented. Certain simulators also have very high requirements for the GPU.
| Simulator | Best For | Advantages | Disadvantages | |---------------|---------------------------------------|-------------------------------------|---------------------------------------------| | Gazebo | General robotics simulation in ROS | Free, accurate physics, ROS support | Moderate visuals, resource-heavy | | Unity | High-fidelity visuals and AI/ML tasks | Realistic graphics, AI tools | Steep learning curve, not robotics-specific | | Webots | Beginner-friendly robotics simulation | Easy setup, cross-platform | Limited graphics, less customizable | | Isaac Sim | High-end AI and robotics simulation | High-fidelity physics, AI support | GPU-intensive, complex setup |
Install Gazebo
Before we install Gazebo we have to understand the compatibility between Gazebo versions and ROS distributions.
| ROS Distribution | Gazebo Citadel (LTS) | Gazebo Fortress (LTS) | Gazebo Garden | Gazebo Harmonic (LTS) | Gazebo Ionic | |-----------------------|--------------------------|---------------------------|-------------------|---------------------------|------------------| | ROS 2 Rolling | ❌ | ❌ | ⚡ | ⚡ | ✅ | | ROS 2 Jazzy (LTS) | ❌ | ❌ | ⚡ | ✅ | ❌ | | ROS 2 Iron | ❌ | ✅ | ⚡ | ⚡ | ❌ | | ROS 2 Humble (LTS)| ❌ | ✅ | ⚡ | ⚡ | ❌ | | ROS 2 Foxy (LTS) | ✅ | ❌ | ❌ | ❌ | ❌ | | ROS 1 Noetic (LTS)| ✅ | ⚡ | ❌ | ❌ | ❌ |
Since we use the latest LTS ROS2 distribution, Jazzy, we need Gazebo Harmonic.
To install Gazebo Harmonic binaries on Ubuntu 24.04 simply follow the steps on this link.
Once it's installed we can try it with the following command:
gz sim shapes.sdfIf everything works well you should see the following screen: ![alt text][image12]
If you have a problem with opening this example shapes.sdf there might be various reasons that requires some debugging skills with Gazebo and Linux.
- If you see a
Segmentation fault (Address not mapped to object [(nil)])due to problems withQtyou can try to set the following environmental variable to force Qt to use X11 instead of Wayland. Link
export QTQPAPLATFORM=xcb- If you run Gazebo in WSL2 or virtual machine the most common problem is with the 3D acceleration with the OGRE2 rendering engine of Gazebo. You can either try disabling HW acceleration (not recommended) or you can switch the older OGRE rendering engine with the following arguments. Link
gz sim shapes.sdf --render-engine ogre- If you run Ubuntu natively on a machine with an integrated Intel GPU and a discrete GPU you can check this troubleshooting guide.
sudo apt install ros-jazzy-ros-gzYou can find the official install guide here.
Run Gazebo examples
Let's start again the gz sim shapes.sdf example again and let's see what is important on the Gazebo GUI: ![alt text][image13]
- Blue - Start and pause the simulation. By default Gazebo starts the simulation paused but if you add the
-rwhen you start Gazebo it automatically starts the simulation. - Cyan - The display shows the real time factor. It should be always close to 100%, if it drops seriously (below 60-70%) it's recommended to change the simulation step size. We'll see this later.
- Red - You can add basic shapes or lights here and you can move and rotate them.
- Pink - The model hierarchy, every item in the simulation is shown here, you can check the links (children) of the model, their collision, inertia, etc.
- Green - Detailed information of the selected model in
4.some parameters can be changed most of them are read only. - Plug-in browser, we'll open useful tools like
Resource Spawner,Visualize Lidar,Image Display, etc.
You can download this offline model library from Google Drive.
After download unzip it and place it in the home folder of your user. To let Gazebo know about the offline model library we have to set the GZSIMRESOURCE_PATH environmental variable, the best is to add it to the .bashrc:
export GZSIMRESOURCEPATH=~/gazebomodelsAfter setting up the offline model library let's open the empty.sdf in Gazebo and add a few models through the Resource Spawner within the plug-in browser: ![alt text][image14]
Turtlebot3 simulation
In this lesson we'll use the simulated and the real Turtlebot3 robot in burger configuration. Turtlebot3 is not supported anymore with the latest ROS2 and Gazebo distributions, but we maintain our own packages to ensure compatibility.
Let's download the following GitHub repositories with the right branch (using the -b branch flag) to our colcon workspace:
git clone -b ros2 https://github.com/MOGI-ROS/turtlebot3_msgs
git clone -b mogi-ros2 https://github.com/MOGI-ROS/turtlebot3
git clone -b newgazebo https://github.com/MOGI-ROS/turtlebot3simulations
We'll need to install a couple of other dependencies with apt - don't forget to run sudo apt update and sudo apt upgrade if your system is not up to date:
sudo apt install ros-jazzy-dynamixel-sdk sudo apt install ros-jazzy-hardware-interface sudo apt install ros-jazzy-nav2-msgs sudo apt install ros-jazzy-nav2-costmap-2d sudo apt install ros-jazzy-nav2-map-server sudo apt install ros-jazzy-nav2-bt-navigator sudo apt install ros-jazzy-nav2-bringup sudo apt install ros-jazzy-interactive-marker-twist-server sudo apt install ros-jazzy-cartographer-ros sudo apt install ros-jazzy-slam-toolboxIf for some reasons you want to install the Dynamixel SDK from source you can download the following branch from GitHub:
>> git clone -b humble-devel https://github.com/MOGI-ROS/DynamixelSDK/
and if your Dynamixel SDK runs into a problem with moduleem, uninstall existingemand install this version as it's reported in this GitHub issue. You might also need to install the modulelark:
> pip install lark >> pip install empy==3.3.4
Before we can test the Turtlebot3 packages we have to set up TURTLEBOT3_MODEL environmental variable:
export TURTLEBOT3_MODEL=burgerIt's only valid for that terminal session where you set it up, so it's recommended to add it into your .bashrc file so every time when you open a new terminal, it will be executed. You can use the following gist as an example how to set up the .bashrc file.
After building the workspace and sourcing the setup.bash file we can test the simulation of the Turtlebot3 burger:
ros2 launch turtlebot3gazebo emptyworld.launch.py![alt text][image15]
If we start a keyboard teleop node we can already drive the robot in the simulation:
ros2 run teleoptwistkeyboard teleoptwistkeyboardOr there is another example world:
ros2 launch turtlebot3gazebo turtlebot3world.launch.pyWhere we can try the cartographer package for mapping:
ros2 launch turtlebot3cartographer cartographer.launch.py usesim:=trueThere is a third simulated environment:
ros2 launch turtlebot3gazebo turtlebot3house.launch.pyWhere we can try the nav2 navigation stack:
ros2 launch turtlebot3navigation2 navigation2usesimtime.launch.py mapyamlfile:=/home/david/ros2ws/src/turtlebot3simulations/turtlebot3_gazebo/maps/map.yamlReplace the map_yaml path to your path!
![alt text][image19]
Test on the real Turtlebot3
Let's try the same functionality on the real Turtlebot3 Burger. The robots at the lab are updated to the latest SD card image but in case you need to write the official MOGI image to another SD card you find it here.
On Linux you can use theddtool to create a backup or write your image back on a card.ifis the input file andofis the output file.
To create a backup you can run the following command, where /dev/sda must match the path to your SD card:
>> sudo dd if=/dev/sda of=/home/david/backup.img status=progress
And you can easily write an image file back to the card:
>> sudo dd of=/dev/sda if=/home/david/backup.img status=progress
With the MOGI image the robots are already fully set up, this is the .bashrc that is running on the robots.
It's useful to take a look especially on this environmental variable:
# Set up a ROS2 domain ID export ROSDOMAINID=30This environment variable used in ROS2 that plays a key role in how nodes communicate over the DDS (Data Distribution Service) middleware. It partitions the DDS network into isolated segments. Nodes with the same domain ID can discover and communicate with each other, while nodes with different domain IDs remain isolated.
First, we have to make sure that the robots are on the same wireless network, if needed this must be set up using a screen and a keyboard. The wifi networks can be configured by editing the /etc/netplan/50-cloud-init.yaml file.
When the robot is on the same network as our PC we can connect to it using SSH, where the user name is pi and the IP address must match with our robot's IP address:
ssh pi@192.168.1.45123 for this image: pi@192.168.1.45's password:The ROS2 workspace is already set up on the robot, we can run the following launch file to start all the functions of the real robot:
ros2 launch turtlebot3_bringup hardware.launch.pyThe on the PC we can start the teleop node:
ros2 run teleoptwistkeyboard teleoptwistkeyboardI suggest to decrease the linear and angular speeds with the z key to some value like this:
> currently: speed 0.12709329141645007 turn 0.25418658283290013 >> q/z : increase/decrease max speeds by 10%
Then on the PC we can try a SLAM algorithm like the cartographer as before or the best open-source SLAM package slam_toolbox:
ros2 launch turtlebot3slamtoolbox slam_toolbox.launch.pyor if you prefer cartographer:
ros2 launch turtlebot3_cartographer cartographer.launch.pyTurtlebot3 MOGI
After this point we'll use the turtlebot3_mogi package which is available in this repository and you can download into your workspace with the following command:
git clone https://github.com/MOGI-ROS/Week-1-8-Cognitive-roboticsIf you've already downloaded it and you want to make sure it's up-to-date you can run the following command:
git pullLet's see what is in the package:
turtlebot3_mogi$ tree . ├── CMakeLists.txt ├── package.xml ├── gazebo_models │ ├── dark_bg │ │ ├── meshes │ │ │ └── dark_bg.dae │ │ ├── model.config │ │ └── model.sdf │ ├── light_bg │ │ ├── meshes │ │ │ └── light_bg.dae │ │ ├── model.config │ │ └── model.sdf │ └── red_line │ ├── meshes │ │ └── red_line.dae │ ├── model.config │ └── model.sdf ├── launch │ ├── check_urdf.launch.py │ ├── robot_mapping.launch.py │ ├── robot_navigation.launch.py │ ├── robot_visualization.launch.py │ ├── simulationbringupline_follow.launch.py │ ├── simulationbringupnavigation.launch.py │ ├── simulationbringupnavigationwithslam.launch.py │ └── simulationbringupslam.launch.py ├── maps │ ├── map.pgm │ └── map.yaml ├── meshes │ ├── dark_bg.blend │ └── light_bg.blend ├── rviz │ ├── robot_basic.rviz │ ├── robot_mapping.rviz │ ├── robot_navigation.rviz │ ├── turtlebot3linefollower.rviz │ ├── turtlebot3_navigation.rviz │ ├── turtlebot3_slam.rviz │ └── urdf.rviz └── worlds ├── dark_background.sdf ├── empty.sdf ├── light_background.sdf └── red_line.sdfgazebo_models: 3D models for the line following worldslaunch: Default launch files are already part of the starting package, we can test the package withsimulationbringupslam.launch.py. Launchfiles starting withrobot_prefix are intended to run with the real robot.maps: saved map for testing thesimulationbringupnavigation.launch.pymeshes: this folder contains the 3D models of the line following worlds in native Blender format.rviz: Pre-configured RViz2 layoutsworlds: default Gazebo worlds that we'll use in the simulations.
Important: this package has a dependency on the mogitrajectoryserver package that helps visualizing the robot's past trajectory. You can download this package from git to your workspace to use it:
git clone https://github.com/MOGI-ROS/mogitrajectoryserverSome launchfiles of the package acts as a simple wrapper to quickly launch the simulations that we already tried previous weeks. Let's try them out one by one, first the SLAM mapping:
ros2 launch turtlebot3mogi simulationbringup_slam.launch.pyIn another terminal run a teleop node:
ros2 run teleoptwistkeyboard teleoptwistkeyboardWe can try the navigation:
ros2 launch turtlebot3mogi simulationbringup_navigation.launch.pyAnd finally a navigation without having an a priori map and running real time SLAM:
ros2 launch turtlebot3mogi simulationbringupnavigationwith_slam.launch.pyThere are 3 launch files that are intended to use with the real robot and not with the simulation:
ros2 launch turtlebot3mogi robotvisualization.launch.py
ros2 launch turtlebot3mogi robotmapping.launch.py
ros2 launch turtlebot3mogi robotnavigation.launch.py
To use these launchfiles, make sure that the robot is on the same network and its ROS nodes are started - on the robot:
ros2 launch turtlebot3_bringup hardware.launch.pyAnd finally there is one more launch file that we will use during the next weeks:
ros2 launch turtlebot3mogi simulationbringuplinefollow.launch.py![alt text][image21]
We can switch to another world with dark background and a light colored line (dark_background.sdf) by changing the launch file or overriding the world argument when we launch the file:
world_arg = DeclareLaunchArgument(
    'world', defaultvalue='lightbackground.sdf',
    description='Name of the Gazebo world file to load'
)
![alt text][image22]
ros2 launch turtlebot3mogi simulationbringuplinefollow.launch.py world:=dark_background.sdfThe turtlebot3_mogi package already includes the different colored tracks that I made in Blender, you can find a short tutorial about how to create your own world in Blender:
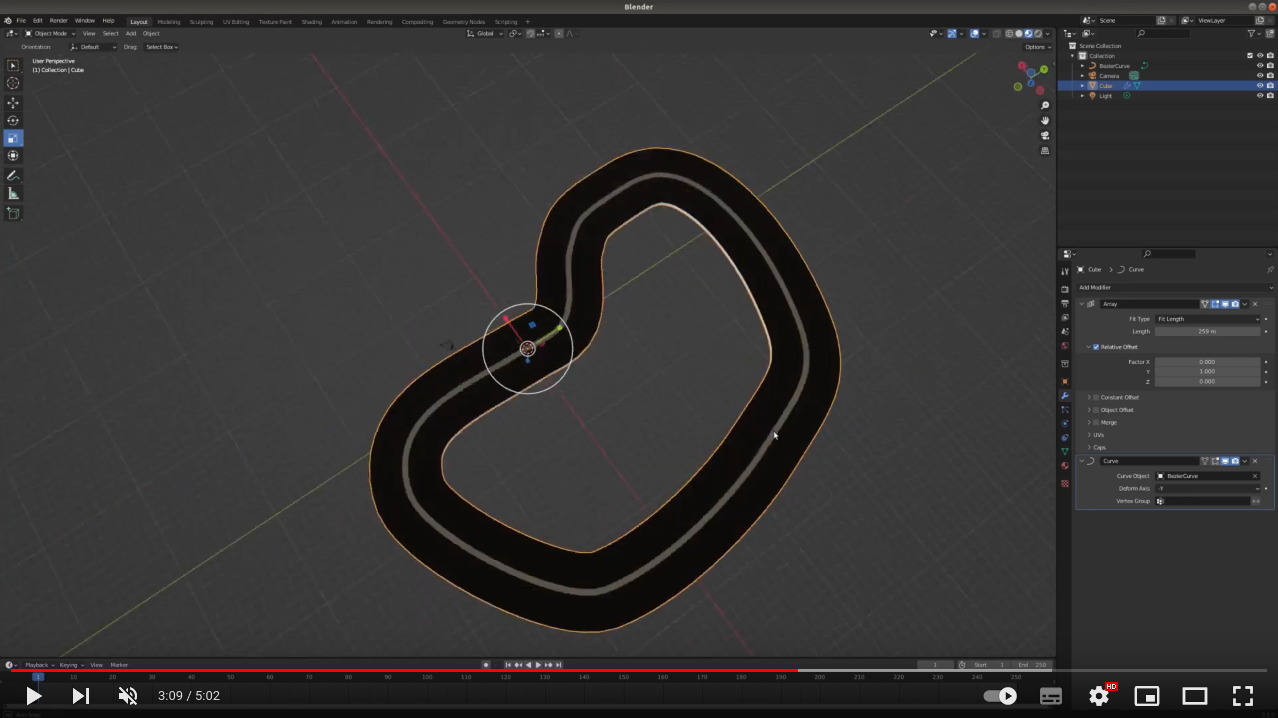
You can also see the recording of another tutorial video about modeling in Blender:
The Blender files can be found in the turtlebot3_mogi/meshes folder!
Line following
Setting up a Python virtual environment
First, we have to set up a python virtual environment where we'll install the python packages that we'll use in the next weeks. I call my virtual environment as tf because primarily I use it for Tensorflow.
There are various ways to set up and use a Python virtual environment, here I show an example using the pipx package.
Install the following packages using apt:
sudo apt install python3-pip sudo apt install pipxThen we are ready to start using the pipx package, run the following commands:
pipx ensurepath pipx install virtualenv pipx install virtualenvwrapperNow let's edit our .bashrc file, the pipx ensurepath command added a line that we'll change now. Replace the following line:
# Created by pipx on 2024-12-15 20:49:03 export PATH="$PATH:/home/david/.local/bin"to this:
# Virtual environment for pipx and tensorflow export PATH="$PATH:/home/$USER/.local/bin" export WORKON_HOME=~/.virtualenvs export VIRTUALENVWRAPPER_PYTHON=/home/$USER/.local/share/pipx/venvs/virtualenvwrapper/bin/python3 source /home/$USER/.local/share/pipx/venvs/virtualenvwrapper/bin/virtualenvwrapper_lazy.sh workon tfStart a new terminal and you'll get the following error message because in .bashrc we used the command workon tf but there is no virtual environment named tf yet:
ERROR: Environment 'tf' does not exist. Create it with 'mkvirtualenv tf'.So let's create one with the following command:
mkvirtualenv tfNow, start a new terminal and you should see the active virtual environment between parentheses in your terminal:
(tf) david@david-ubuntu24:~$Install Python packages
Let's install Python packages that we'll use, to ensure compatibility with the codes in this repository let's use a specific version from numpy and tensorflow:
pip install tensorflow==2.18.0
pip install imutils
pip install scikit-learn
pip install opencv-python
pip install matplotlib
pip install numpy==1.26.4
Line following with OpenCV:
OpenCV (Open Source Computer Vision Library) is a free, open-source library used for computer vision, image processing, and machine learning. It provides tools to analyze visual data from images and videos, such as detecting faces, objects, and motion, or applying filters and transformations. OpenCV is widely used in robotics, AI, and real-time applications, and it supports many programming languages, including Python and C++. It helps developers easily build systems that can “see” and interpret visual information.
As we saw in the previous chapter, we can start the simulation that is set up for the line following with the following command:
ros2 launch turtlebot3mogi simulationbringuplinefollow.launch.pyNow let's try the node that follows the line with image processing using OpenCV:
ros2 run turtlebot3mogipy line_followerThe robot starts follwoing the line and we see the following window: ![alt text][image23]
Let's analyze the code! We create a subscriber for compressed images from the robot's camera and a publisher for the cmdvel topic that will drive the robot. We also start another thread that guarantees that the spin() function is called regardless how long our image processing will take. The spin() function is essential to ensure that imagecallback() will be always executed and we won't miss frames.
```python class ImageSubscriber(Node): def init(self): super().init('image_subscriber') ''' # Create a subscriber with a queue size of 1 to only keep the last frame self.subscription = self.create_subscription( Image, 'image_raw', # Replace with your topic name self.image_callback, 1 # Queue size of 1 ) '''
self.subscription = self.cr
README truncated. View on GitHub


