
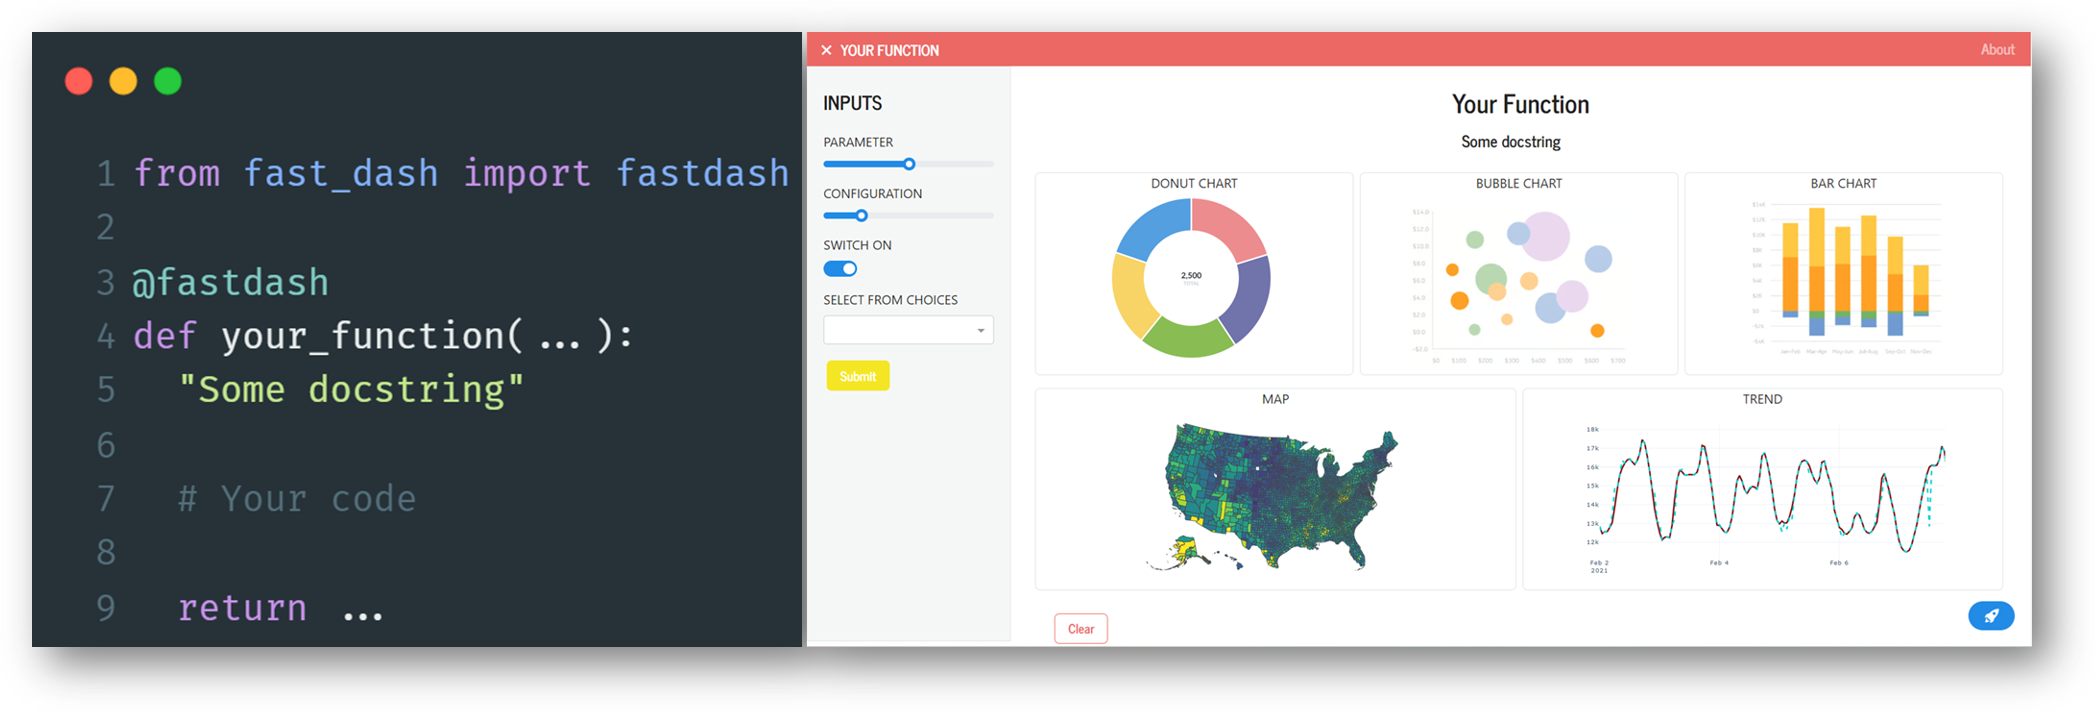
Turn your Python functions into interactive apps! Fast Dash is an innovative way to deploy your Python code as interactive web apps with minimal changes.

Turn any Python function into a web app with a single decorator ⚡





- Documentation: docs.fastdash.app
- Source: github.com/dkedar7/fast_dash
- Install:
pip install fast-dash - Claude Code users:
/plugin marketplace add dkedar7/fast_dashthen/plugin install fast-dash@fast-dashto load the Fast Dash skill — agents will pick it up automatically when you ask them to "turn this function into a web app".
What is Fast Dash?
Fast Dash inspects your Python function's signature, picks UI components from the type hints and default values, and serves the result as a Plotly Dash app — usually in under five lines of code. No frontend, no callbacks, no boilerplate.
It exists for one job: collapse the gap between a working Python function and a shareable interactive web app.
30-second example
pip install fast-dashfrom fast_dash import fastdash
@fastdash def greet(name: str = "world") -> str: return f"Hello, {name}!"
Serving on http://127.0.0.1:8080
That's the entire app. Open the URL, type a name, click Run, see the response.
Chat apps
Pass chat=True and your callback becomes a streaming chat app — a composer, a scrolling transcript, and per-session history — with no LLM provider baked in:
from fast_dash import fastdash
@fastdash(chat=True) def assistant(query: str):     for token in my_llm.stream(query):     # any provider — you choose         yield token
yield strings to stream the reply as markdown; add a history parameter for multi-turn memory, and any other parameter becomes a sidebar setting (tucked into a collapsible accordion when there are many). chat= also accepts a LangGraph graph, a (query, ctx) callable, or a chat-model instance.
Or keep a normal app and add an assistant beside it — pass your agent as chat=: the agent reads your app's live inputs (ctx.inputs) and can drive it (setinput / runapp) — anything a user can do, the agent can do.
from fast_dash import FastDash
def dashboard(revenue: int = 100, region: str = "West") -> str:     return f"{region}: ${revenue}"
def assistant(query, ctx):        # ctx.inputs holds the app's live values     yield {"type": "set_input", "name": "revenue", "value": 250}     yield {"type": "run_app"}     yield "Bumped revenue to 250 and re-ran."
FastDash(callbackfn=dashboard, chat=assistant, chattitle="Helper").run()
Give the agent tools
Pass a chat model (or chat=True with chat_model=) and Fast Dash auto-builds a LangChain assistant wired to your app. Its tools — read the app, set inputs, run it, set individual outputs, rearrange the layout, run Python — come from agenttoolkit(app), trimmed to the chattools allowlist you choose:
from fast_dash import FastDash
def dashboard(revenue: int = 100, region: str = "West") -> str:     return f"{region}: ${revenue}"
The default toolkit lets the agent drive inputs, set outputs, re-mosaic the
layout, and run Python (with approval). Narrow it with chat_tools=.
FastDash(
    callback_fn=dashboard,
    chat=True,
    chatmodel="openai:gpt-4o-mini",            # or a model instance / FASTDASHMODEL
    chattools=("readapp", "setinput", "runapp"),   # read-only + drive, no code exec
).run()
Install the extra with pip install "fast-dash[agent]". See the chat guide.
How it works
The @fastdash decorator does three things at import time:
- Inspects the function signature — each parameter becomes an input component, the return becomes an output component.
- Picks components from type hints and defaults —
int→ number input,bool→ checkbox,pd.DataFrame→ table, etc. (full table below). - Builds a Dash app and starts the server — the function body is wired as the callback that runs when the user clicks Run.
inputs= and outputs=, or by skipping the decorator and using the FastDash(...) class directly.
Type hint → component reference
Inputs (parameter type → UI component):
| Type hint | Component | | --- | --- | | str | Single-line text input | | str with a multi-line / long default | Text area | | str with a hex-color default (e.g. "#1c7ed6") | Color picker | | str with default=[...] | Single-select dropdown | | int, float | Number input | | int/float with range(...) default | Slider | | bool | Checkbox | | list | Multi-select dropdown | | dict (with default) | Multi-select dropdown (keys) | | datetime.date | Date picker | | PIL.Image.Image | Image upload | | Literal["a", "b"] | Single-select dropdown | | enum.Enum subclass | Single-select dropdown | | Annotated[int, range(0, 100)] | Slider | | Annotated[str, ["a", "b"]] | Single-select dropdown | | Optional[T] | As T, but nullable | | Any Dash component instance | Used directly | | Any Fast Dash component (Text, Slider, ...) | Used directly |
Outputs (return type → UI component):
| Return type | Component | | --- | --- | | str, int, float, etc. | Text (rendered as <h1>) | | pd.DataFrame | Table | | PIL.Image.Image, matplotlib.figure.Figure | Image | | plotly.graph_objects.Figure (or string-form "go.Figure", "Figure") | Plotly chart | | Tuple of types | Multiple outputs (one component each) | | Any Fast Dash component (Graph, Image, ...) | Used directly |
from fast_dash import fastdash, Graph
@fastdash def chart(rows: int = 100) -> Graph:     import plotly.express as px     return px.scatter(px.data.iris().head(rows), x="sepalwidth", y="sepallength")
Unknown hints fall back to text. Source-introspection failures (REPL, exec) fall back to generic OUTPUT1, OUTPUT2 labels — the app still works.
Built-in components
The package exports ready-to-use Fast Dash components you can pass directly as inputs= or outputs=:
| Component | Use as | Notes | | --- | --- | --- | | Text, TextArea, PasswordInput | input or output | Single-line, multi-line, masked text | | NumberInput, Slider | input | Numeric with optional bounds | | Switch | input | Toggle (True / False) | | MultiSelect | input | Multi-select dropdown | | DateInput, DateRange | input | Single date / date range picker | | ColorInput | input | Color picker, returns hex | | Upload, UploadImage | input | File / image upload | | Graph, Image, Table, Markdown | output | Plotly chart, image, DataFrame table, rendered Markdown | | Chat | output | Streaming chat history (with stream=True) | | Download | output | Triggers a browser download |
Common patterns
Multiple inputs and outputs
from fast_dash import fastdash
@fastdash def describe(text: str, count: int = 3) -> str:     """Repeat text count times."""     return " · ".join([text] * count)
Mosaic layout for arranging multiple outputs:
from fast_dash import fastdash, Graph
import plotly.express as px
import pandas as pd
@fastdash(mosaic="AB\nAC") def dashboard(rows: int = 100) -> (Graph, Graph, Graph):     df = px.data.iris().head(rows)     return (         px.scatter(df, x="sepalwidth", y="sepallength", color="species"),         px.histogram(df, x="petal_width"),         px.box(df, y="petal_length", color="species"),     )
The mosaic string is ASCII art (inspired by Matplotlib's subplot_mosaic). Each letter corresponds to one output, in order.
Wrapping arbitrary Dash components with Fastify:
from fast_dash import fastdash, Fastify
from dash import dcc
custom_slider = Fastify(dcc.Slider(min=0, max=100, value=50), "value")
@fastdash def myapp(x: customslider) -> str:     return f"You picked {x}"
Cascading inputs with depends_on — wire one input's options to another input's value:
from fastdash import fastdash, dependson
countries = {     "USA": ["California", "Texas", "New York"],     "India": ["Maharashtra", "Karnataka", "Delhi"], }
@fastdash def pick_state(     country: str = list(countries),     state: str = depends_on("country", lambda c: countries[c]), ) -> str:     return f"{state}, {country}"
The resolver receives the parent input's current value. Return:
- a list to set the dependent dropdown's options (and clear its value),
- a dict like
{"data": [...], "value": ...}to set both, or - a scalar to set just the value.
from fast_dash import FastDash
def my_fn(x: int) -> int: return x * 2
app = FastDash(callbackfn=myfn, title="Doubler", port=8050) app.run()
Multiple functions in a single tabbed app — pass a list of callbacks:
from fast_dash import FastDash
def greet(name: str) -> str:     return f"Hello, {name}!"
def add(a: int, b: int) -> int:     return a + b
app = FastDash([greet, add], tab_titles=["Greeter", "Adder"]) app.run()
Each function gets its own tab with independent inputs, outputs, and callbacks. tab_titles is optional — without it, tabs are named after the functions.
Multi-step pipelines with steps= — chain functions into a wizard, threading outputs forward via from_step:
from fastdash import FastDash, fromstep
import pandas as pd
def load_data(rows: int = 100) -> pd.DataFrame:     """Load a sample dataset."""     return pd.DataFrame({"x": range(rows), "y": [i * 2 for i in range(rows)]})
def double(data=fromstep(loaddata)) -> pd.DataFrame:     """Double every value."""     return data * 2
def summarise(data=from_step(double), prefix: str = "Result:") -> str:     """One-line summary."""     return f"{prefix} {len(data)} rows, sum={data.values.sum()}"
FastDash(steps=[load_data, double, summarise], title="Pipeline Demo").run()
Each step is shown one at a time with a stepper progress indicator. Click Run to execute the active step, then Next to advance. Use fromstep(prevfn) as a parameter default to wire an upstream output into a downstream input. Steps without from_step parameters can mix in regular UI inputs (like prefix above).
Drive your app from an AI agent (MCP)
Pass mcpserver=True and your app serves a web UI and an MCP server — built on Dash's native MCP (Dash ≥ 4.3) and mounted on the same port — so any MCP-capable agent (Claude Code, Cursor, Cline, …) can inspect and drive it.
from fast_dash import fastdash
import plotly.graph_objects as go
@fastdash(mcp_server=True)            # web UI AND MCP on :8080/mcp def plot_bars(n: int = 6, color: str = "#1c7ed6") -> go.Figure:     ...
Point an agent at http://localhost:8080/mcp:
{"servers": {"my-app": {"url": "http://localhost:8080/mcp"}}}The agent calls describeapp() to discover the input contract (each input's id, type, default, options, and current value), then drives the app with setinput / setinputs / invoke / setform / getinvocation / listcomponenttypes. Dash's native dash://layout / dash://components / getdash_component expose the static component tree. Agent mutations apply to the live browser within ~500 ms (no reload).
# From the agent's side, in one call:
invoke(inputs={"n": 12, "color": "#2f9e44"})   # set inputs and run, one round-trip
Agent-generated UI with DynamicDash — the form materializes when an agent calls the set_form tool:
from fast_dash import DynamicDash, Graph, Markdown
app = DynamicDash(     callback_fn=score,     placeholder="Ask the agent to call set_form() to build the form.",     output_components=[Graph, Markdown],     mcp_server=True, ) app.run(port=8052)                    # run() mounts the MCP server on :8052/mcp
Real-time push (opt-in). On the default Flask backend, agent mutations reach the browser via a ~500 ms polling drain. Install fast-dash[fastapi] and pass backend="fastapi" to switch to Dash's ASGI backend, where updates stream over a WebSocket via set_props (sub-100 ms, no polling):
@fastdash(mcp_server=True, backend="fastapi")   # real-time WebSocket push
def plot_bars(n: int = 6) -> go.Figure:
    ...
Notes: the MCP route shares the web app's host/port and has no authentication — keep it loopback in development. Multi-function and steps modes skip the MCP surface.
Decorator options
Most apps need none of these — defaults are sensible. Pass any of them as kwargs to @fastdash(...) or FastDash(...).
| Option | Default | Effect | | --- | --- | --- | | title | function name | App title shown in the header | | inputs, outputs | inferred | Override component selection | | mosaic | None | ASCII layout for multiple outputs | | theme | "JOURNAL" | Any Bootswatch theme name | | port | 8080 | Port to serve on | | mode | None | Set to "jupyterlab", "inline", or "external" for notebook use | | update_live | False | Re-run on every input change instead of waiting for the Run button | | about | True | Show the docstring as an "About" modal; pass a string to override | | minimal | False | Hide chrome (header, footer, nav) for embedding | | branding | False | Show the Fast Dash rocket footer | | stream | False | Enable streaming outputs (see docs) | | mcp_server | False | Also serve an MCP server (Dash-native, on the web app's port at /mcp) so AI agents can drive the app (see above) | | backend | None | "fastapi" (needs fast-dash[fastapi]) for the ASGI backend + real-time WebSocket push; default is Flask |
The full list lives in the docs.
Limits and gotchas
- Output labels are inferred from the
returnline of your source. If the source can't be retrieved (REPL,exec, frozen environments), Fast Dash falls back to genericOUTPUT1,OUTPUT2labels rather than crashing. Passoutput_labels=[...]explicitly to control them. - Reusing component instances across inputs and outputs can mutate shared attributes. Construct fresh components per slot (or use
inputs=Textrather thaninputs=text_instance). - The
themearg expects a Bootswatch name, not a CSS URL. It sets light/dark mode (dark forCYBORG,DARKLY,QUARTZ,SLATE,SOLAR,SUPERHERO,VAPOR); Bootswatch CSS still loads and stylesdbc-rendered bits (e.g. data tables). To set the accent colour of the Mantine chrome (buttons, links, focus rings, chat bubbles), passaccent="indigo"— a Mantine colour name — rather than expectingthemeto carry it.
Development
git clone https://github.com/dkedar7/fast_dash.git
cd fast_dash
uv pip install -e ".[test]"   # or: pip install -e ".[test]"
uv pip install "dash[testing]"
uv run --no-sync pytest tests/
Selenium tests need a chromedriver matching your installed Chrome version (brew install --cask chromedriver on macOS).
The tests/ directory is the canonical example collection — tests/examples.py and tests/testtypinghints.py cover most patterns the library supports.
Project structure
fast_dash/
  fast_dash.py     # FastDash class + @fastdash decorator + callback wiring
  Components.py    # Layout (AppLayout) + type-hint inference + built-in components
  utils.py         # Source introspection, theme mapping, docstring parsing
  assets/          # Static CSS served by Dash
tests/             # pytest suite (also serves as runnable examples)
docs/              # MkDocs site source
License
MIT. Built on top of Plotly Dash.


