
An ERC721 dapp tutorial to demonstrate how digital asset could be represented and traded on blockchain removing the need of third party.A full stack dapp made via solidity (contracts deployed on ropsten) integrated with web3js deployed on ipfs.
Last updated Apr 5, 2026
43
Stars
11
Forks
1
Issues
0
Stars/day
Attention Score
24
Topics
Language breakdown
No language data available.
▸ Files
click to expand
README

Let's put Taj Mahal on sale !!
Yes i am not out of my mind and it is completely possible with the help of blockchain technology.Of course Blockchian will protect us from intervention of third parties. What we will be building is a digital asset (ERC721 token) on blockchain with the help of solidity(by writing smart contracts).We will then use IPFS to deploy our Dapp.Setup Environment
We need to get hold of truffle,get it viainstall -g truffleLet's conspire to sell Taj Mahal
- Open Terminal
- Make a suitable folder with
and navigate into foldertajmahaltajmahal - Now initialize the project with
.init
- In truffle.js replace the stuff with following code.
// Allows us to use ES6 in our migrations and tests.
// require('babel-register')
// require('babel-polyfill')
module.exports = {   networks: {     development: {         host: '127.0.0.1',         port: 7545,         network_id: '*', // Match any network id     } }, };
- Now add the following contracts in the contracts directory and then hit
compile
- Since we have smart contracts in place we need to migrate these contract.But before we proceed to this step we need to install and run ganache in background.

- After installing ganache and running in backgroud navigate to folder migrations and create a file named
and add the following code in it.link.js
var Tajmahal = artifacts.require("Tajmahal");
module.exports = function(deployer) {   deployer.deploy(Tajmahal); }
- After following the above steps hit
(make sure ganache is running in background).migrate - In Ganache, note that the state of the blockchain has changed. The blockchain now shows that the current block, previously 0, is now 4. In addition, while the first account originally had 100 ether, it is now lower, due to the transaction costs of migration.

- Hola your contract is deployed on local blockchain!!! But we still have long way to go.
- Ok those following genuinely till here have a homework to do.Try testing smart contracts with truffle framework.
Deploy smart contracts
Logicaly speaking there are tons of way to deploy smart contract on tons of network(ropsten,rinkbey,mainnet,private).We could use truffle also to deploy our network.In this i will be discussing deployment of smart contracts on ropsten network.- First we will be needing a wallet.Go and install chrome extension called Metamask.
- Once installed, you'll see the MetaMask fox icon next to your address bar. Click the icon and you'll see this screen appear:

- Click Accept to accept the Privacy Notice.
- Then you'll see the Terms of Use. Read them, scrolling to the bottom, and then click Accept there too.

- Now you'll see the initial MetaMask screen. Set your password.

- Now we need to connect MetaMask to the blockchain.Connect to Ropsten network.

- Create an Account

- Copy Account Address

- Request Free ether from here or here. Paste the copied account address in text box and click on send me 1 test ether.

- you got a ether !!!!

- now, we have to the paste contracts in remix IDE remix

- click on Run. Select Injected Web 3 Ropsten under environment and the account in Metamask is shown here under Account with balance ether as well.Hit the deploy button.

- Metamask will pop up with transaction details.

- Now enter the gass price.Higher you pay faster it gets executed.

- After transaction is completed you will be directed with etherscan link.

- Important ! please note down contract address and abi as they would be required for frontend integration.
Frontend for smart contract and interaction with it.
Since we have made and deployed our smart contracts,we need to put a pretty face to it so that normal user can interact with it.- Make a folder called frontend in the directory.
- Make a file called index.html in frontend folder and add the following code from here.
- You can add following Tajmahal images from here to your frontend folder.

- Now we have frontend in place,we need this frontend to interact with our smart contract.For this we require web3js
code imports web3js in html file.- Now lets ponder over following snippet in index.html file.
- It's saying that if web3 is not undefined, then we'll use that as our provider. If it's undefined (else), we can manually specify the provider ourselves.
- You may be wondering, how would web3 be defined? Well, if you're using the Chrome extension MetaMask (which we will use later in this course) or an Ethereum browser like Mist, the provider is automatically injected.
- Now go back to Remix IDE, click on the Compile tab and click Details. Scroll down until you see the Interface - ABI section and click the copy icon as shown below:
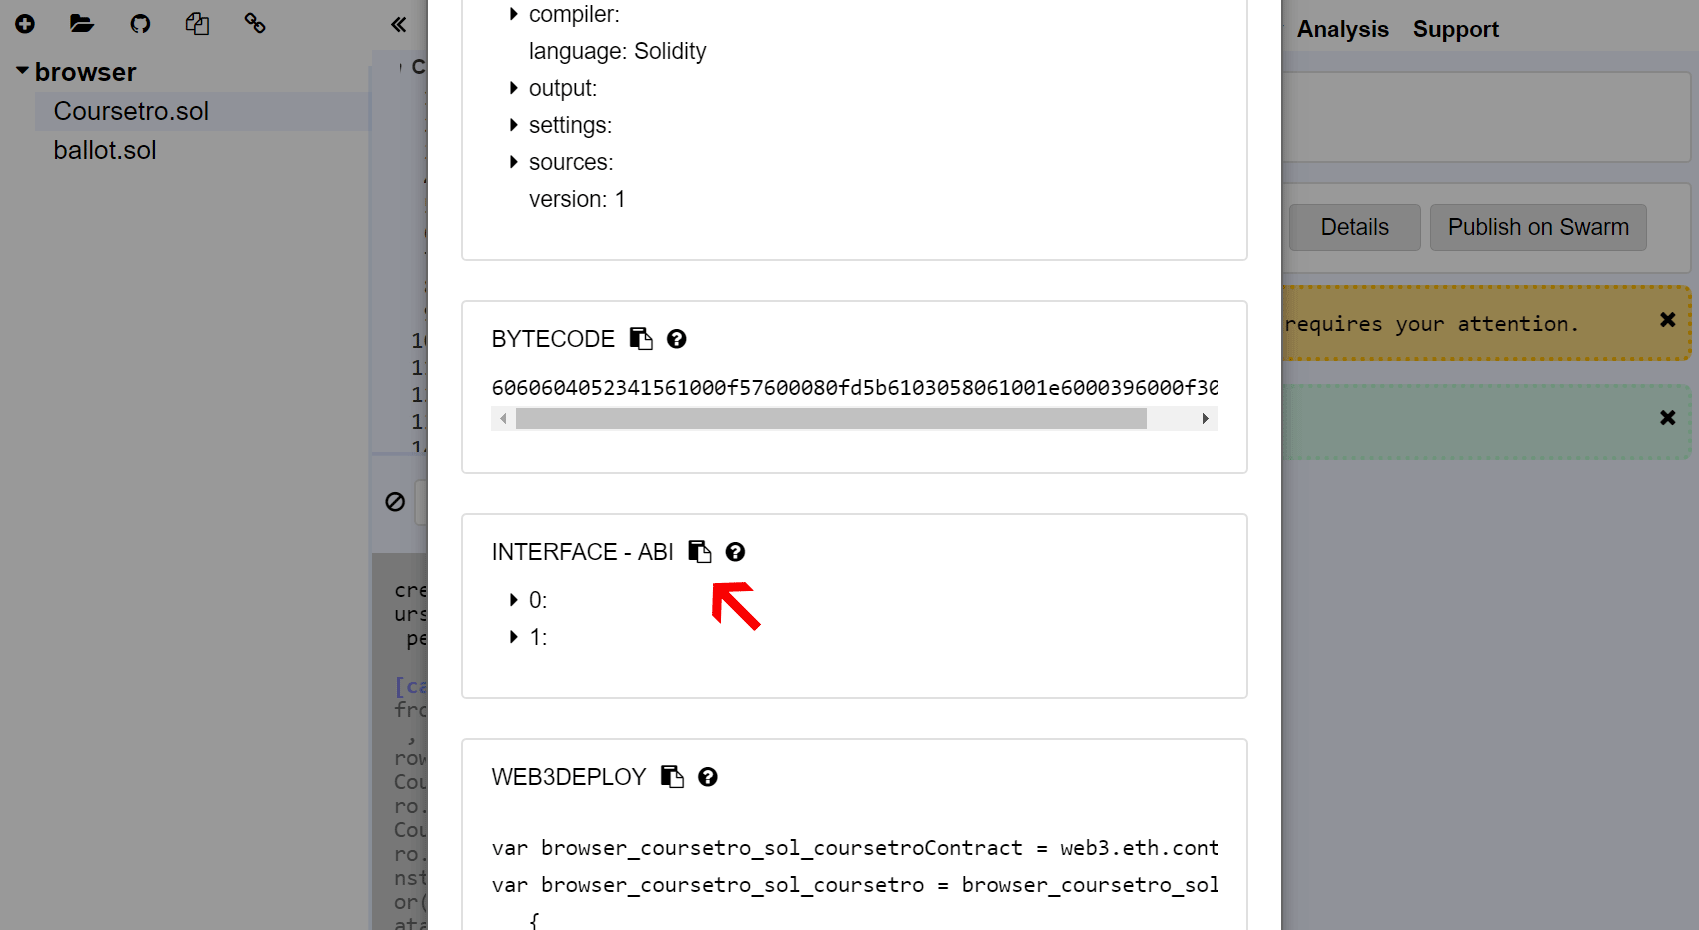
- In index.html in the following code snippet paste your contract adsress and abi copied in above step.
Deployment to IPFS
- Install IPFS as described at https://ipfs.io/docs/install/
- Run IPFS daemons
daemon - then run
add -r frontend/ - You should see something like this
added QmeYxwj4CwCeGVhwi3xLrmBZUUFQdftshSiGLrTdTnWEVV frontend- The hash on the last line is the root of your site, you can visit is by opening
So the example site is at://gateway.ipfs.io/ipfs/<your hash here>.://gateway.ipfs.io/ipfs/QmWrrQHELjXW41tkM2RUCGGyyHqKzauCZMSvcxa3271GP6/ - Publish to IPNS
name publish <your site hash> - That will return your peerID and the hash you are publishing to it. You can confirm by running
or by viewingname resolve <peerId>
(notice the directory is ipns not ipfs).://gateway.ipfs.io/ipns/<peerID> - Your site is deployed !!!


