
Run macOS VM in a Docker! Run near native OSX-KVM in Docker! X11 Forwarding! CI/CD for OS X Security Research! Docker mac Containers.
Docker-OSX · Follow @sickcodes on Twitter
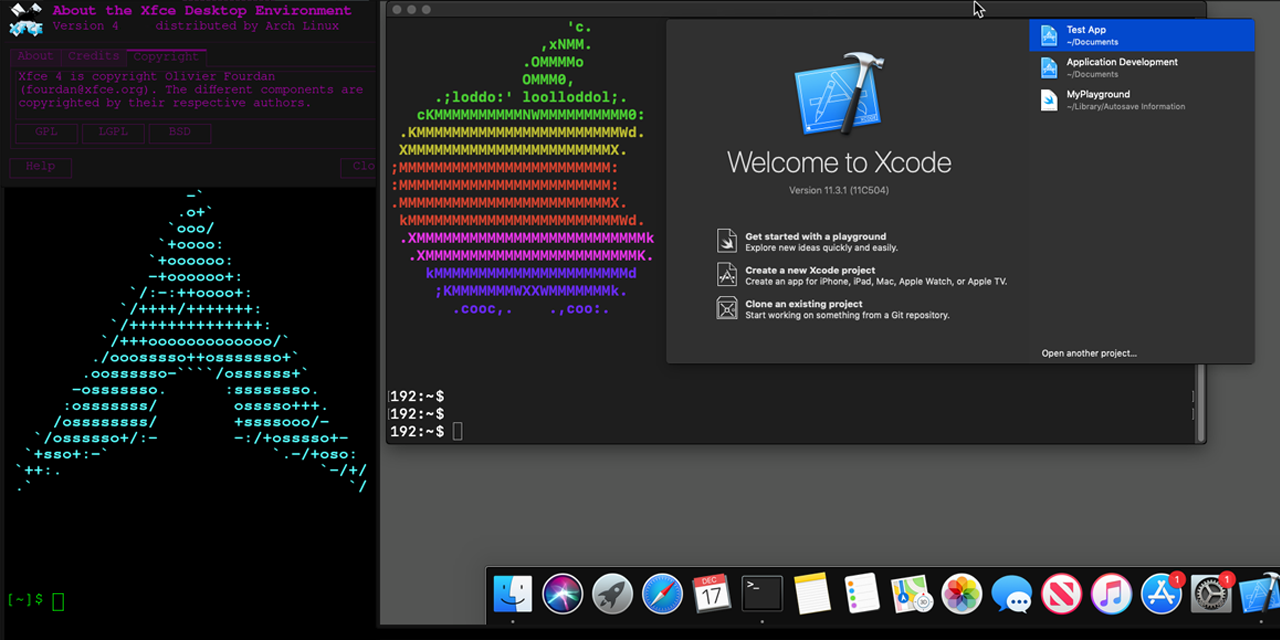
Run Mac OS X in Docker with near-native performance! X11 Forwarding! iMessage security research! iPhone USB working! macOS in a Docker container!
Conduct Security Research on macOS using both Linux & Windows!
Docker-OSX now has a Discord server & Telegram!
The Discord is active on #docker-osx and anyone is welcome to come and ask questions, ideas, etc.


Click to join the Discord server https://discord.gg/sickchat
Click to join the Telegram server https://t.me/sickcodeschat
Or reach out via Linkedin if it's private: https://www.linkedin.com/in/sickcodes
Or via https://sick.codes/contact/
Author
This project is maintained by Sick.Codes. (Twitter)
Additional credits can be found here: https://github.com/sickcodes/Docker-OSX/blob/master/CREDITS.md
Additionally, comprehensive list of all contributors can be found here: https://github.com/sickcodes/Docker-OSX/graphs/contributors
Big thanks to @kholia for maintaining the upstream project, which Docker-OSX is built on top of: OSX-KVM.
Also special thanks to @thenickdude who maintains the valuable fork KVM-OpenCore, which was started by @Leoyzen!
Extra special thanks to the OpenCore team over at: https://github.com/acidanthera/OpenCorePkg. Their well-maintained bootloader provides much of the great functionality that Docker-OSX users enjoy :)
If you like this project, consider contributing here or upstream!
Quick Start Docker-OSX
Video setup tutorial is also available here: https://www.youtube.com/watch?v=wLezYl77Ll8
Windows users: click here to see the notes below!
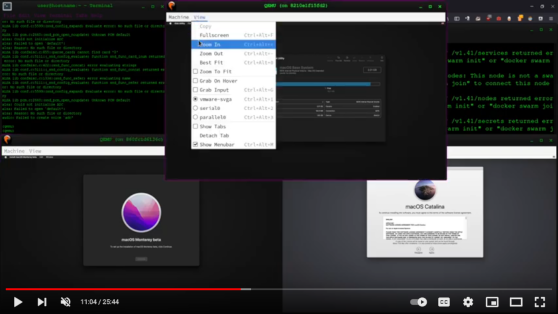
First time here? try initial setup, otherwise try the instructions below to use either Catalina or Big Sur.
Any questions, ideas, or just want to hang out?
https://discord.gg/sickchat
Release names and their version:
Catalina (10.15) 
docker run -it \
    --device /dev/kvm \
    -p 50922:10022 \
    -v /tmp/.X11-unix:/tmp/.X11-unix \
    -e "DISPLAY=${DISPLAY:-:0.0}" \
    -e SHORTNAME=catalina \
    sickcodes/docker-osx:latest
docker build -t docker-osx .
Big Sur (11)
docker run -it \
    --device /dev/kvm \
    -p 50922:10022 \
    -v /tmp/.X11-unix:/tmp/.X11-unix \
    -e "DISPLAY=${DISPLAY:-:0.0}" \
    -e SHORTNAME=big-sur \
    sickcodes/docker-osx:latest
docker build -t docker-osx .
Monterey (12)
docker run -it \
    --device /dev/kvm \
    -p 50922:10022 \
    -v /tmp/.X11-unix:/tmp/.X11-unix \
    -e "DISPLAY=${DISPLAY:-:0.0}" \
    -e GENERATE_UNIQUE=true \
    -e MASTERPLISTURL='https://raw.githubusercontent.com/sickcodes/osx-serial-generator/master/config-custom.plist' \
    -e SHORTNAME=monterey \
    sickcodes/docker-osx:latest
docker build -t docker-osx .
Ventura (13)
docker run -it \
    --device /dev/kvm \
    -p 50922:10022 \
    -v /tmp/.X11-unix:/tmp/.X11-unix \
    -e "DISPLAY=${DISPLAY:-:0.0}" \
    -e GENERATE_UNIQUE=true \
    -e MASTERPLISTURL='https://raw.githubusercontent.com/sickcodes/osx-serial-generator/master/config-custom.plist' \
    -e SHORTNAME=ventura \
    sickcodes/docker-osx:latest
docker build -t docker-osx .
Sonoma (14)
docker run -it \
    --device /dev/kvm \
    -p 50922:10022 \
    -v /tmp/.X11-unix:/tmp/.X11-unix \
    -e "DISPLAY=${DISPLAY:-:0.0}" \
    -e GENERATE_UNIQUE=true \
    -e CPU='Haswell-noTSX' \
    -e CPUID_FLAGS='kvm=on,vendor=GenuineIntel,+invtsc,vmware-cpuid-freq=on' \
    -e MASTERPLISTURL='https://raw.githubusercontent.com/sickcodes/osx-serial-generator/master/config-custom-sonoma.plist' \
    -e SHORTNAME=sonoma \
    sickcodes/docker-osx:latest
docker build -t docker-osx .
Sequoia (15)
docker run -it \
    --device /dev/kvm \
    -p 50922:10022 \
    -v /tmp/.X11-unix:/tmp/.X11-unix \
    -e "DISPLAY=${DISPLAY:-:0.0}" \
    -e GENERATE_UNIQUE=true \
    -e CPU='Haswell-noTSX' \
    -e CPUID_FLAGS='kvm=on,vendor=GenuineIntel,+invtsc,vmware-cpuid-freq=on' \
    -e MASTERPLISTURL='https://raw.githubusercontent.com/sickcodes/osx-serial-generator/master/config-custom-sonoma.plist' \
    -e SHORTNAME=sequoia \
    sickcodes/docker-osx:latest
docker build -t docker-osx .
Tahoe (16)
docker run -it \
    --device /dev/kvm \
    -p 50922:10022 \
    -v /tmp/.X11-unix:/tmp/.X11-unix \
    -e "DISPLAY=${DISPLAY:-:0.0}" \
    -e GENERATE_UNIQUE=true \
    -e CPU='Haswell-noTSX' \
    -e CPUID_FLAGS='kvm=on,vendor=GenuineIntel,+invtsc,vmware-cpuid-freq=on' \
    -e MASTERPLISTURL='https://raw.githubusercontent.com/sickcodes/osx-serial-generator/master/config-custom-sonoma.plist' \
    -e SHORTNAME=tahoe \
    sickcodes/docker-osx:latest
docker build -t docker-osx .
Older Systems
High Sierra
docker run -it \
    --device /dev/kvm \
    -p 50922:10022 \
    -v /tmp/.X11-unix:/tmp/.X11-unix \
    -e "DISPLAY=${DISPLAY:-:0.0}" \
    -e SHORTNAME=high-sierra \
    sickcodes/docker-osx:latest
docker build -t docker-osx .
Mojave
docker run -it \
    --device /dev/kvm \
    -p 50922:10022 \
    -v /tmp/.X11-unix:/tmp/.X11-unix \
    -e "DISPLAY=${DISPLAY:-:0.0}" \
    -e SHORTNAME=mojave \
    sickcodes/docker-osx:latest
docker build -t docker-osx .
Download the image manually and use it in Docker

This is a particularly good way for downloading the container, in case Docker's CDN (or your connection) happens to be slow.
wget https://images2.sick.codes/machddng_auto.img
docker run -it \     --device /dev/kvm \     -p 50922:10022 \     -v "${PWD}/machddng_auto.img:/image" \     -v /tmp/.X11-unix:/tmp/.X11-unix \     -e "DISPLAY=${DISPLAY:-:0.0}" \     -e GENERATE_UNIQUE=true \     -e MASTERPLISTURL=https://raw.githubusercontent.com/sickcodes/Docker-OSX/master/custom/config-nopicker-custom.plist \     -e SHORTNAME=catalina \     sickcodes/docker-osx:naked
Share directories, sharing files, shared folder, mount folder
The easiest and most secure way issshfs
# on Linux/Windows
mkdir ~/mnt/osx
sshfs user@localhost: -p 50922 ~/mnt/osx
wait a few seconds, and ~/mnt/osx will have full rootfs mounted over ssh, and in userspace
automated: sshpass -p <password> sshfs user@localhost:/ -p 50922 ~/mnt/osx
(VFIO) iPhone USB passthrough (VFIO)
If you have a laptop see the next usbfluxd section.
If you have a desktop PC, you can use @Silfalion's instructions: https://github.com/Silfalion/Iphonedockerosxpassthrough
(USBFLUXD) iPhone USB -> Network style passthrough OSX-KVM Docker-OSX
Video setup tutorial for usbfluxd is also available here: https://www.youtube.com/watch?v=kTk5fGjK_PM
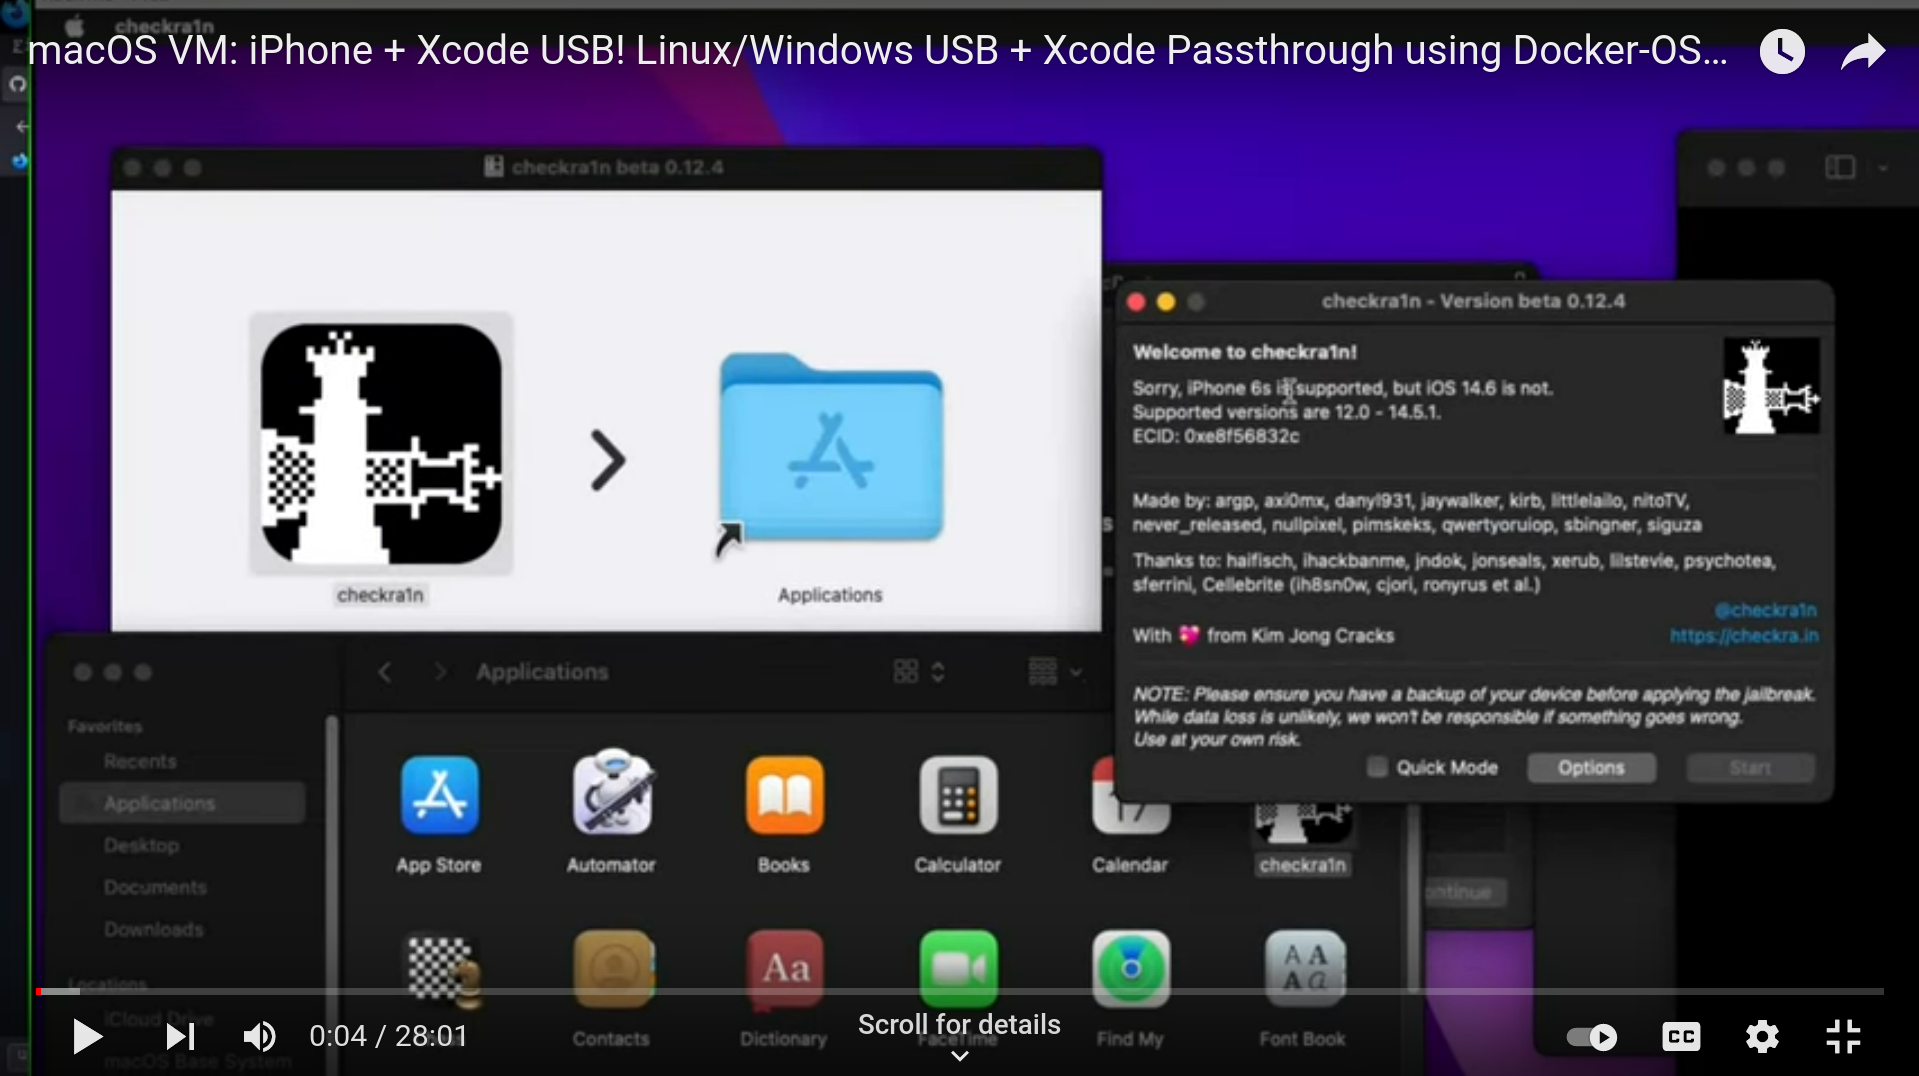
This method WORKS on laptop, PC, anything!
Thank you @nikias for usbfluxd via https://github.com/corellium!
This is done inside Linux.
Open 3 terminals on Linux
Connecting your device over USB on Linux allows you to expose usbmuxd on port 5000 using https://github.com/corellium/usbfluxd to another system on the same network.
Ensure usbmuxd, socat and usbfluxd are installed.
sudo pacman -S libusbmuxd usbmuxd avahi socat
Available on the AUR: https://aur.archlinux.org/packages/usbfluxd/
yay usbfluxd
Plug in your iPhone or iPad.
Terminal 1
sudo systemctl start usbmuxd sudo avahi-daemonTerminal 2:
# on host sudo systemctl restart usbmuxd sudo socat tcp-listen:5000,fork unix-connect:/var/run/usbmuxdTerminal 3:
sudo usbfluxd -f -nConnect to a host running usbfluxd
This is done inside macOS.
Install homebrew.
172.17.0.1 is usually the Docker bridge IP, which is your PC, but you can use any IP from ip addr...
macOS Terminal:
# on the guest brew install make automake autoconf libtool pkg-config gcc libimobiledevice usbmuxd
git clone https://github.com/corellium/usbfluxd.git cd usbfluxd
./autogen.sh make sudo make install
Accept the USB over TCP connection, and appear as local:
(you may need to change 172.17.0.1 to the IP address of the host. e.g. check ip addr)
# on the guest
sudo launchctl start usbmuxd
export PATH=/usr/local/sbin:${PATH}
sudo usbfluxd -f -r 172.17.0.1:5000
Close apps such as Xcode and reopen them and your device should appear!
If you need to start again on Linux, wipe the current usbfluxd, usbmuxd, and socat:
sudo killall usbfluxd sudo systemctl restart usbmuxd sudo killall socatMake container FASTER using https://github.com/sickcodes/osx-optimizer
SEE commands in https://github.com/sickcodes/osx-optimizer!
- Skip the GUI login screen (at your own risk!)
- Disable spotlight indexing on macOS to heavily speed up Virtual Instances.
- Disable heavy login screen wallpaper
- Disable updates (at your own risk!)
Increase disk space by moving /var/lib/docker to external drive, block storage, NFS, or any other location conceivable.
Move /var/lib/docker, following the tutorial below
- Cheap large physical disk storage instead using your server's disk, or SSD.
- Block Storage, NFS, etc.
Only follow the above tutorial if you are happy with wiping all your current Docker images/layers.
Safe mode: Disable docker temporarily so you can move the Docker folder temporarily.
- Do NOT do this until you have moved your image out already https://github.com/dulatello08/Docker-OSX/#quick-start-your-own-image-naked-container-image
killall dockerd
systemctl disable --now docker
systemctl disable --now docker.socket
systemctl stop docker
systemctl stop docker.socketThen, symbolicly link /var/lib/docker somewhere:
mv /var/lib/docker /run/media/user/some_drive/docker
ln -s /run/media/user/some_drive/docker /var/lib/docker
now check if /var/lib/docker is working still
ls /var/lib/dockerImportant notices:
2021-11-14 - Added High Sierra, Mojave
Pick one of these while building, irrelevant when using docker pull:
--build-arg SHORTNAME=high-sierra --build-arg SHORTNAME=mojave --build-arg SHORTNAME=catalina --build-arg SHORTNAME=big-sur --build-arg SHORTNAME=monterey --build-arg SHORTNAME=ventura --build-arg SHORTNAME=sonomaTechnical details
There are currently multiple images, each with different use cases (explained below):
- High Sierra (10.13)
- Mojave (10.14)
- Catalina (10.15)
- Big Sur (11)
- Monterey (12)
- Ventura (13)
- Sonoma (14)
- Auto (pre-made Catalina)
- Naked (use your own .img)
- Naked-Auto (user your own .img and SSH in)

Mojave:

Catalina:
Big-Sur:

Monterey make your own image:

Ventura make your own image:

Sonoma make your own image:

Pre-made Catalina system by Sick.Codes: username: user, password: alpine

Naked: Bring-your-own-image setup (use any of the above first):
Naked Auto: same as above but with -e USERNAME & -e PASSWORD and -e OSX_COMMANDS="put your commands here"

Capabilities
- use iPhone OSX KVM on Linux using usbfluxd!
- macOS Monterey VM on Linux!
- Folder sharing-
- USB passthrough (hotplug too)
- SSH enabled (
localhost:50922) - VNC enabled (
localhost:8888) if using ./vnc version - iMessage security research via serial number generator!
- X11 forwarding is enabled
- runs on top of QEMU + KVM
- supports Big Sur, custom images, Xvfb headless mode
- you can clone your container with
docker commit
Requirements
- 20GB+++ disk space for bare minimum installation (50GB if using Xcode)
- virtualization should be enabled in your BIOS settings
- a x86_64 kvm-capable host
- at least 50 GBs for
:auto(half for the base image, half for your runtime image
TODO
- documentation for security researchers
- gpu acceleration
- support for virt-manager
Docker
Images built on top of the contents of this repository are also available on Docker Hub for convenience: https://hub.docker.com/r/sickcodes/docker-osx
A comprehensive list of the available Docker images and their intended purpose can be found in the Instructions.
Kubernetes
Docker-OSX supports Kubernetes.
Kubernetes Helm Chart & Documentation can be found under the helm directory.
Thanks cephasara for contributing this major contribution.

Support
Small questions & issues
Feel free to open an issue, should you come across minor issues with running Docker-OSX or have any questions.
Resolved issues
Before you open an issue, however, please check the closed issues and confirm that you're using the latest version of this repository — your issues may have already been resolved! You might also see your answer in our questions and answers section below.
Feature requests and updates
Follow @sickcodes!
Professional support
For more sophisticated endeavours, we offer the following support services:
- Enterprise support, business support, or casual support.
- Custom images, custom scripts, consulting (per hour available!)
- One-on-one conversations with you or your development team.
License/Contributing
Docker-OSX is licensed under the GPL v3+. Contributions are welcomed and immensely appreciated. You are in fact permitted to use Docker-OSX as a tool to create proprietary software.
Other cool Docker/QEMU based projects
- Run Android in a Docker Container with Dock Droid
- Run Android fully native on the host!
- Run iOS 12 in a Docker container with Docker-eyeOS - https://github.com/sickcodes/Docker-eyeOS
- Run iMessage relayer in Docker with Bluebubbles.app - Getting started wiki
Disclaimer
If you are serious about Apple Security, and possibly finding 6-figure bug bounties within the Apple Bug Bounty Program, then you're in the right place! Further notes: Is Hackintosh, OSX-KVM, or Docker-OSX legal?
Product names, logos, brands and other trademarks referred to within this project are the property of their respective trademark holders. These trademark holders are not affiliated with our repository in any capacity. They do not sponsor or endorse this project in any way.
Instructions
Container images
Already set up or just looking to make a container quickly? Check out our quick start or see a bunch more use cases under our container creation examples section.
There are several different Docker-OSX images available that are suitable for different purposes.
sickcodes/docker-osx:latest- I just want to try it out.sickcodes/docker-osx:latest- I want to use Docker-OSX to develop/secure apps in Xcode (sign into Xcode, Transporter)sickcodes/docker-osx:naked- I want to use Docker-OSX for CI/CD-related purposes (sign into Xcode, Transporter)
:latest or big-sur. Then, pull the image out the image. Afterwards, you will be able to duplicate that image and import it to the :naked container, in order to revert the container to a previous state repeatedly.
sickcodes/docker-osx:auto- I'm only interested in using the command line (useful for compiling software or using Homebrew headlessly).sickcodes/docker-osx:naked- I need iMessage/iCloud for security research.sickcodes/docker-osx:big-sur- I want to run Big Sur.sickcodes/docker-osx:monterey- I want to run Monterey.sickcodes/docker-osx:ventura- I want to run Ventura.sickcodes/docker-osx:sonoma- I want to run Sonoma.
sickcodes/docker-osx:high-sierra- I want to run High Sierra.sickcodes/docker-osx:mojave- I want to run Mojave.
Initial setup
Before you do anything else, you will need to turn on hardware virtualization in your BIOS. Precisely how will depend on your particular machine (and BIOS), but it should be straightforward.Then, you'll need QEMU and some other dependencies on your host:
# ARCH
sudo pacman -S qemu libvirt dnsmasq virt-manager bridge-utils flex bison iptables-nft edk2-ovmf
UBUNTU DEBIAN
sudo apt install qemu qemu-kvm libvirt-clients libvirt-daemon-system bridge-utils virt-manager libguestfs-tools
CENTOS RHEL FEDORA
sudo yum install libvirt qemu-kvm
Then, enable libvirt and load the KVM kernel module:
sudo systemctl enable --now libvirtd
sudo systemctl enable --now virtlogd
echo 1 | sudo tee /sys/module/kvm/parameters/ignore_msrs
sudo modprobe kvm
I'd like to run Docker-OSX on Windows
Running Docker-OSX on Windows is possible using WSL2 (Windows 11 + Windows Subsystem for Linux).
You must have Windows 11 installed with build 22000+ (21H2 or higher).
First, install WSL on your computer by running this command in an administrator powershell. For more info, look here.
This will install Ubuntu by default.
wsl --installYou can confirm WSL2 is enabled using wsl -l -v in PowerShell. To see other distributions that are available, use wsl -l -o.
If you have previously installed WSL1, upgrade to WSL 2. Check this link to upgrade from WSL1 to WSL2.
After WSL installation, go to C:/Users/<YourName>/.wslconfig and add nestedVirtualization=true to the end of the file (If the file doesn't exist, create it). For more information about the .wslconfig file check this link. Verify that you have selected "Show Hidden Files" and "Show File Extensions" in File Explorer options. The result should be like this:
[wsl2] nestedVirtualization=trueGo into your WSL distro (Run wsl in powershell) and check if KVM is enabled by using the kvm-ok command. The output should look like this:
INFO: /dev/kvm exists
KVM acceleration can be used
Use the command sudo apt -y install bridge-utils cpu-checker libvirt-clients libvirt-daemon qemu qemu-kvm to install it if it isn't.
Now download and install Docker for Windows if it is not already installed.
After installation, go into Settings and check these 2 boxes:
General -> "Use the WSL2 based engine";
Resources -> WSL Integration -> "Enable integration with my default WSL distro",
Ensure x11-apps is installed. Use the command sudo apt install x11-apps -y to install it if it isn't.
Finally, there are 3 ways to get video output:
- WSLg: This is the simplest and easiest option to use. There may be some issues such as the keyboard not being fully passed through or seeing a second mouse on the desktop - Issue on WSLg - but this option is recommended.
-e "DISPLAY=${DISPLAY:-:0.0}" \
-v /mnt/wslg/.X11-unix:/tmp/.X11-unix \-e "DISPLAY=${DISPLAY:-:0}" \
-v /mnt/wslg/.X11-unix:/tmp/.X11-unix \For Ubuntu 20.x on Windows, see https://github.com/sickcodes/Docker-OSX/discussions/458
- VNC: See the VNC section for more information. You could also add -vnc argument to qemu. Connect to your mac VM via a VNC Client. Here is a how to
- Desktop Environment: This will give you a full desktop linux experience but it will use a bit more of the computer's resources. Here is an example guide, but there are other guides that help set up a desktop environment. DE Example
Additional boot instructions for when you are creating your container
- Boot the macOS Base System (Press Enter)
- Click
Disk Utility
- Erase the BIGGEST disk (around 200gb default), DO NOT MODIFY THE SMALLER DISKS.
erase, you may need to reduce the disk size by 1kb
- (optional) Create a partition using the unused space to house the OS and your files if you want to limit the capacity. (For Xcode 12 partition at least 60gb.)
- Click
Reinstall macOS
- The system may require multiple reboots during installation
Troubleshooting
Routine checks
This is a great place to start if you are having trouble getting going, especially if you're not that familiar with Docker just yet.
Just looking to make a container quickly? Check out our container creation examples section.
More specific/advanced troubleshooting questions and answers may be found in More Questions and Answers. You should also check out the closed issues. Someone else might have gotten a question like yours answered already even if you can't find it in this document!
Confirm that your CPU supports virtualization
See initial setup.
Docker Unknown Server OS error
docker: unknown server OS: .
See 'docker run --help'.
This means your docker daemon is not running.
pgrep dockerd should return nothing
Therefore, you have a few choices.
sudo dockerd for foreground Docker usage. I use this.
Or
sudo systemctl --start dockerd to start dockerd this now.
Or
sudo systemctl --enable --now dockerd for start dockerd on every reboot, and now.
Use more CPU Cores/SMP
Examples:
-e EXTRA='-smp 6,sockets=3,cores=2'
-e EXTRA='-smp 8,sockets=4,cores=2'
-e EXTRA='-smp 16,sockets=8,cores=2'
Note, unlike memory, CPU usage is shared. so you can allocate all of your CPU's to the container.
Confirm your user is part of the Docker group, KVM group, libvirt group
Add yourself to the Docker group
If you use sudo dockerd or dockerd is controlled by systemd/systemctl, then you must be in the Docker group. If you are not in the Docker group:
sudo usermod -aG docker "${USER}"sudo usermod -aG libvirt "${USER}"
sudo usermod -aG kvm "${USER}"See also: initial setup.
Is the docker daemon enabled?
# run ad hoc
sudo dockerd
or daemonize it
sudo nohup dockerd &
enable it in systemd (it will persist across reboots this way)
sudo systemctl enable --now docker
or just start it as your user with systemd instead of enabling it
systemctl start docker
More Questions and Answers
Big thank you to our contributors who have worked out almost every conceivable issue so far!
https://github.com/sickcodes/Docker-OSX/blob/master/CREDITS.md
Start the same container later (persistent disk)
Created a container with docker run and want to reuse the underlying image again later?
NB: see container creation examples first for how to get to the point where this is applicable.
This is for when you want to run the SAME container again later. You may need to use docker commit to save your container before you can reuse it. Check if your container is persisted with docker ps --all.
If you don't run this you will have a new image every time.
# look at your recent containers and copy the CONTAINER ID
docker ps --all
docker start the container ID
docker start -ai abc123xyz567
if you have many containers, you can try automate it with filters like this
docker ps --all --filter "ancestor=sickcodes/docker-osx"
for locally tagged/built containers
docker ps --all --filter "ancestor=docker-osx"
You can also pull the .img file out of the container, which is stored in /var/lib/docker, and supply it as a runtime argument to the :naked Docker image.
See also: here.
I have used Docker-OSX before and want to restart a container that starts automatically
Containers that use sickcodes/docker-osx:auto can be stopped while being started.
# find last container
docker ps -a
docker start old container with -i for interactive, -a for attach STDIN/STDOUT
docker start -ai -i <Replace this with your ID>
LibGTK errors "connection refused"
You may see one or more libgtk-related errors if you do not have everything set up for hardware virtualisation yet. If you have not yet done so, check out the initial setup section and the routine checks section as you may have missed a setup step or may not have all the needed Docker dependencies ready to go.
See also: here.
Permissions denied error
If you have not yet set up xhost, try the following:
echo $DISPLAY
ARCH
sudo pacman -S xorg-xhost
UBUNTU DEBIAN
sudo apt install x11-xserver-utils
CENTOS RHEL FEDORA
sudo yum install xorg-x11-server-utils
then run
xhost +
RAM over-allocation
You cannot allocate more RAM than your machine has. The default is 3 Gigabytes:-e RAM=3.
If you are trying to allocate more RAM to the container than you currently have available, you may see an error like the following: cannot set up guest memory 'pc.ram': Cannot allocate memory. See also: here, here.
For example (below) the buff/cache already contains 20 Gigabytes of allocated RAM:
[user@hostname ~]$ free -mh
               total        used        free      shared  buff/cache   available
Mem:            30Gi       3.5Gi       7.0Gi       728Mi        20Gi        26Gi
Swap:           11Gi          0B        11Gi
Clear the buffer and the cache:
sudo tee /proc/sys/vm/drop_caches <<< 3Now check the RAM again:
[user@hostname ~]$ free -mh
               total        used        free      shared  buff/cache   available
Mem:            30Gi       3.3Gi        26Gi       697Mi       1.5Gi        26Gi
Swap:           11Gi          0B        11Gi
PulseAudio
Use PulseAudio for sound
Note: AppleALC, alcid and VoodooHDA-OC do not have codec support. However, IORegistryExplorer does show the controller component working.
docker run \
    --device /dev/kvm \
    -e AUDIO_DRIVER=pa,server=unix:/tmp/pulseaudio.socket \
    -v "/run/user/$(id -u)/pulse/native:/tmp/pulseaudio.socket" \
    -v /tmp/.X11-unix:/tmp/.X11-unix \
    sickcodes/docker-osx
PulseAudio debugging
docker run \
    --device /dev/kvm \
    -e AUDIO_DRIVER=pa,server=unix:/tmp/pulseaudio.socket \
    -v "/run/user/$(id -u)/pulse/native:/tmp/pulseaudio.socket" \
    -v /tmp/.X11-unix:/tmp/.X11-unix \
    -e PULSE_SERVER=unix:/tmp/pulseaudio.socket \
    sickcodes/docker-osx pactl list
PulseAudio with WSLg
docker run \
    --device /dev/kvm \
    -e AUDIO_DRIVER=pa,server=unix:/tmp/pulseaudio.socket \
    -v /mnt/wslg/runtime-dir/pulse/native:/tmp/pulseaudio.socket \
    -v /mnt/wslg/.X11-unix:/tmp/.X11-unix \
    sickcodes/docker-osx
Forward additional ports (nginx hosting example)
It's possible to forward additional ports depending on your needs. In this example, we'll use Mac OSX to host nginx:
host:10023 <-> 10023:container:10023 <-> 80:guestOn the host machine, run:
docker run -it \
    --device /dev/kvm \
    -p 50922:10022 \
    -e ADDITI \
    -p 10023:10023 \
    sickcodes/docker-osx:auto
In a Terminal session running the container, run:
/bin/bash -c "$(curl -fsSL https://raw.githubusercontent.com/Homebrew/install/HEAD/install.sh)"
brew install nginx sudo sed -i -e 's/8080/80/' /usr/local/etc/nginx/nginx.confcd sudo nginx -s stop sudo nginx
nginx should now be reachable on port 10023.
Additionally, you can string multiple statements together, for example:
-e ADDITI
    -p 10023:10023 \
    -p 10043:10043 \
Bridged networking
You might not need to do anything with the default setup to enable internet connectivity from inside the container. Additionally, curl may work even if ping doesn't.
See discussion here and here and here.
Enable IPv4 forwarding for bridged network connections for remote installations
This is not required for LOCAL installations.
Additionally note it may cause the host to leak your IP, even if you're using a VPN in the container.
However, if you're trying to connect to an instance of Docker-OSX remotely (e.g. an instance of Docker-OSX hosted in a datacenter), this may improve your performance:
# enable for current session
sudo sysctl -w net.ipv4.ip_forward=1
OR
sudo tee /proc/sys/net/ipv4/ip_forward <<< 1
enable permanently
sudo touch /etc/sysctl.conf
sudo tee -a /etc/sysctl.conf <<EOF
net.ipv4.ip_forward = 1
EOF
or edit manually with the editor of your choice
nano /etc/sysctl.conf || vi /etc/sysctl.conf || vim /etc/sysctl.conf
now reboot
Share folder with Docker-OSX QEMU macOS
Sharing a folder with guest is quite simple.
Your folder, will go to /mnt/hostshare inside the Arch container which is then passed over QEMU.
Then mount using sudo -S mount_9p hostshare from inside the mac.
For example,
FOLDER=~/somefolder-v "${FOLDER}:/mnt/hostshare" \
-e EXTRA="-virtfs local,path=/mnt/hostshare,mounttag=hostshare,securitymodel=passthrough,id=hostshare" \Full example:
# stat machddng.img
SHARE=~/somefolder
docker run -it \     --device /dev/kvm \     -p 50922:10022 \     -v /tmp/.X11-unix:/tmp/.X11-unix \     -e "DISPLAY=${DISPLAY:-:0.0}" \     -v "${PWD}/machddng.img:/home/arch/OSX-KVM/machddng.img" \     -v "${SHARE}:/mnt/hostshare" \     -e EXTRA="-virtfs local,path=/mnt/hostshare,mounttag=hostshare,securitymodel=passthrough,id=hostshare" \     sickcodes/docker-osx:latest
!!! Open Terminal inside macOS and run the following command to mount the virtual file system
sudo -S mount_9p hostshare
Share Linux NFS Drive into macOS
To share a folder using NFS, setup a folder for on the host machine, for example, /srv/nfs/share and then append to /etc/exports:
/srv/nfs/share 127.0.0.1/0(insecure,rw,allsquash,anonuid=1000,anongid=985,nosubtree_check)You may need to reload exports now, which will begin sharing that directory.
# reload shared folders
sudo exportfs -arvGive permissions on the shared folder for the anonuid and anongid, where anonuid and anongid matches that of your linux user; id -u
id -u ; id -g will print userid:groupid
chown 1000:985 /srv/nfs/share chmod u+rwx /srv/nfs/shareStart the Docker-OSX container with the additional flag --network host
Create and mount the nfs folder from the mac terminal:
mkdir -p ~/mnt sudo mount_nfs -o locallocks 10.0.2.2:/srv/nfs/share ~/mntShare USB Drive into macOS over QEMU
Mount USB Drive (Hotplug/Hot Plug USB)
Start your container.
Pick a port, for example, 7700.
lsusb to get vid:pid
On Linux: sudo usbredirserver -p 7700 1e3d:2096
Now, in the Docker window hit Enter to see the (qemu) console.
You can add/remove the disk using commands like this, even once the machine is started:
chardev-add socket,id=usbredirchardev1,port=7700,host=172.17.0.1
device_add usb-redir,chardev=usbredirchardev1,id=usbredirdev1,debug=4
Mount USB Drive inside macOS at boot Docker OSX
PORT=7700 IP_ADDRESS=172.17.0.1-e NETWORKING=vmxnet3-e EXTRA="-chardev socket,id=usbredirchardev1,port=${PORT},host=${IP_ADDRESS} -device usb-redir,chardev=usbredirchardev1,id=usbredirdev1,debug=4" \
</code></pre>Fedora: enable internet connectivity with a bridged network
Fedora's default firewall settings may prevent Docker's network interface from reaching the internet. In order to resolve this, you will need to whitelist the interface in your firewall:
<pre><code class="lang-bash"># Set the docker0 bridge to the trusted zone sudo firewall-cmd --permanent --zone=trusted --add-interface=docker0 sudo firewall-cmd --reload</code></pre>
Nested Hardware Virtualization
Check if your machine has hardware virtualization enabled:
<pre><code class="lang-bash">sudo tee /sys/module/kvm/parameters/ignore_msrs <<< 1
egrep -c '(svm|vmx)' /proc/cpuinfo</code></pre>
Virtual network adapters
Fast internet connectivity
-e NETWORKING=e1000-82545emSlow internet connectivity
du -sh *CI/CD Related Improvements
Tips for reducing the size of the image
to do this is to use
- Start the container as usual, and remove unnecessary files. A useful way
starting from the/directory, and find large directories where files can be removed. E.g. unnecessary cached files, Xcode platforms, etc.sudo trimforce enable
- Once you are satisfied with the amount of free space, enable trim with
, and reboot.dd if=/dev/zero of=./empty && rm -f emptyZero out the empty space on the disk with docker cp stoppedcontainer:/home/arch/OSX-KVM/machddng.img .Shut down the VM and copy out the qcow image with qemu-img check -r all machddng.imgRun to fix any errors.qemu-img convert -O qcow2 machddng.img deduped.imgRun and check for errors againqemu-img convert -c -O qcow2 deduped.img compressed.imgOPTIONAL: Run to further compress the image. This may reduce the runtime speed though, but it should reduce the size by roughly 25%.-e EXTRA=Check for errors again, and build a fresh docker image. E.g. with this Dockerfile <pre><code class="lang-">FROM sickcodes/docker-osx USER arch COPY --chown=arch ./deduped.img /home/arch/OSX-KVM/machddng.img</code></pre>Run Docker-OSX headlessly with Telnet
First make sure autoboot is enabled
Next, you will want to set up SSH to be automatically started.
<pre><code class="lang-bash">sudo systemsetup -setremotelogin on</code></pre>
Make sure to commit the new docker image and save it, or rebuild as described in the section on reducing disk space.
Then run it with these arguments.
<pre><code class="lang-bash"># Run with the -nographic flag, and enable a telnet interface docker run \ --device /dev/kvm \ -p 50922:10022 \ -e "DISPLAY=${DISPLAY:-:0.0}" \ -e EXTRA="-monitor telnet::45454,server,nowait -nographic -serial null" \ mycustomimage</code></pre>
What mirrors are appropriate to use to build Docker-OSX locally?
If you are building Docker-OSX locally, you'll probably want to use Arch Linux's mirrors.
Mirror locations can be found here (uses two-letter country codes): https://archlinux.org/mirrorlist/all/
<pre><code class="lang-bash">docker build -t docker-osx:latest \ --build-arg RANKMIRRORS=true \ --build-arg MIRROR_COUNTRY=US \ --build-arg MIRROR_COUNT=10 \ --build-arg SHORTNAME=catalina \ --build-arg SIZE=200G .</code></pre>
Custom QEMU Arguments (passthrough devices)
Pass any devices/directories to the Docker container & the QEMU arguments using the handy runtime argument provider option
../custom<pre><code class="lang-bash"># example customizations docker run \ -e RAM=4 \ -e SMP=4 \ -e CORES=4 \ -e EXTRA='-usb -device usb-host,hostbus=1,hostaddr=8' \ -e INTERNALSSHPORT=23 \ -e MAC_ADDRESS="$(xxd -c1 -p -l 6 /dev/urandom | tr '\n' ':' | cut -c1-17)" \ -e AUDIO_DRIVER=alsa \ -e IMAGE_PATH=/image \ -e SCREENSHAREPORT=5900 \ -e DISPLAY=:0 \ -e NETWORKING=vmxnet3 \ --device /dev/kvm \ --device /dev/snd \ -v /tmp/.X11-unix:/tmp/.X11-unix \ docker-osx:latest</code></pre>
Generating serial numbers
Generate serial numbers in
OR make docker generate them at runtime (see below)../customAt any time, verify your serial number before logging into iCloud, etc.
<pre><code class="lang-bash"># this is a quick way to check your serial number via cli inside OSX ioreg -l | grep IOPlatformSerialNumber
test some commands
sshpass -p 'alpine' ssh user@localhost -p 50922 'ping google.com'check your serial number
sshpass -p 'alpine' ssh user@localhost -p 50922 'ioreg -l | grep IOPlatformSerialNumber'</code></pre>Getting started with serial numbers
<pre><code class="lang-bash"># ARCH pacman -S libguestfs
UBUNTU DEBIAN
apt install libguestfs -yRHEL FEDORA CENTOS
yum install libguestfs -y</code></pre>Inside the
folder you will find4scripts.config-nopicker-custom.plistopencore-image-ng.shThese two files are from OSX-KVM.generate-unique-machine-values.shYou don't need to touch these two files.
The config.plist has 5 values replaced with placeholders. Click here to see those values for no reason.
This script will generate serial numbers, with Mac Addresses, plus output to CSV/TSV, plus make abootdisk image../custom/generate-unique-machine-values.sh --helpYou can create hundreds,
generate-specific-bootdisk.sh<pre><code class="lang-bash">./custom/generate-unique-machine-values.sh \ --count 1 \ --tsv ./serial.tsv \ --bootdisks \ --output-bootdisk OpenCore.qcow2 \ --output-env source.env.sh</code></pre>
Or if you have some specific serial numbers...
<pre><code class="lang-bash">generate-specific-bootdisk.sh \ --model "${DEVICE_MODEL}" \ --serial "${SERIAL}" \ --board-serial "${BOARD_SERIAL}" \ --uuid "${UUID}" \ --mac-address "${MAC_ADDRESS}" \ --output-bootdisk OpenCore-nopicker.qcow2</code></pre>-e GENERATE_UNIQUE=true \This example generates a random set of serial numbers at runtime, headlessly
<pre><code class="lang-bash"># proof of concept only, generates random serial numbers, headlessly, and quits right after. docker run --rm -it \ --device /dev/kvm \ -p 50922:10022 \ -e NOPICKER=true \ -e GENERATE_UNIQUE=true \ -e DEVICE_MODEL="iMacPro1,1" \ sickcodes/docker-osx:auto
-e OSX_COMMANDS='ioreg -l | grep IOPlatformSerialNumber' \</code></pre>
This example generates a specific set of serial numbers at runtime
<pre><code class="lang-bash"># run the same as above 17gb auto image, with SSH, with nopicker, and save the bootdisk for later.
you don't need to save the bootdisk IF you supply specific serial numbers!
docker run -it \ --device /dev/kvm \ -p 50922:10022 \ -e NOPICKER=true \ -e GENERATE_SPECIFIC=true \ -e DEVICE_MODEL="iMacPro1,1" \ -e SERIAL="C02TW0WAHX87" \ -e BOARD_SERIAL="C027251024NJG36UE" \ -e UUID="5CCB366D-9118-4C61-A00A-E5BAF3BED451" \ -e MAC_ADDRESS="A8:5C:2C:9A:46:2F" \ -e OSX_COMMANDS='ioreg -l | grep IOPlatformSerialNumber' \ sickcodes/docker-osx:auto</code></pre>
This example generates a specific set of serial numbers at runtime, with your existing image, at 1000x1000 display resolution
<pre><code class="lang-bash"># run an existing image in current directory, with a screen, with SSH, with nopicker.
stat machddng.img # make sure you have an image if you're using :naked
docker run -it \ -v "${PWD}/machddng.img:/image" \ --device /dev/kvm \ -e "DISPLAY=${DISPLAY:-:0.0}" \ -v /tmp/.X11-unix:/tmp/.X11-unix \ -p 50922:10022 \ -e NOPICKER=true \ -e GENERATE_SPECIFIC=true \ -e DEVICE_MODEL="iMacPro1,1" \ -e SERIAL="C02TW0WAHX87" \ -e BOARD_SERIAL="C027251024NJG36UE" \ -e UUID="5CCB366D-9118-4C61-A00A-E5BAF3BED451" \ -e MAC_ADDRESS="A8:5C:2C:9A:46:2F" \ -e WIDTH=1000 \ -e HEIGHT=1000 \ sickcodes/docker-osx:naked</code></pre>
If you want to generate serial numbers, either make them at runtime using
./customOr you can generate them inside the
folder. And then use: <pre><code class="lang-bash">-e GENERATE_SPECIFIC=true \ -e SERIAL="" \ -e BOARD_SERIAL="" \ -e UUID="" \ -e MAC_ADDRESS="" \</code></pre>5Making serial numbers persist across reboots
<pre><code class="lang-bash">stat machddng_testing.img touch ./output.env
generate fresh random serial numbers, with a screen, using your own image, and save env file with your new serial numbers for later.
docker run -it \ --device /dev/kvm \ -e "DISPLAY=${DISPLAY:-:0.0}" \ -v /tmp/.X11-unix:/tmp/.X11-unix \ -p 50922:10022 \ -e NOPICKER=true \ -e GENERATE_UNIQUE=true \ -e GENERATE_SPECIFIC=true \ -e DEVICE_MODEL="iMacPro1,1" \ -v "${PWD}/output.env:/env" \ -v "${PWD}/machddng_testing.img:/image" \ sickcodes/docker-osx:naked</code></pre>
To use iMessage or iCloud you need to change
values.SERIALBOARD_SERIALUUIDMAC_ADDRESSROMis just the lowercased mac address, without:between each word.-e GENERATE_UNIQUE=trueYou can tell the container to generate them for you using
-e GENERATE_SPECIFIC=trueOr tell the container to use specific ones using
OpenCore.qcow2<pre><code class="lang-bash">-e GENERATE_SPECIFIC=true \ -e DEVICE_MODEL="iMacPro1,1" \ -e SERIAL="C02TW0WAHX87" \ -e BOARD_SERIAL="C027251024NJG36UE" \ -e UUID="5CCB366D-9118-4C61-A00A-E5BAF3BED451" \ -e MAC_ADDRESS="A8:5C:2C:9A:46:2F" \</code></pre>
Changing display resolution
The display resolution is controlled by this line:
https://github.com/sickcodes/Docker-OSX/blob/master/custom/config-nopicker-custom.plist#L819
Instead of mounting that disk, Docker-OSX will generate a new
by using this one cool trick:WIDTH<pre><code class="lang-bash">-e GENERATE_UNIQUE=true \ -e WIDTH=800 \ -e HEIGHT=600 \</code></pre>
To use
/HEIGHT, you must use with either-e GENERATEUNIQUE=trueor-e GENERATESPECIFIC=true.libguestfsIt will take around 30 seconds longer to boot because it needs to make a new boot partition using
.config-custom.plist<pre><code class="lang-bash">-e GENERATE_SPECIFIC=true \ -e WIDTH=1920 \ -e HEIGHT=1080 \ -e SERIAL="" \ -e BOARD_SERIAL="" \ -e UUID="" \ -e MAC_ADDRESS="" \</code></pre>
Change Docker-OSX Resolution Examples
<pre><code class="lang-bash"># using an image in your current directory stat machddng.img
docker run -it \ --device /dev/kvm \ -p 50922:10022 \ -v "${PWD}/machddng.img:/image" \ -v /tmp/.X11-unix:/tmp/.X11-unix \ -e "DISPLAY=${DISPLAY:-:0.0}" \ -e GENERATE_SPECIFIC=true \ -e DEVICE_MODEL="iMacPro1,1" \ -e SERIAL="C02TW0WAHX87" \ -e BOARD_SERIAL="C027251024NJG36UE" \ -e UUID="5CCB366D-9118-4C61-A00A-E5BAF3BED451" \ -e MAC_ADDRESS="A8:5C:2C:9A:46:2F" \ -e MASTERPLISTURL=https://raw.githubusercontent.com/sickcodes/Docker-OSX/master/custom/config-nopicker-custom.plist \ -e WIDTH=1600 \ -e HEIGHT=900 \ sickcodes/docker-osx:naked</code></pre>
<pre><code class="lang-bash"># generating random serial numbers, using the DIY installer, along with the screen resolution changes. docker run -it \ --device /dev/kvm \ -p 50922:10022 \ -v /tmp/.X11-unix:/tmp/.X11-unix \ -e "DISPLAY=${DISPLAY:-:0.0}" \ -e GENERATE_UNIQUE=true \ -e WIDTH=800 \ -e HEIGHT=600 \ sickcodes/docker-osx:latest</code></pre>
Here's a few other resolutions! If your resolution is invalid, it will default to 800x600.
<pre><code class="lang-">-e WIDTH=800 \ -e HEIGHT=600 \</code></pre>
<pre><code class="lang-">-e WIDTH=1280 \ -e HEIGHT=768 \</code></pre>
<pre><code class="lang-">-e WIDTH=1600 \ -e HEIGHT=900 \</code></pre>
<pre><code class="lang-">-e WIDTH=1920 \ -e HEIGHT=1080 \</code></pre>
<pre><code class="lang-">-e WIDTH=2560 \ -e HEIGHT=1600 \</code></pre>
This example shows how to change resolution after the container is created.
First step is to stop the docker daemon <pre><code class="lang-">sudo systemctl stop docker</code></pre> The second step is to change container config in <pre><code class="lang-">/var/lib/docker/containers/[container-id]/config.v2.json</code></pre> (Suppose your original WIDTH is 1024 and HEIGHT is 768, you can search 1024 and replace it with the new value. Same for 768.)
The last step is to restart the docker daemon <pre><code class="lang-">sudo systemctl restart docker</code></pre>
Mounting physical disks in Mac OSX
Pass the disk into the container as a volume and then pass the disk again into QEMU command line extras with.
Use the
because you probably want to see the boot menu, otherwise omit the first line:qcow2<pre><code class="lang-bash">DISKTWO="${PWD}/mountme.img"</code></pre> <pre><code class="lang-dockerfile">-e MASTERPLISTURL='https://raw.githubusercontent.com/sickcodes/osx-serial-generator/master/config-custom.plist' \ -v "${DISK_TWO}:/disktwo" \ -e EXTRA='-device ide-hd,bus=sata.5,drive=DISK-TWO -drive id=DISK-TWO,if=none,file=/disktwo,format=qcow2' \</code></pre>
Physical disk mounting example
<pre><code class="lang-bash">OSXIMAGE="${PWD}/machddngxcode_bigsur.img" DISKTWO="${PWD}/mountme.img"
docker run -it \ --device /dev/kvm \ -e "DISPLAY=${DISPLAY:-:0.0}" \ -v /tmp/.X11-unix:/tmp/.X11-unix \ -e MASTERPLISTURL='https://raw.githubusercontent.com/sickcodes/osx-serial-generator/master/config-custom.plist' \ -v "${OSX_IMAGE}":/image \ -v "${DISK_TWO}":/disktwo \ -e EXTRA='-device ide-hd,bus=sata.5,drive=DISK-TWO -drive id=DISK-TWO,if=none,file=/disktwo,format=qcow2' \ sickcodes/docker-osx:naked</code></pre>
See also: here.
Extracting the APFS disk on Linux
In Docker-OSX, we are using
images.new_image.imgThis means the image grows as you use it, but the guest OS thinks you have 200GB available.
READ ONLY
<pre><code class="lang-bash"># mount the qemu image like a real disk sudo modprobe nbd max_part=8 sudo qemu-nbd --connect=/dev/nbd0 ./image.img sudo fdisk /dev/nbd0 -l
mkdir -p ./mnt sudo mount /dev/nbd0p1 ./mnt
inspect partitions (2 partitions)
sudo fdisk /dev/nbd0 -lmount using apfs-linux-rw OR apfs-fuse
mkdir -p ./partsudo mount /dev/nbd0p2 ./part sudo apfs-fuse -o allow_other /dev/nbd0p2 ./part</code></pre>
When you are finishing looking at your disk, you can unmount the partition, the disk, and remove the loopback device:
<pre><code class="lang-bash">sudo umount ./part sudo umount ./mnt sudo qemu-nbd --disconnect /dev/nbd0 sudo rmmod nbd</code></pre>
USB Passthrough
Firstly, QEMU must be started as root.
It is also potentially possible to accomplish USB passthrough by changing the permissions of the device in the container. See here.
For example, create a new Dockerfile with the following
<pre><code class="lang-bash">FROM sickcodes/docker-osx USER arch RUN sed -i -e s/exec\ qemu/exec\ sudo\ qemu/ ./Launch.sh COPY --chown=arch ./newimage.img /home/arch/OSX-KVM/machdd_ng.img</code></pre>
Where
is the qcow2 image you extracted. Then rebuild withdocker build .system_profiler SPUSBDataType` in the MacOS shell.Next we need to find out the bus and port numbers of the USB device we want to pass through to the VM:
<pre><code class="lang-bash">lsusb -t /: Bus 02.Port 1: Dev 1, Class=roothub, Driver=xhcihcd/6p, 5000M /: Bus 01.Port 1: Dev 1, Class=roothub, Driver=xhcihcd/12p, 480M |__ Port 2: Dev 5, If 0, Class=Human Interface Device, Driver=usbhid, 12M |__ Port 2: Dev 5, If 1, Class=Chip/SmartCard, Driver=, 12M |__ Port 3: Dev 2, If 0, Class=Wireless, Driver=, 12M |__ Port 3: Dev 2, If 1, Class=Wireless, Driver=, 12M |__ Port 5: Dev 3, If 0, Class=Video, Driver=uvcvideo, 480M |__ Port 5: Dev 3, If 1, Class=Video, Driver=uvcvideo, 480M</code></pre>
In this example, we want to pass through a smartcard device. The device we want is on bus 1 and port 2.
There may also be differences if your device is usb 2.0 (ehci) vs usb 3.0 (xhci). See here for more details.
<pre><code class="lang-bash"># hostbus and hostport correspond to the numbers from lsusb
runs in privileged mode to enable access to the usb devices.
docker run \ --privileged \ --device /dev/kvm \ -e RAM=4 \ -p 50922:10022 \ -e "DISPLAY=${DISPLAY:-:0.0}" \ -e EXTRA="-device virtio-serial-pci -device usb-host,hostbus=1,hostport=2" \ mycustomimage</code></pre>You should see the device show up when you do
Important Note: this will cause the host system to lose access to the USB device while the VM is running!
Container creation examples
Quick Start your own image (naked co
README truncated. View on GitHub


