
Default Keycloak login form with additional validation of configurable user attribute!
Keycloak username password attribute authenticator


Supported Keycloak versions
| |
| keycloak-username-password-attribute-authenticator:0.3.0 |
|-------------------------------------------------------------------------------------------------------------------------|-----------------------------------------------------------------------------------------------------------------------------------------------------------|
|  |
| keycloak-username-password-attribute-authenticator:1.0.1 |
Description
Keycloak default login form with additional user attribute validation. Example: 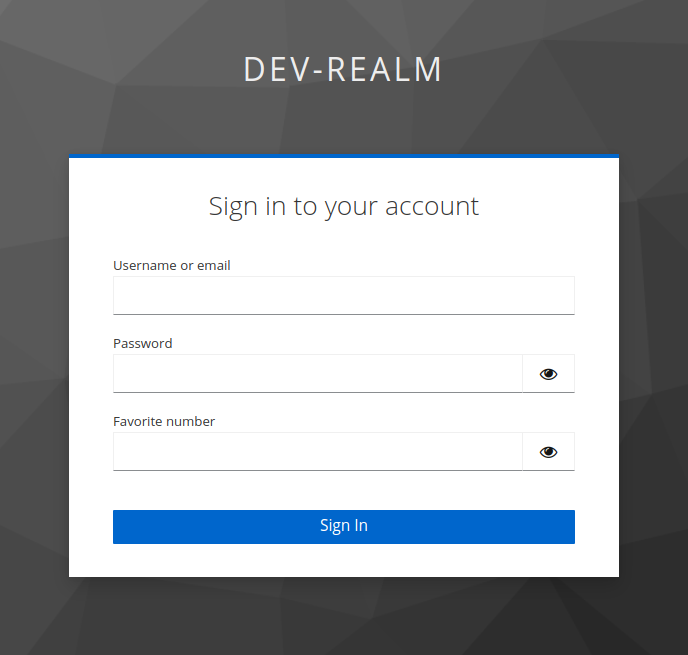
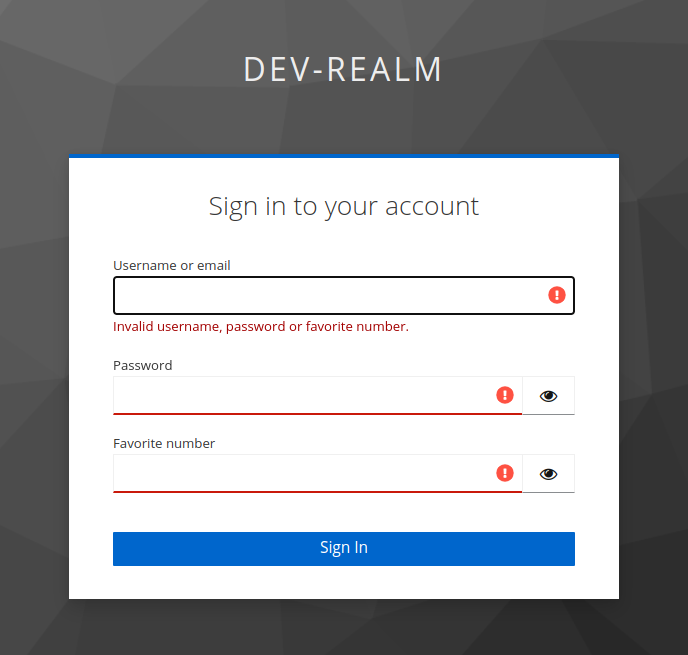
Usage
To use this authenticator, it should be bundled together with Keycloak, here's how do that:Deploying jar
Build your Keycloak image like below:FROM quay.io/keycloak/keycloak:24.0.1
RUN curl -s -L -o /opt/keycloak/providers/keycloak-username-password-attribute-authenticator-1.0.1.jar https://github.com/kilmajster/keycloak-username-password-attribute-authenticator/releases/download/1.0.1/keycloak-username-password-attribute-authenticator-1.0.1.jar RUN /opt/keycloak/bin/kc.sh build
ENTRYPOINT ["/opt/keycloak/bin/kc.sh", "start"]
Authentication configuration
Following steps shows how to create authentication flow that uses authenticator with user attribute validation.- In Keycloak admin console, go to Authentication section, select authentication type of Browser and click
- Set name for new authentication flow eg.
Browser with user attributeand click Ok. - In newly created authentication flow remove Username Password Form execution.
- On Browser With User Attribute Forms level, click Actions > Add execution and select provider of type
required, then save.
- Then move Username Password Attribute Form on a previous position of Username Password Form,
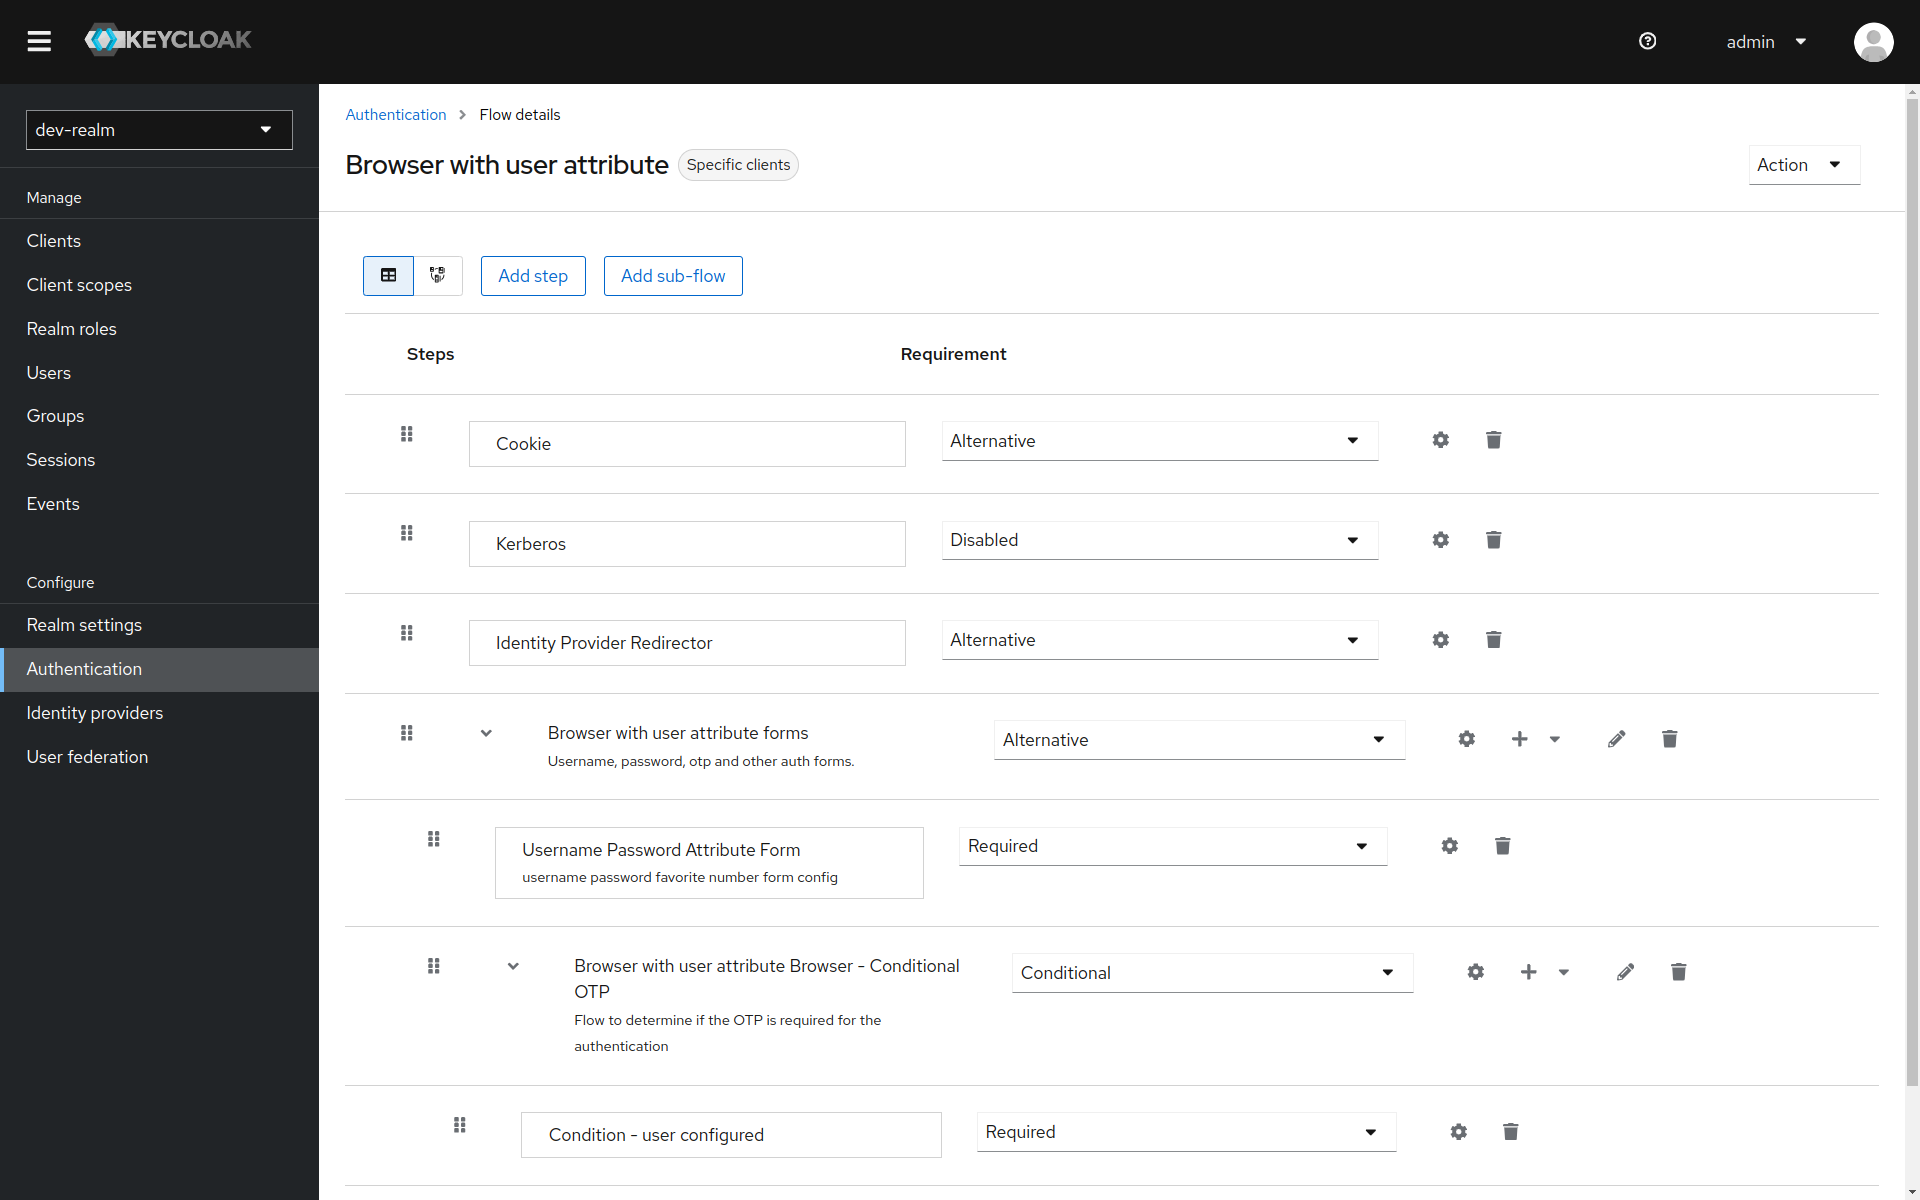
- On Username Password Attribute Form level, click Actions > Settings.
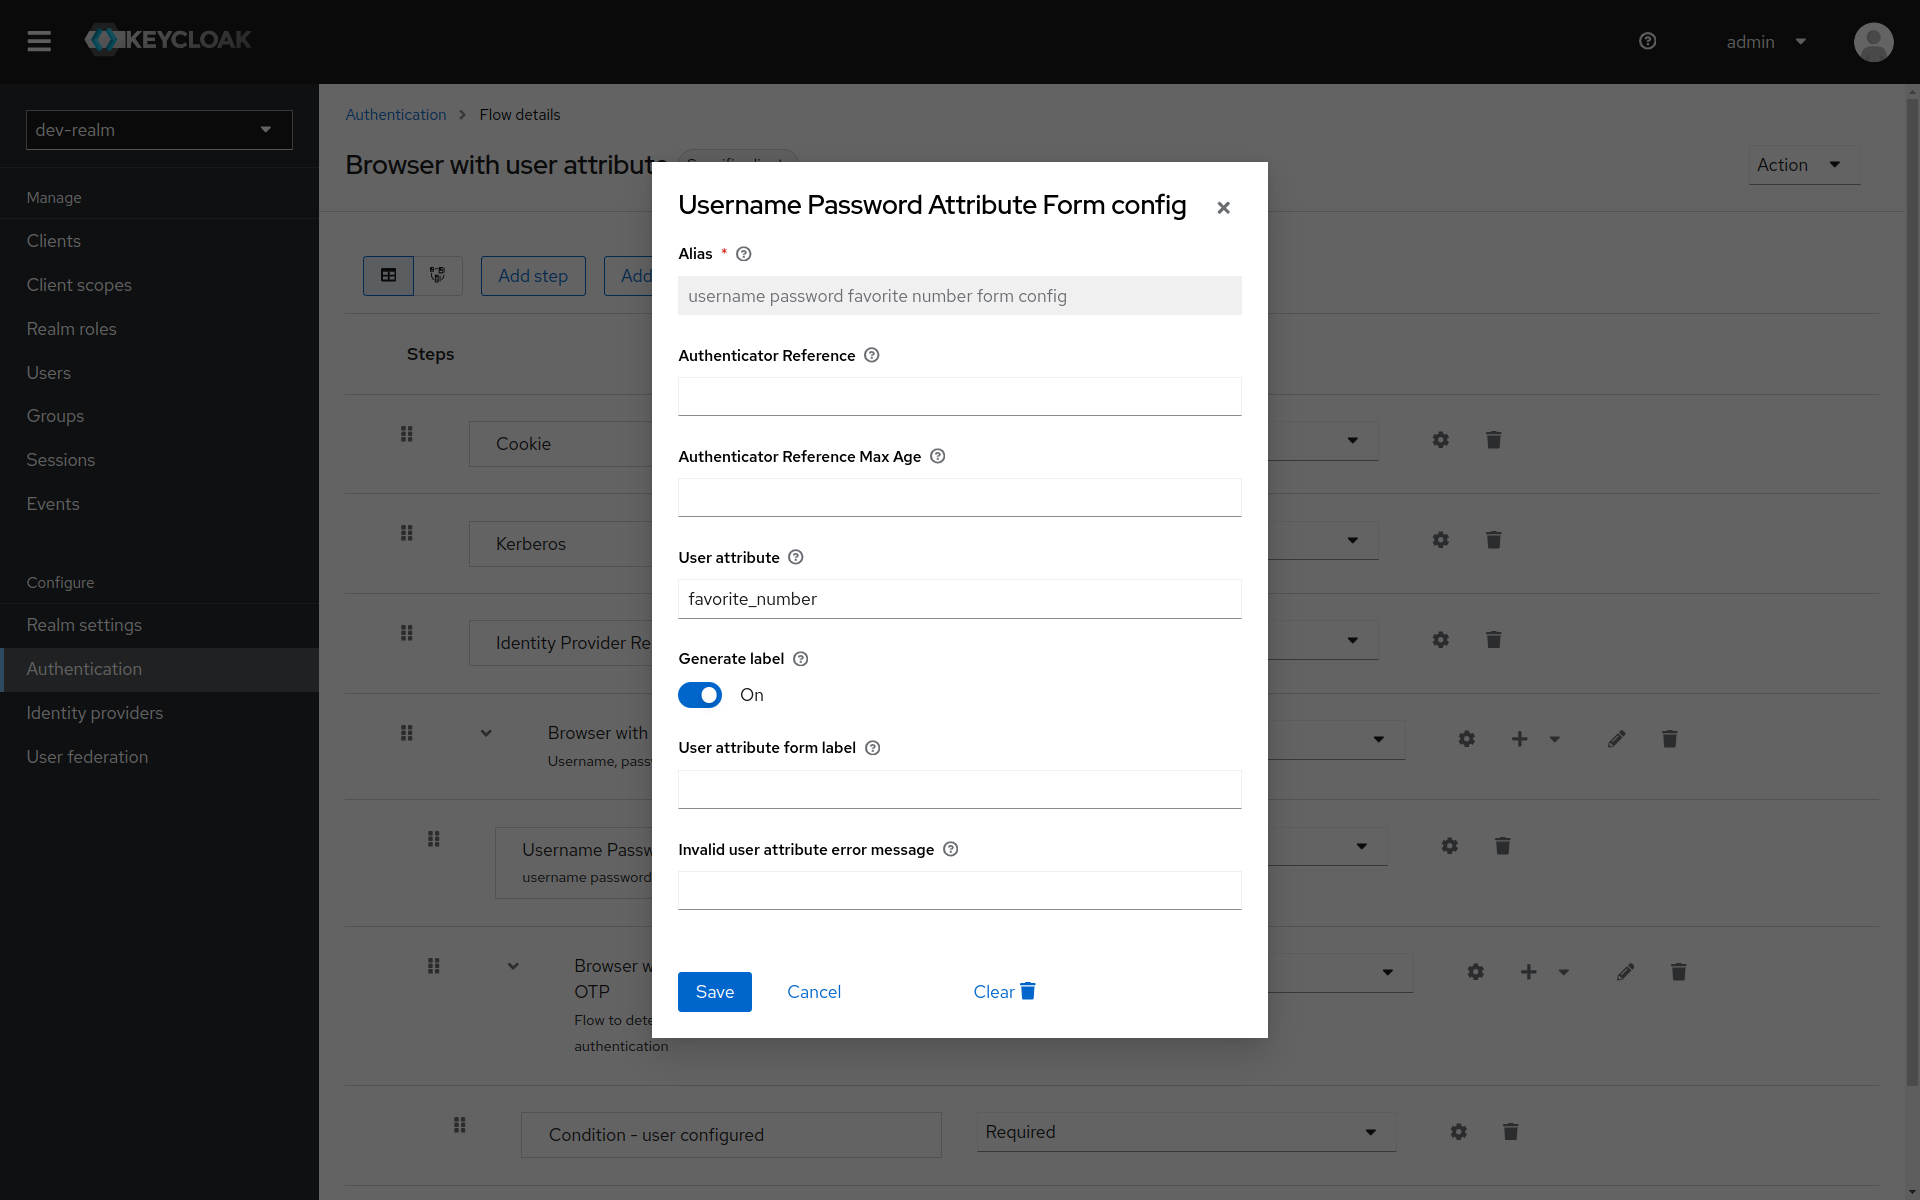
Minimal configuration
- #####
User attribute
Advanced configuration
- #####
Generate label(default true)
favoritenumber will be labeled as Favorite number_
- REALLYcustom.user-Attribute will be translated to Really custom user attribute_, etc.
By default, set to true. If User attribute form label
is configured, label is taken form configuration and generation is skipped.
- #####
User attribute form label
- #####
Invalid user attribute error message
Theme configuration
Theme configuration is handled in clients section, in following example Keycloak defaultaccount-console client will be used.
Using bundled default Keycloak theme
In Keycloak admin panel, go to Clients and select client you want to authenticate with user attribute form. As Login Theme setbase-with-attribute
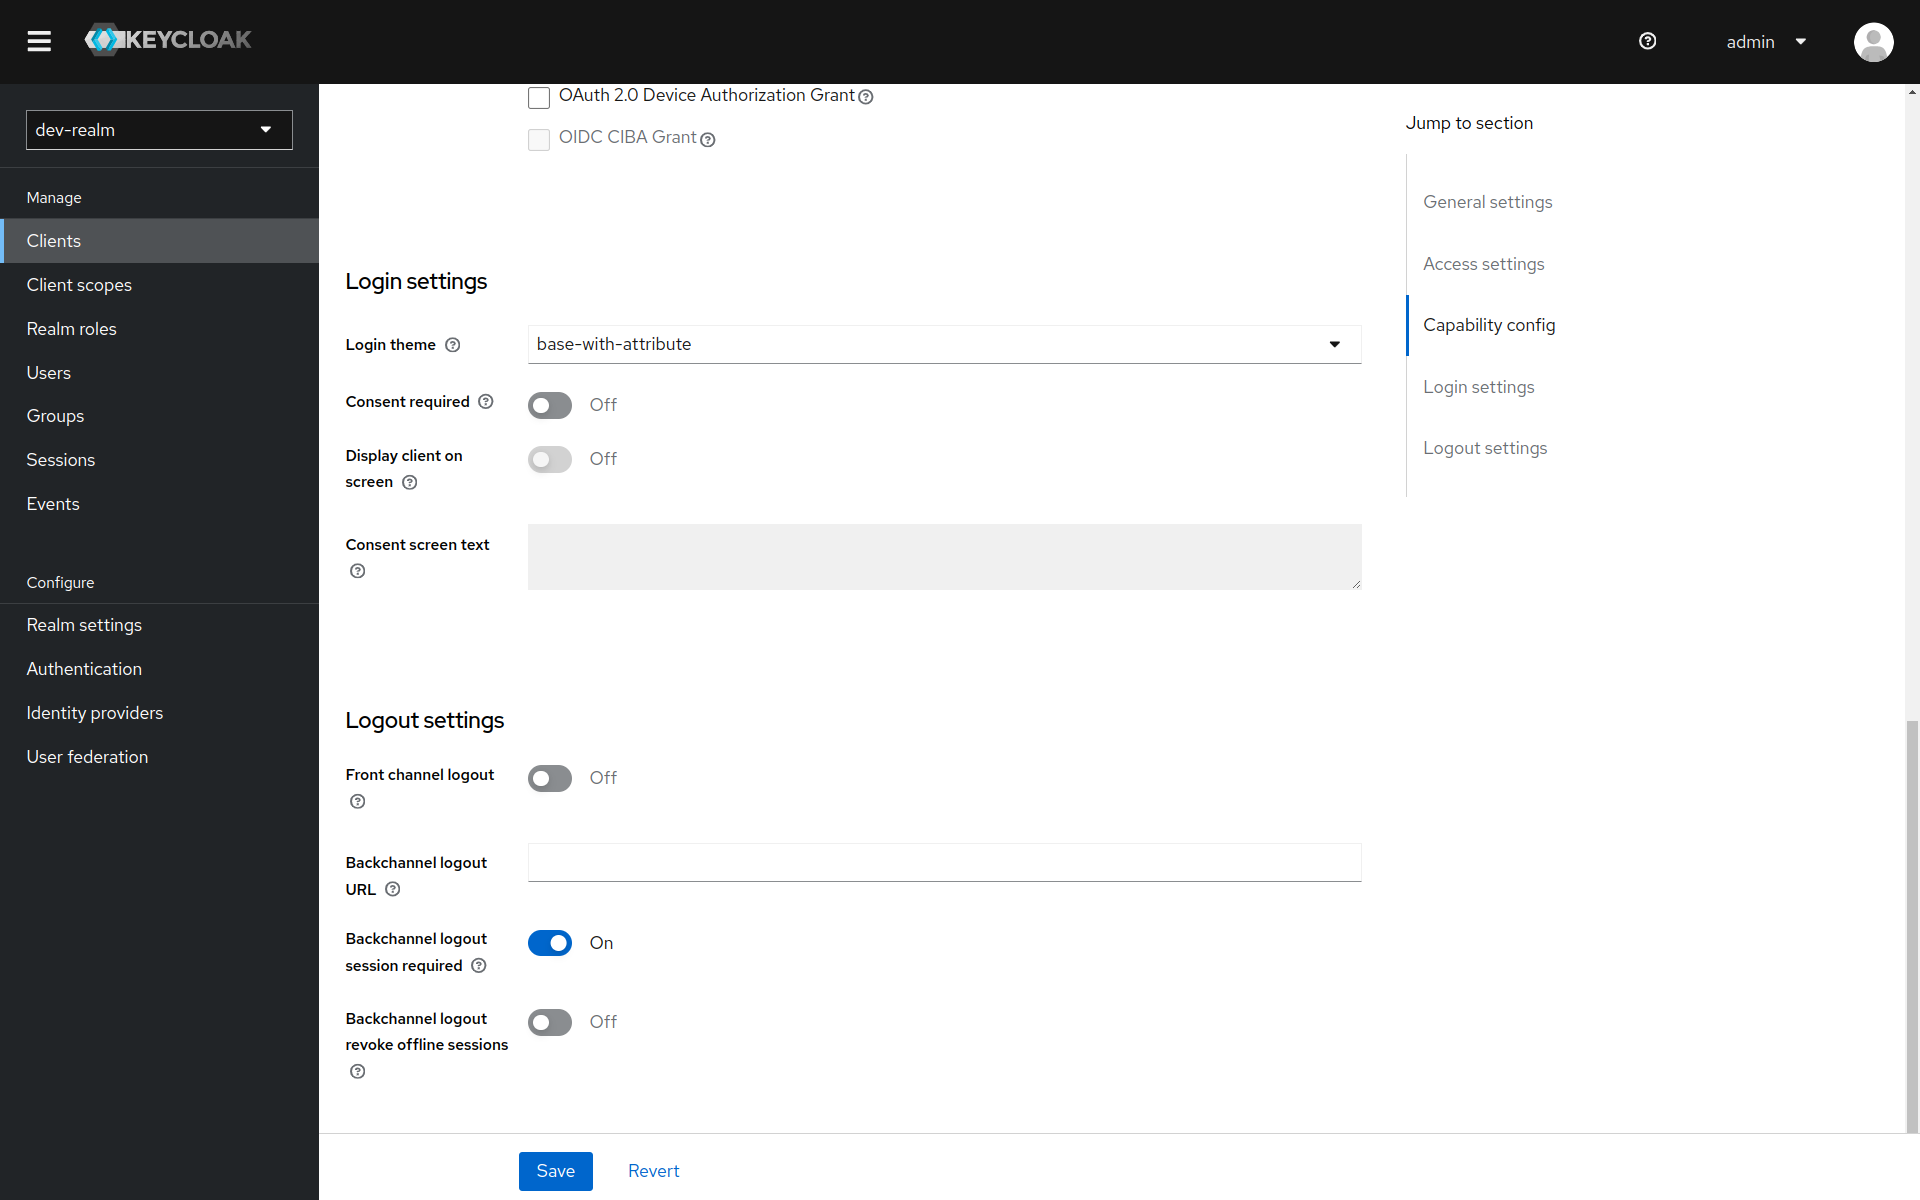
Browser with user attribute.
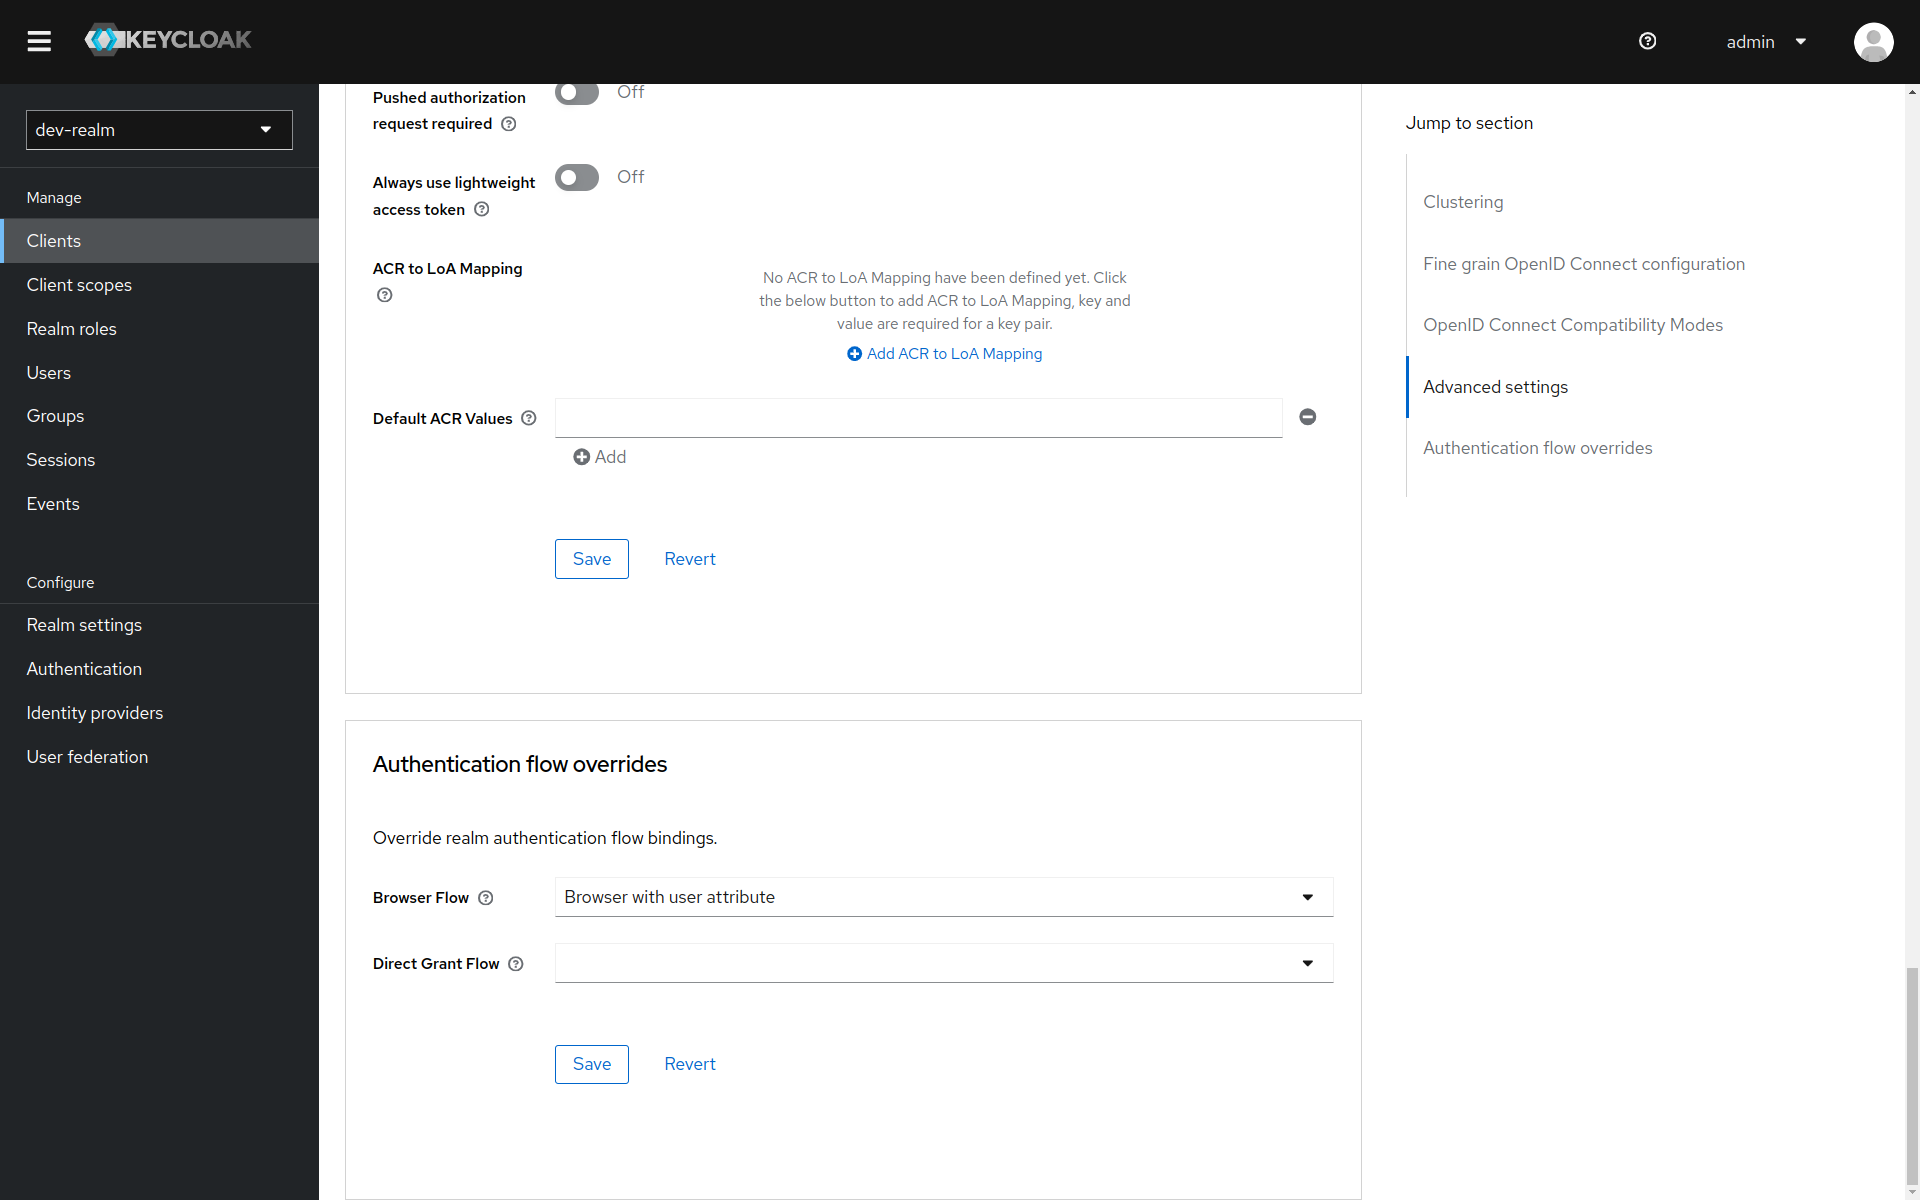
Extending own theme
If you have your own theme, then in.your-theme/login/login.ftl add following below <div> responsible for a password stuff or anywhere you want.
How it was done with Keycloak base theme, you can check here.
<#if usernameHidden?? && messagesPerField.existsError('username','password')>
        <span id="input-error" class="${properties.kcInputErrorMessageClass!}" aria-live="polite">
                ${kcSanitize(messagesPerField.getFirstError('username','password'))?no_esc}
        </span>
    </#if>
</div>
<!-- attribute input block start--> <div class="${properties.kcFormGroupClass!}">     <label for="userattribute" class="${properties.kcLabelClass!}"><#if userattributelabel??>${msg(userattribute_label)}<#else>${msg("defaultUserAttributeLabel")}</#if></label>     <div class="${properties.kcInputGroup!}">         <input tabindex="3" id="userattribute" class="${properties.kcInputClass!}" name="userattribute" type="password" autocomplete="current-user-attribute"             aria-invalid="<#if messagesPerField.existsError('username','password','user_attribute')>true</#if>"         />         <button class="${properties.kcFormPasswordVisibilityButtonClass!}" type="button" aria-label="${msg("showUserAttribute")}"             aria-c data-password-toggle tabindex="4"             data-icon-show="${properties.kcFormPasswordVisibilityIconShow!}" data-icon-hide="${properties.kcFormPasswordVisibilityIconHide!}"             data-label-show="${msg('showUserAttribute')}" data-label-hide="${msg('hideUserAttribute')}">             <i class="${properties.kcFormPasswordVisibilityIconShow!}" aria-hidden="true"></i>         </button>     </div>     <#if usernameHidden?? && messagesPerField.existsError('username','password', 'user_attribute')>     <span id="input-error" class="${properties.kcInputErrorMessageClass!}" aria-live="polite">         ${kcSanitize(messagesPerField.getFirstError('username','password'))?no_esc}     </span>     </#if> </div> <!-- attribute input block end-->
<div class="${properties.kcFormGroupClass!} ${properties.kcFormSettingClass!}">     <div id="kc-form-options">         <#if realm.rememberMe && !usernameHidden??>             <div class="checkbox">
Testing & development
Build the project
$ mvn packageRun Keycloak with authenticator in docker compose
After building a project, do following to start Keycloak with bundled authenticator jar and dummy configuration (dev-realm.json).
$ docker compose uptest, Password = test and Favorite number = 46 to login.


