
Access any internal service from your browser. No VPN, no client, one command. Shield CLI is a browser-first internal service gateway — SSH terminals, remote desktops, database admin, web apps — all accessible through any browser with a single command.

Shield CLI
Access any internal service from your browser. No VPN, no client, one command.
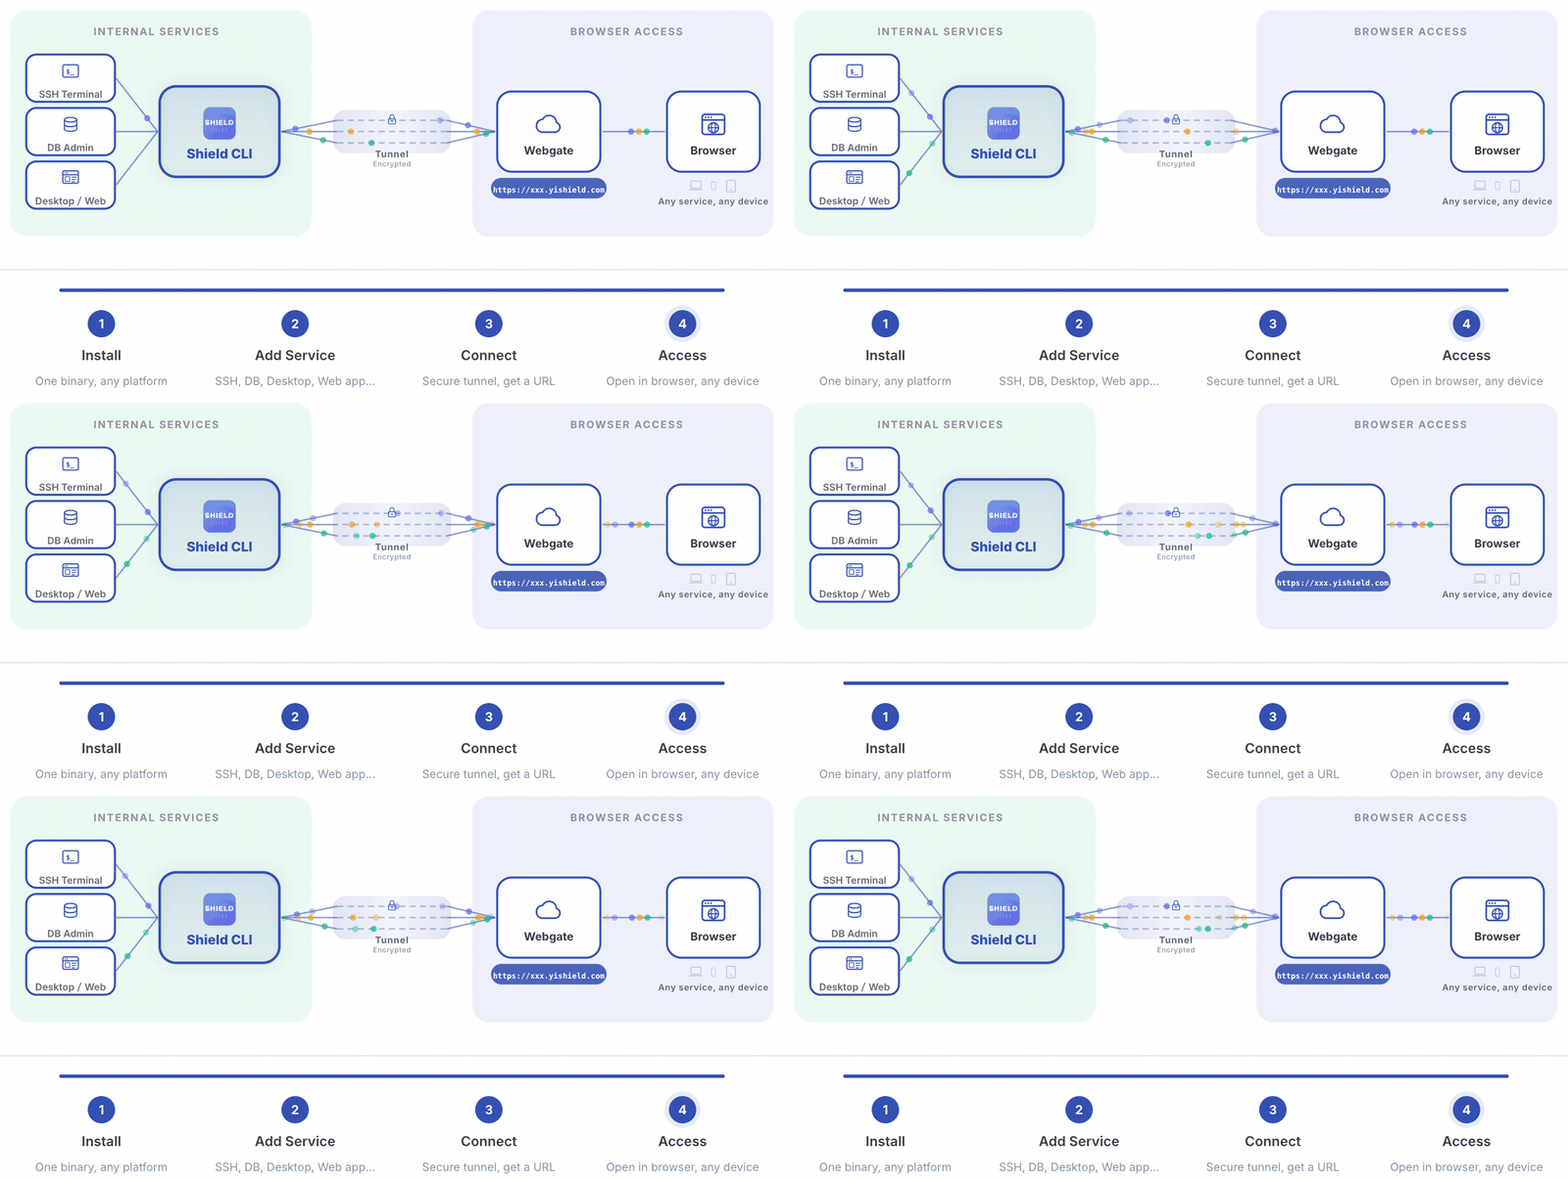
Shield CLI is a browser-first internal service gateway — SSH terminals, remote desktops, database admin, web apps — all accessible through any browser with a single command.
Documentation • Installation • Quick Start • 中文文档



How It Works
Demo
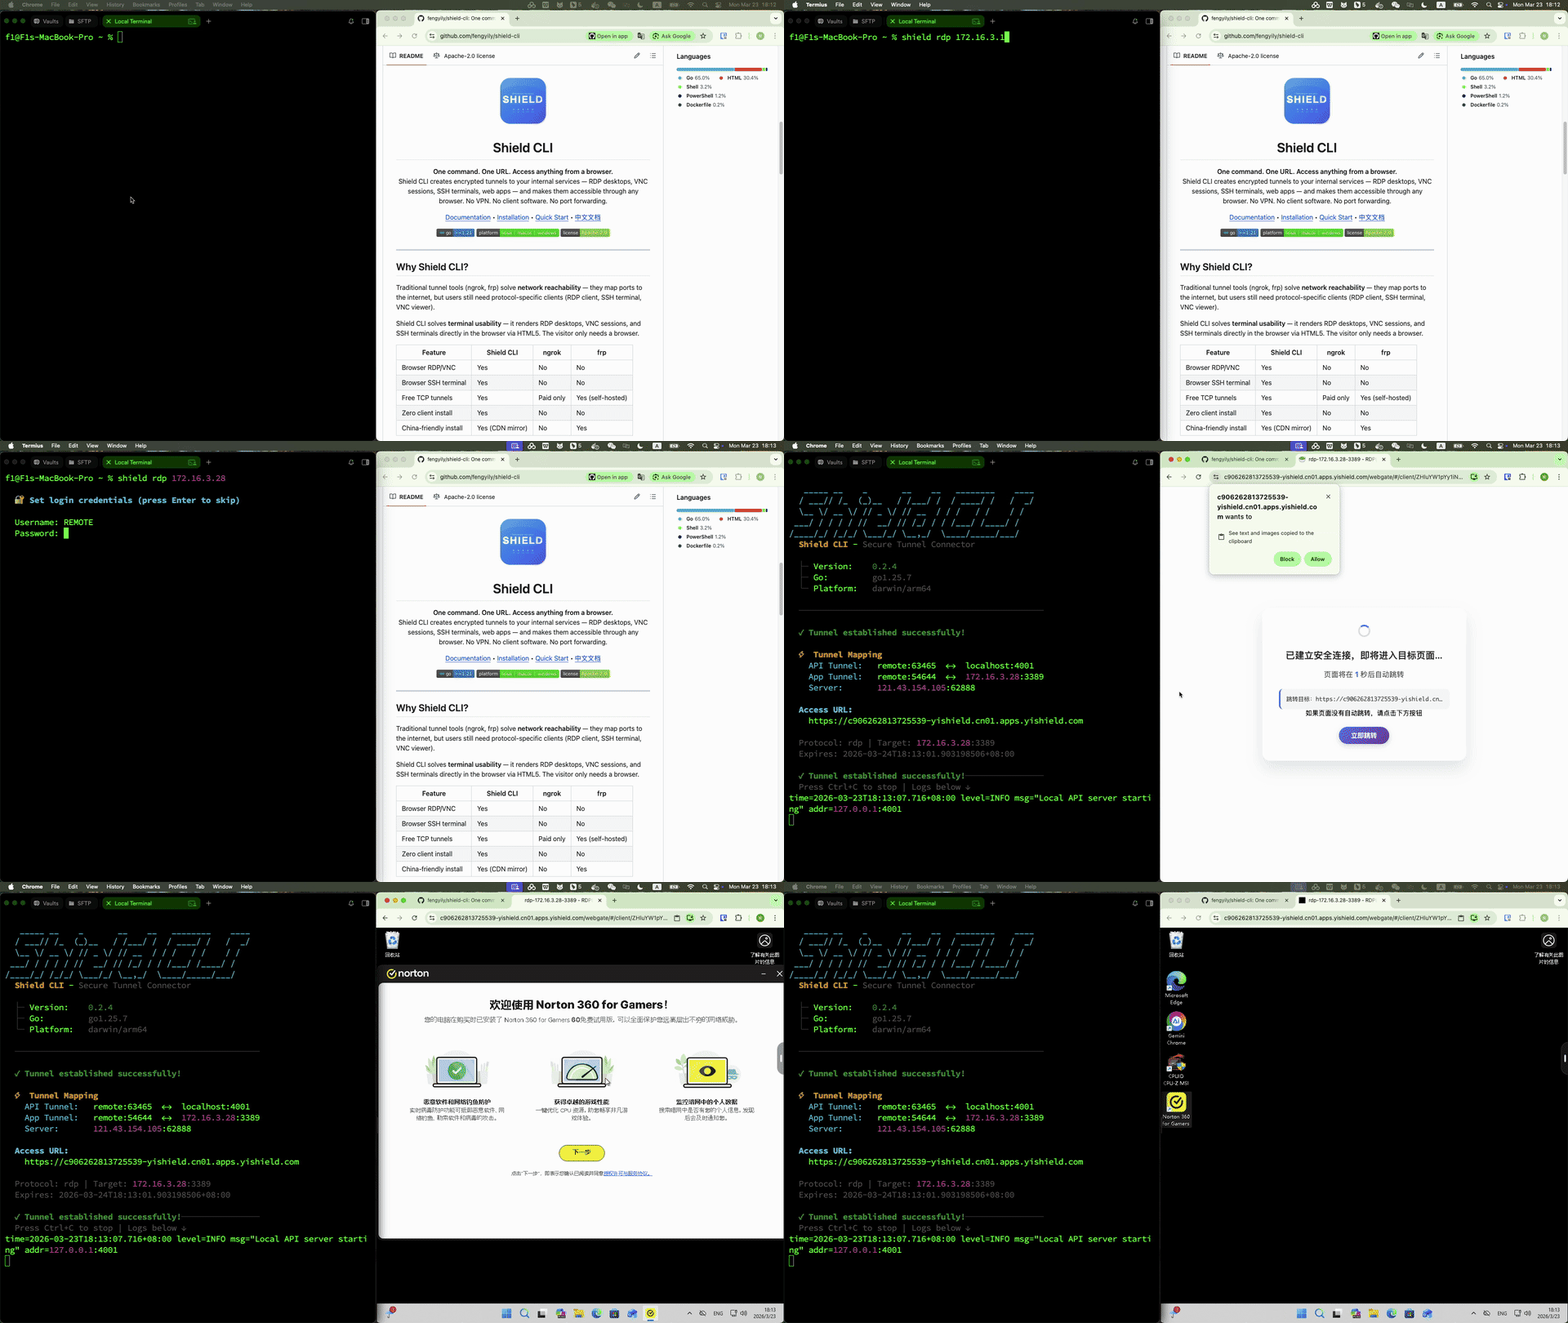
RDP — Browser Remote Desktop
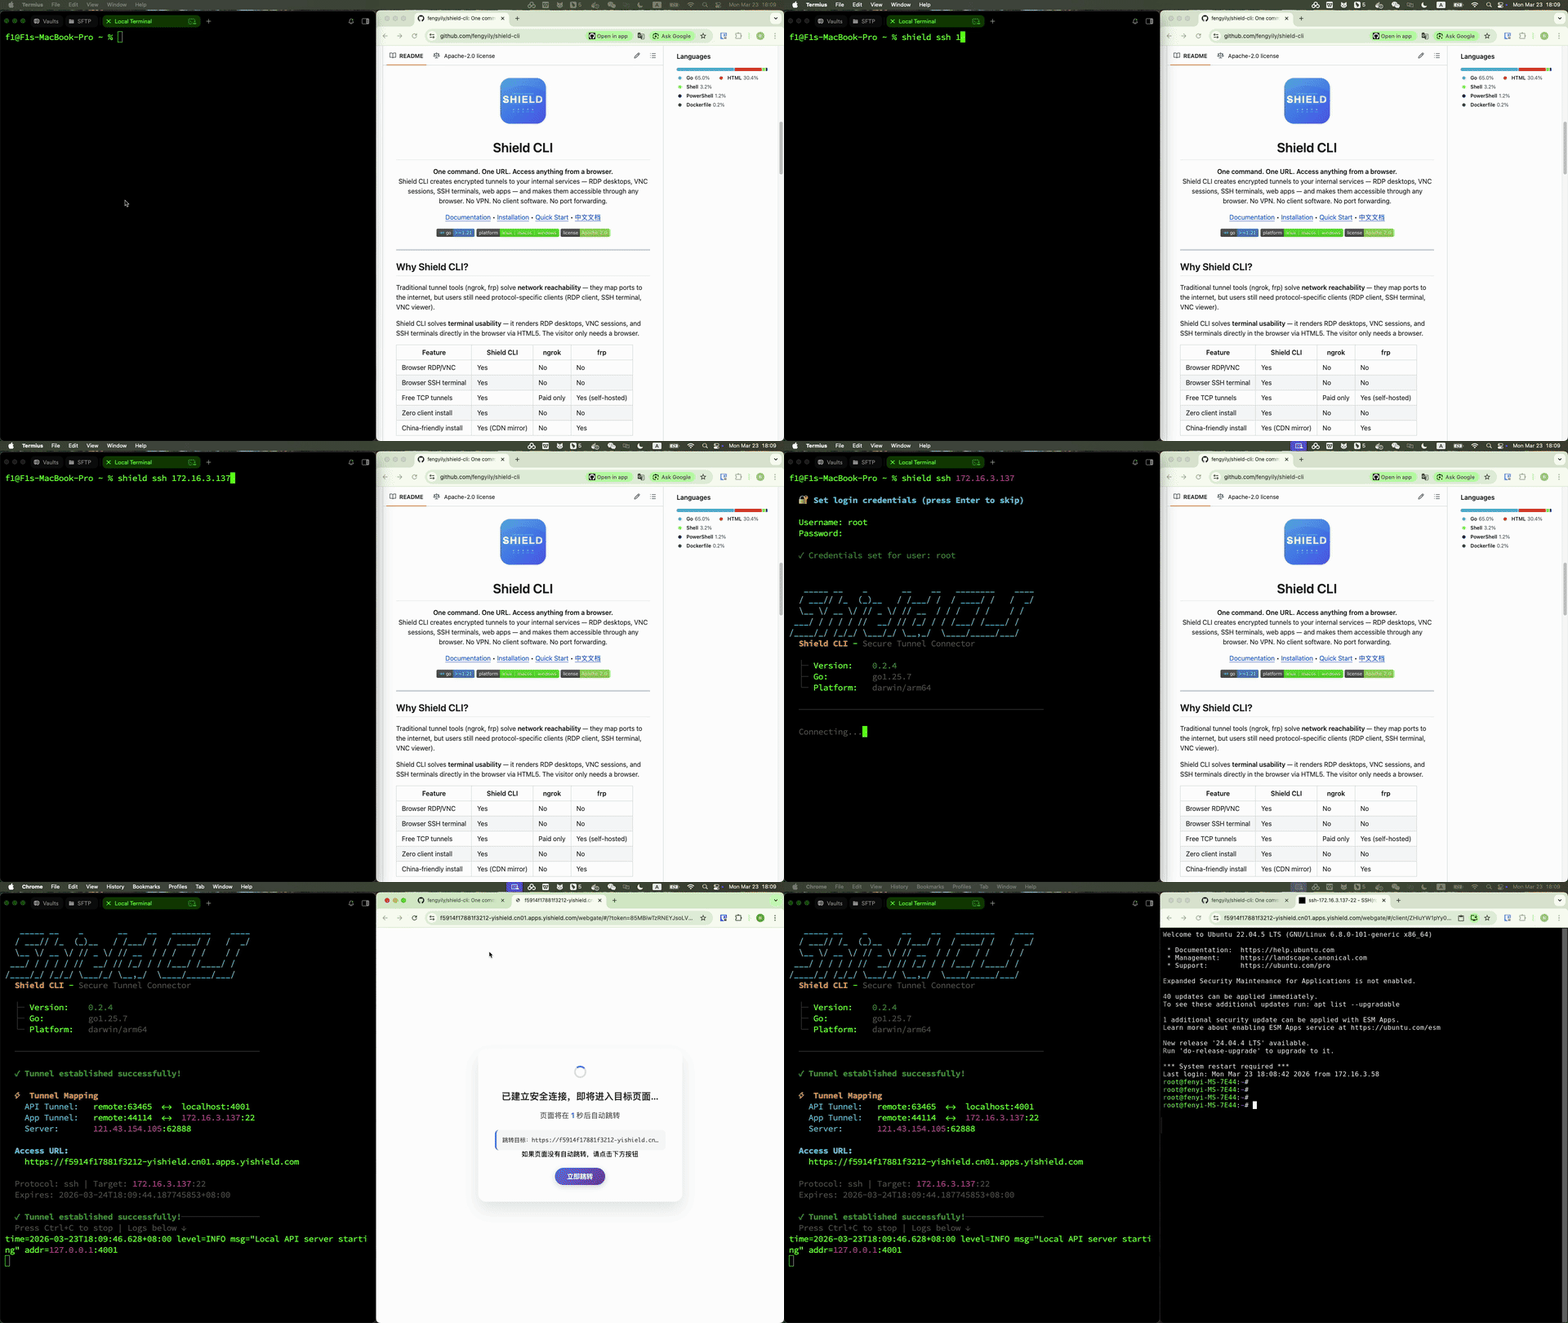
SSH — Browser Terminal
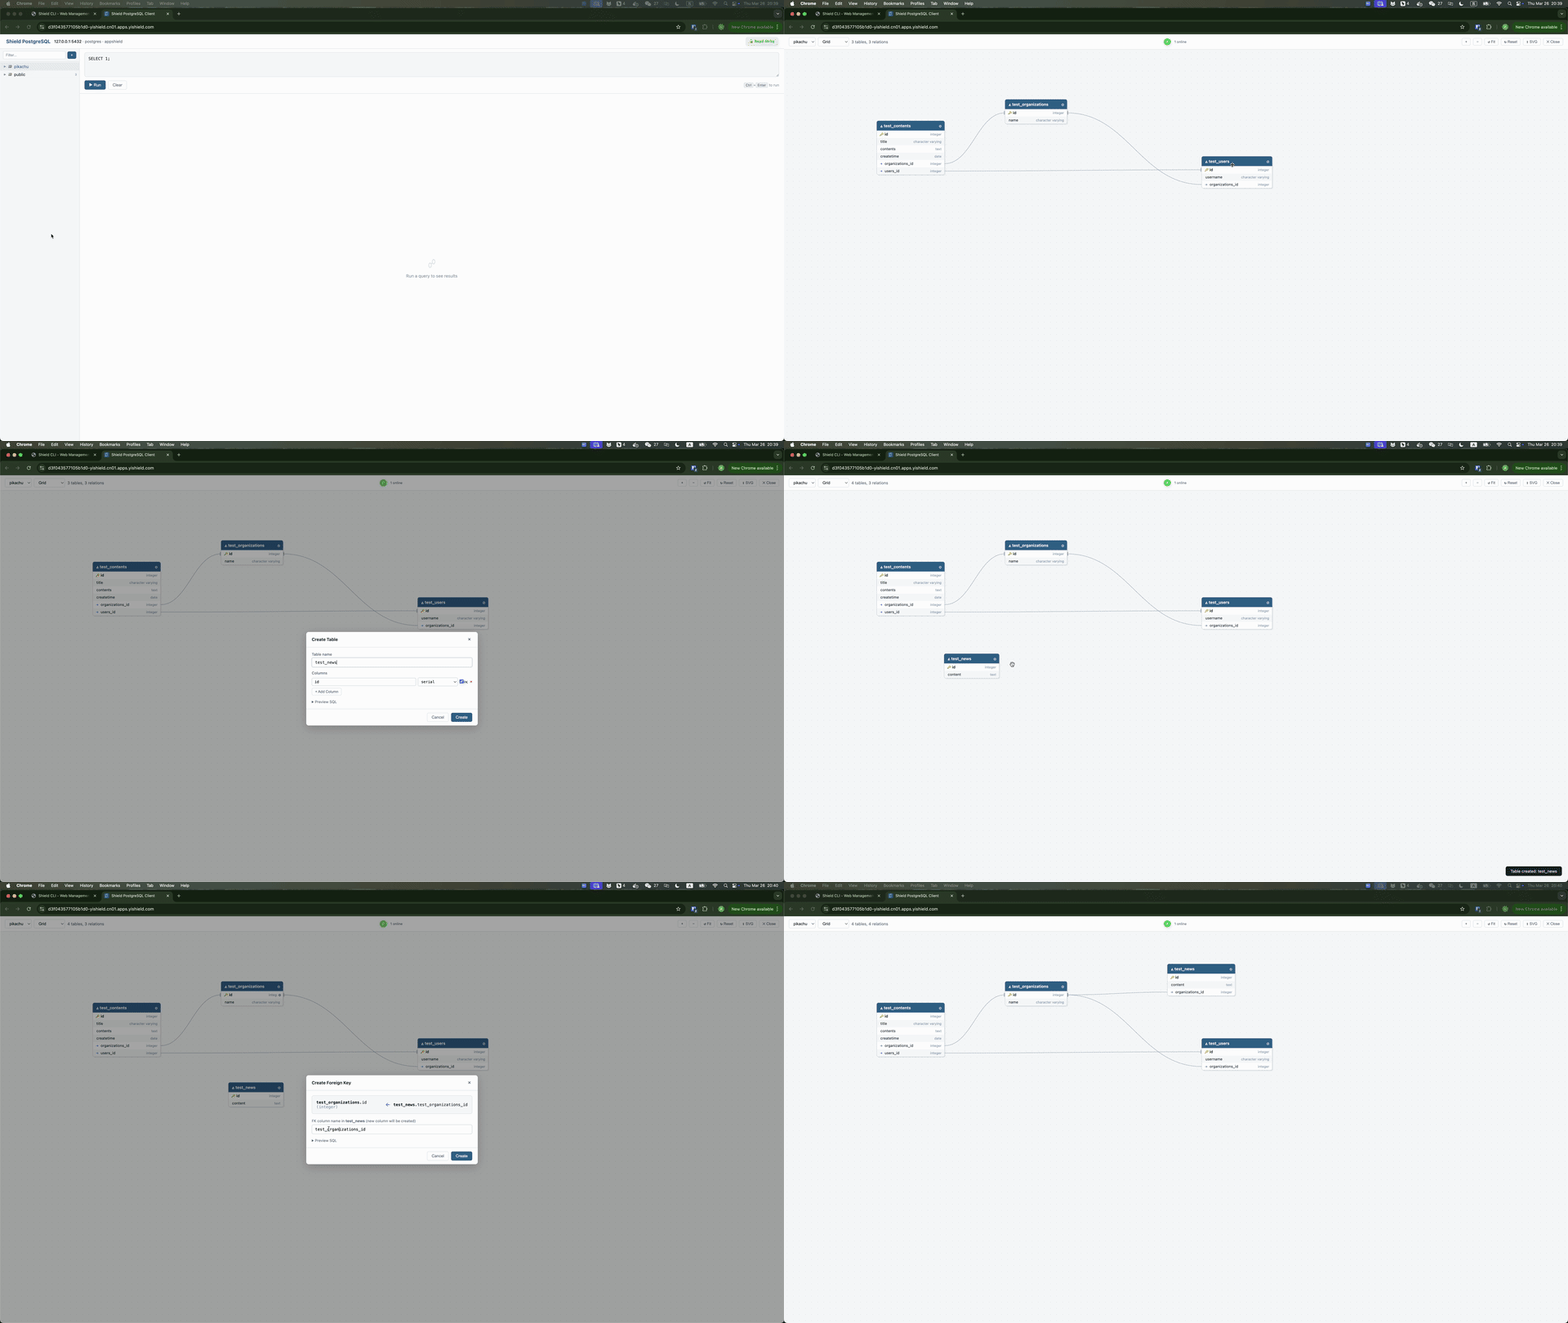
Postgres — Browser Terminal
Why Shield CLI?
Traditional tools solve network reachability (ngrok, frp) or access control (Teleport, Boundary) — but they still require protocol-specific clients or complex setup.
Shield CLI is a unified browser gateway for all your internal services. One binary, one command — SSH terminals, remote desktops, database admin, web apps — all rendered in the browser via HTML5.
| Capability | Shield CLI | ngrok/frp | Teleport/Boundary | |-----------|-----------|-----------|-------------------| | Browser RDP/VNC/SSH | Yes | No | Partial | | Database Web Admin | Yes (plugins) | No | No | | Zero client install | Yes | No | No | | Single binary deploy | Yes | Yes | No | | Plugin extensibility | Yes | No | No |
Installation
# macOS
brew tap fengyily/tap && brew install shield-cli
Windows (one-click installer — download and double-click)
https://raw.githubusercontent.com/fengyily/shield-cli/main/install.bat
Or via Scoop:
scoop bucket add shield https://github.com/fengyily/scoop-bucket && scoop install shield-cli
Linux (apt) — Debian / Ubuntu
curl -fsSL https://raw.githubusercontent.com/fengyily/shield-cli/main/scripts/setup-repo.sh | sudo bash
Linux (yum) — RHEL / CentOS / Fedora
curl -fsSL https://raw.githubusercontent.com/fengyily/shield-cli/main/scripts/setup-repo.sh | sudo bash
Linux / macOS (one-liner binary)
curl -fsSL https://raw.githubusercontent.com/fengyily/shield-cli/main/install.sh | sh
China mirror (jsDelivr CDN)
curl -fsSL https://cdn.jsdelivr.net/gh/fengyily/shield-cli@main/install.sh | sh
Docker
# Use the prebuilt image (recommended)
docker run -d --name shield \
  --network host \
  --restart unless-stopped \
  fengyily/shield-cli
Or build from source
docker build -t shield-cli .
docker run -d --name shield --network host --restart unless-stopped shield-cliNote:>--network hostshares the host's network stack, allowing Shield CLI to reach local and LAN services (e.g.,10.0.0.x,192.168.x.x). Openhttp://localhost:8181to access the Web UI.
Caveat: --network host only works on Linux. On macOS/Windows Docker Desktop, use port mapping instead:
>
>> docker run -d --name shield -p 8181:8181 --restart unless-stopped fengyily/shield-cli
More installation methods (apt, yum, deb, rpm, PowerShell, source build): Installation Guide
Quick Start
Web UI (Recommended)
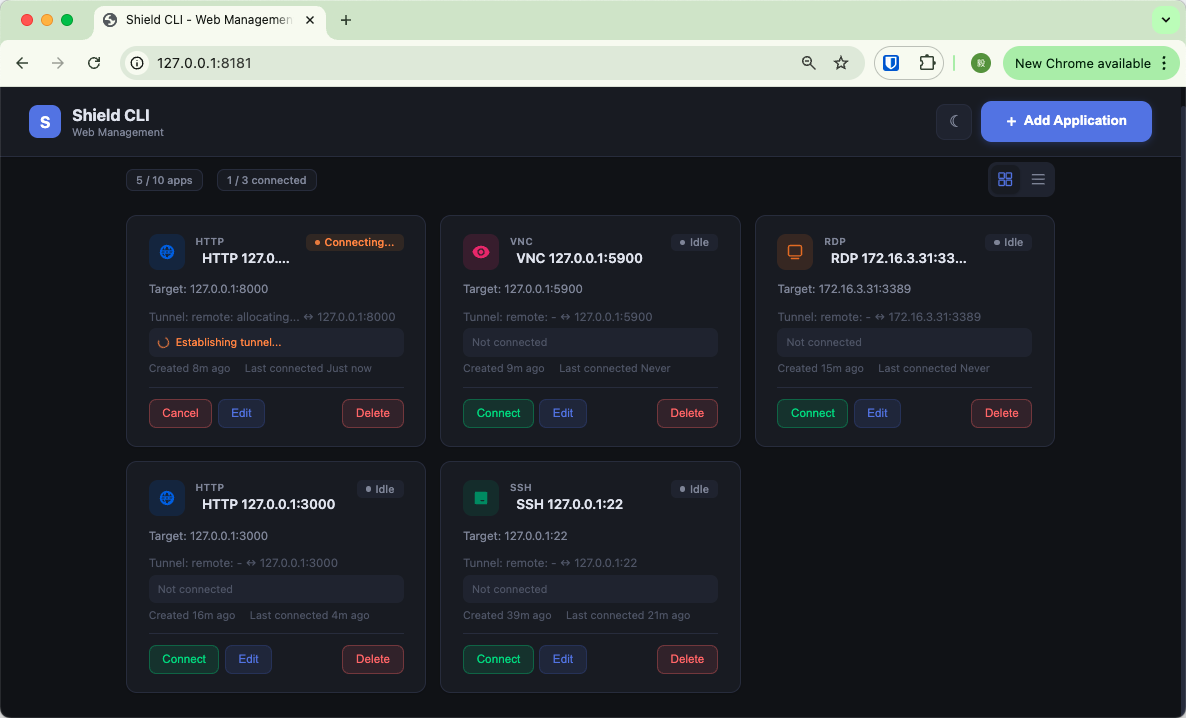
shield startOpen http://localhost:8181, add your services, and connect with one click. On macOS and Windows, a system tray icon provides quick access to the Dashboard.
System Service (Auto-Start on Boot)
shield install              # Install as system service (port 8181)
shield install --port 8182  # Use custom port if 8181 is occupied
shield start                # Start the service (if stopped)
shield stop                 # Stop the service
shield uninstall            # Remove the service
After shield install, the service starts automatically and will restart on boot. If the service is stopped, use shield start to restart it — no need to reinstall.
Supports macOS (launchd), Linux (systemd), and Windows. See System Service Guide for details.
Command Line
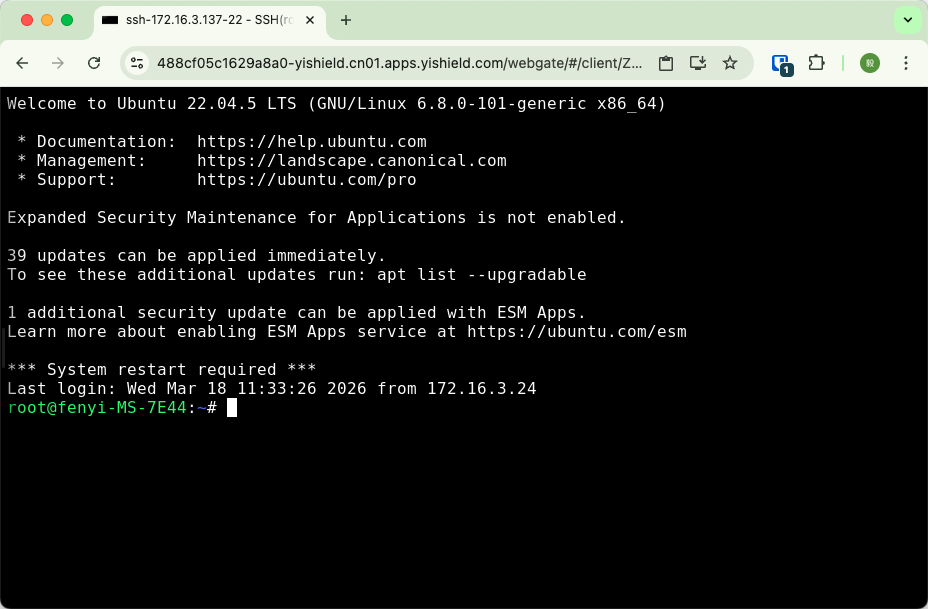
shield ssh              # SSH terminal in browser (127.0.0.1:22)
shield rdp 10.0.0.5     # Windows desktop in browser
shield mysql 10.0.0.20  # Database admin in browser (plugin)
shield http 3000        # Expose local web app
shield vnc 10.0.0.10    # VNC screen sharing in browser
shield tcp 3306         # TCP port proxy
shield udp 53           # UDP port proxy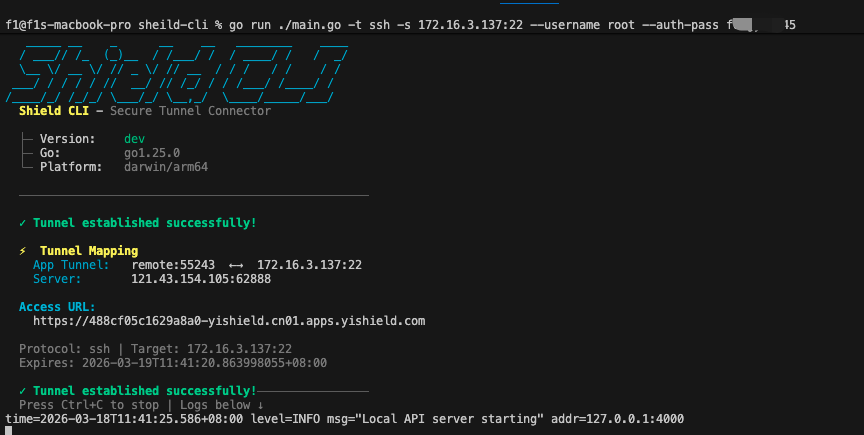
Smart Defaults
| Command | Resolves To | |---------|-------------| | shield ssh | 127.0.0.1:22 | | shield ssh 2222 | 127.0.0.1:2222 | | shield ssh 10.0.0.2 | 10.0.0.2:22 | | shield rdp | 127.0.0.1:3389 | | shield http 3000 | 127.0.0.1:3000 | | shield tcp 3306 | 127.0.0.1:3306 | | shield udp 53 | 127.0.0.1:53 |
Protocols: ssh, rdp, vnc, http, https, telnet, tcp, udp — Full Commands Reference
Security
- AES-256-GCM encryption — credentials encrypted with machine fingerprint-derived keys
- Password masking — all passwords hidden in logs
- WebSocket transport — authenticated encrypted tunnels
- 0600 permissions — credential files readable only by owner
Documentation
Full documentation is available at docs.yishield.com:
- What is Shield CLI — overview and key features
- Installation — all installation methods
- Quick Start — 5-minute tutorial
- Protocol Guides — SSH, RDP, VNC, HTTP, Telnet
- Plugin System — MySQL and more
- Commands Reference — full parameter guide
- FAQ — frequently asked questions
- Troubleshooting — common errors and fixes
AI Tools Integration
Shield CLI provides an MCP Server so that AI coding tools can look up installation, usage, protocol, and plugin information.
Claude Code:
claude mcp add shield-cli -- npx -y shield-cli-mcpCursor / Windsurf / Trae:
Add to MCP settings:
{
  "mcpServers": {
    "shield-cli": {
      "command": "npx",
      "args": ["-y", "shield-cli-mcp"]
    }
  }
}
Trae: Click the AI sidebar → Settings icon → MCP → Add MCP Server, then paste the JSON above.

License
Apache 2.0


