
Tools for generating Kubernetes related manifests.
jbang ./scripts/ChangeVersion.java readme.md io.dekorate 4.0.1
Features
- Generates manifest via annotation processing
- Customize manifests using annotations
- Build tool independent (works with maven, gradle, bazel and so on)
- Rich framework integration
- Configuration externalization for known frameworks (annotationless)
- Integration with external generators
- Rich set of examples
- Explicit configuration of annotation processors
- junit5 integration testing extension
Experimental features
- Register hooks for triggering builds and deployment
Rationale
There are tons of tools out there for scaffolding / generating kubernetes manifests. Sooner or later these manifests will require customization. Handcrafting is not an appealing option. Using external tools, is often too generic. Using build tool extensions and adding configuration via xml, groovy etc is a step forward, but still not optimal.
Annotation processing has quite a few advantages over external tools or build tool extensions:
- Configuration is validated by the compiler.
- Leverages tools like the IDE for writing type safe config (checking, completion etc).
- Works with all build tools.
- Can "react" to annotations provided by the framework.
Hello World
This section provides examples on how to get started based on the framework you are using.
NOTE: All examples in README using the version that corresponds to the target branch.
On github master that is the latest 2.x release.
Hello Spring Boot
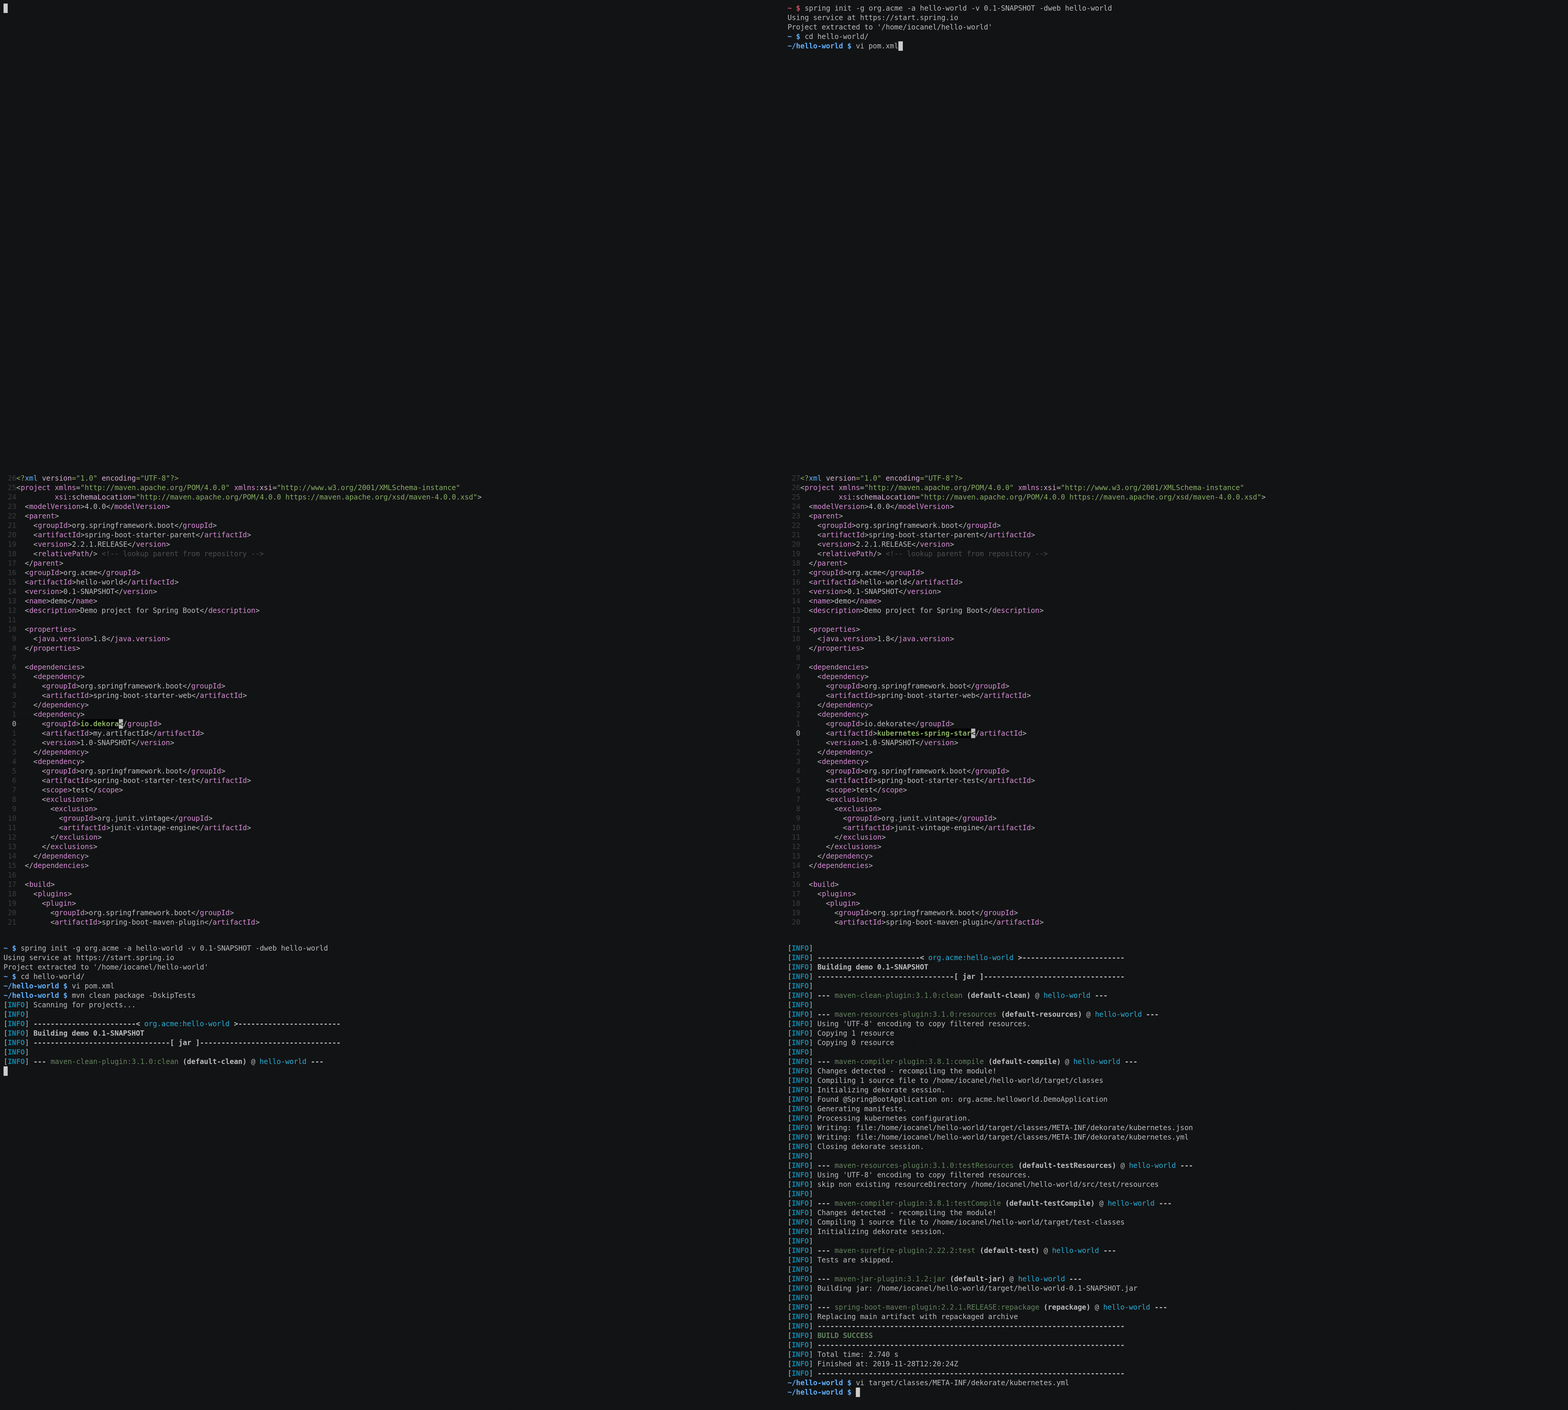
Add the following dependency to your project:
<dependency>
  <groupId>io.dekorate</groupId>
  <artifactId>kubernetes-spring-starter</artifactId>
  <version>4.1.5</version>
</dependency>
That's all! Next time you perform a build, using something like:
mvn clean package The generated manifests can be found under target/classes/META-INF/dekorate.
related examples
- spring boot on kubernetes example - spring boot on openshift exampleHello Quarkus
Add the following dependency to your project:
<dependency>
  <groupId>io.quarkus</groupId>
  <artifactId>quarkus-kubernetes</artifactId>
  <version>1.0.0.Final</version>
</dependency>
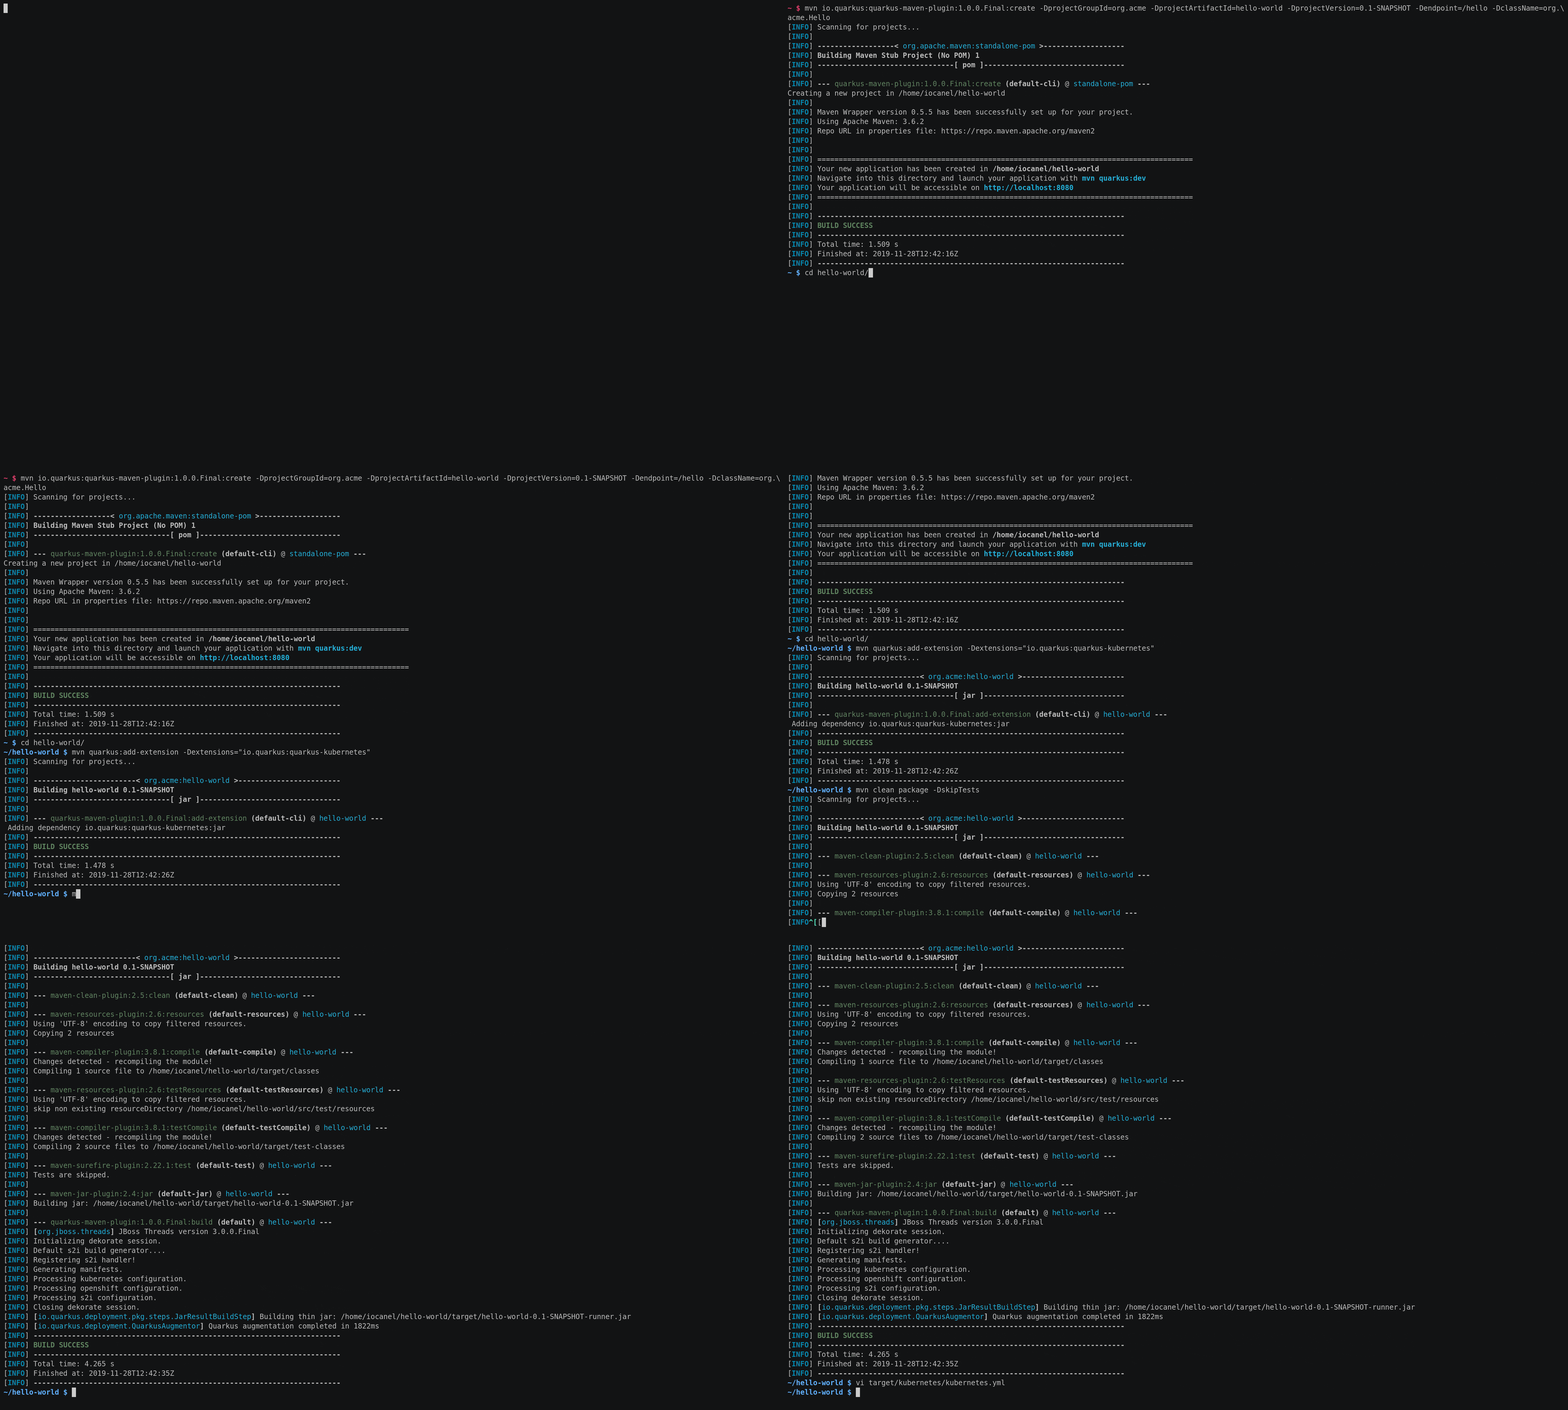
That's all! Next time you perform a build, using something like:
mvn clean package The generated manifests can be found under target/kubernetes. Note: Quarkus is using its own dekorate based Kubernetes extension (see more at Quarkus).
Hello Thorntail
Add the following dependency to your project:
<dependency>
  <groupId>io.dekorate</groupId>
  <artifactId>thorntail-spring-starter</artifactId>
  <version>4.1.5</version>
</dependency>
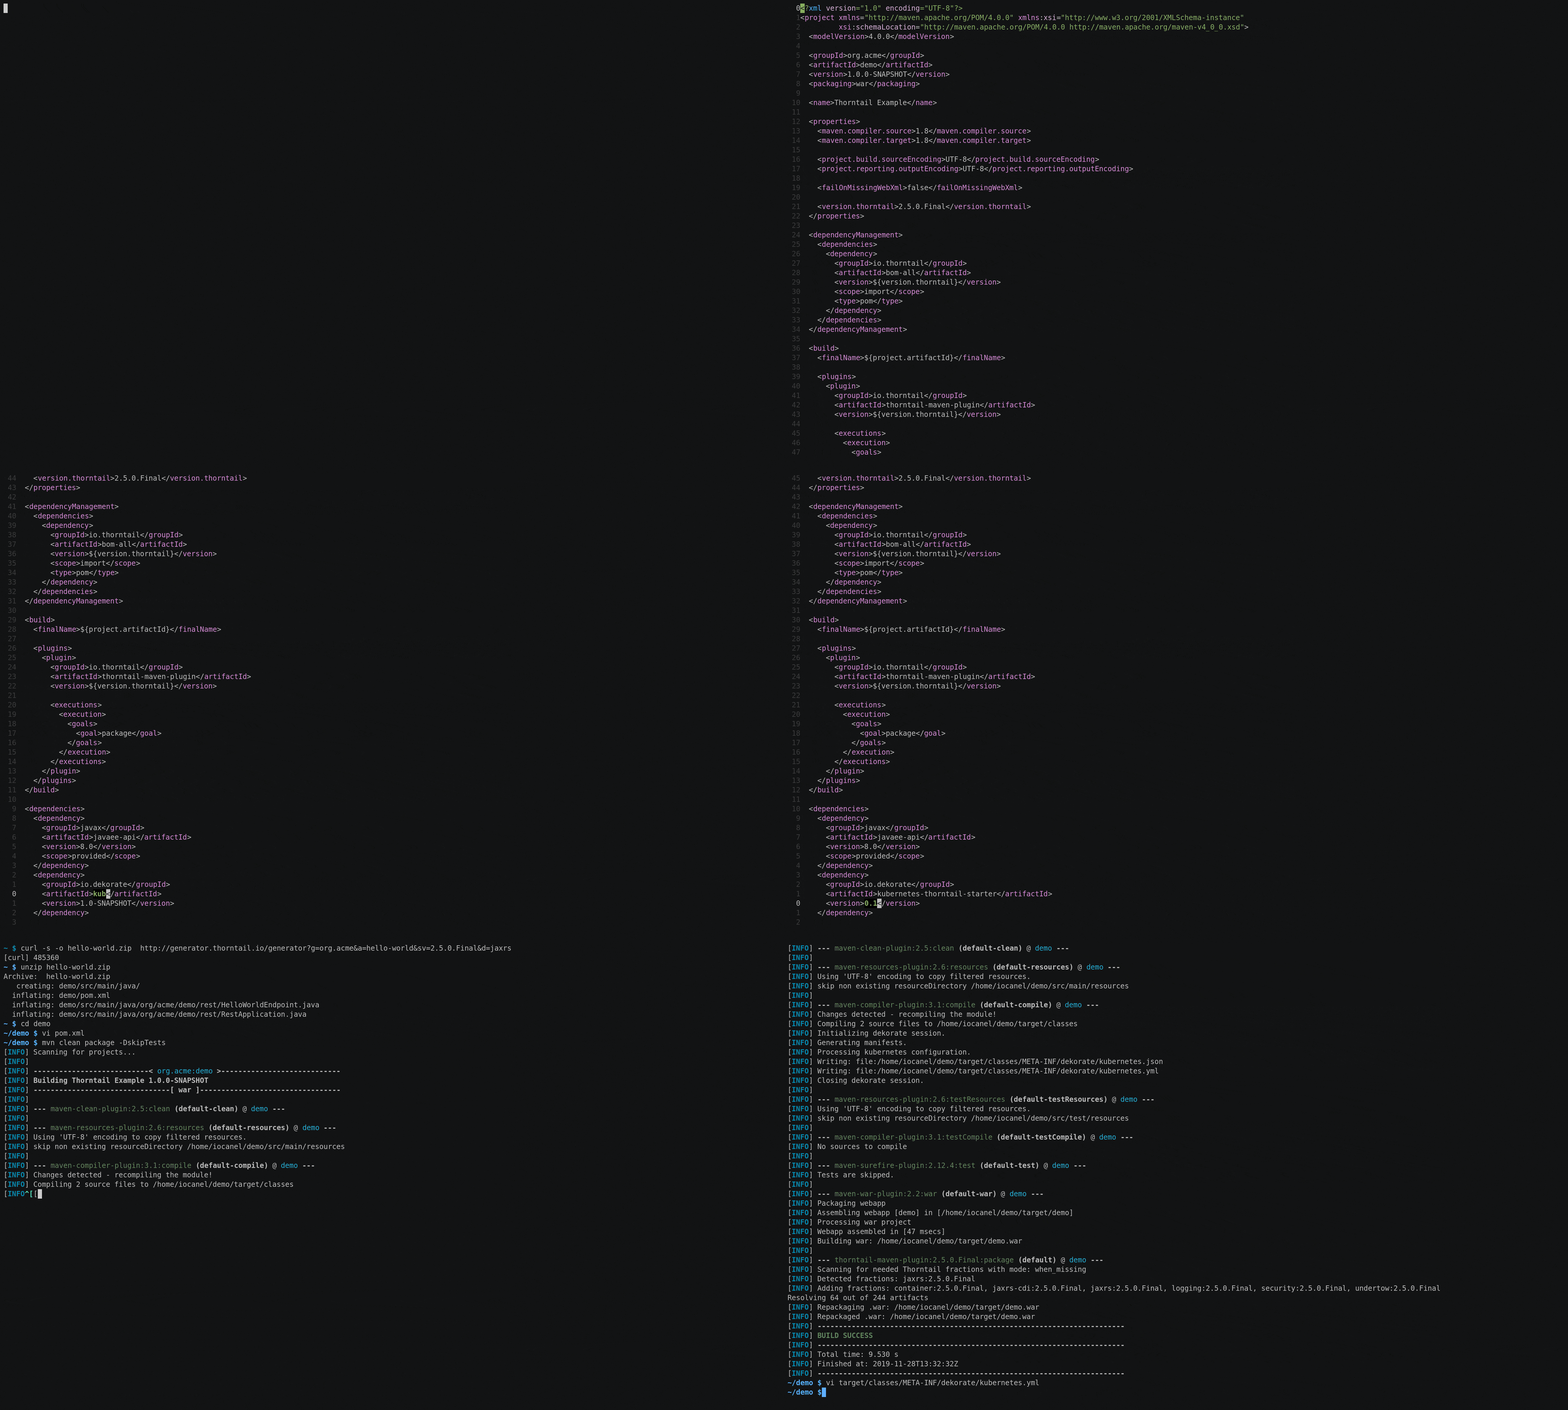
That's all! Next time you perform a build, using something like:
mvn clean package The generated manifests can be found under target/classes/META-INF/dekorate.
related examples
- thorntail on kubernetes example - thorntail on openshift exampleHello Generic Java Application
Add the following dependency to your project:
<dependency>
  <groupId>io.dekorate</groupId>
  <artifactId>kubernetes-annotations</artifactId>
  <version>4.1.5</version>
</dependency>
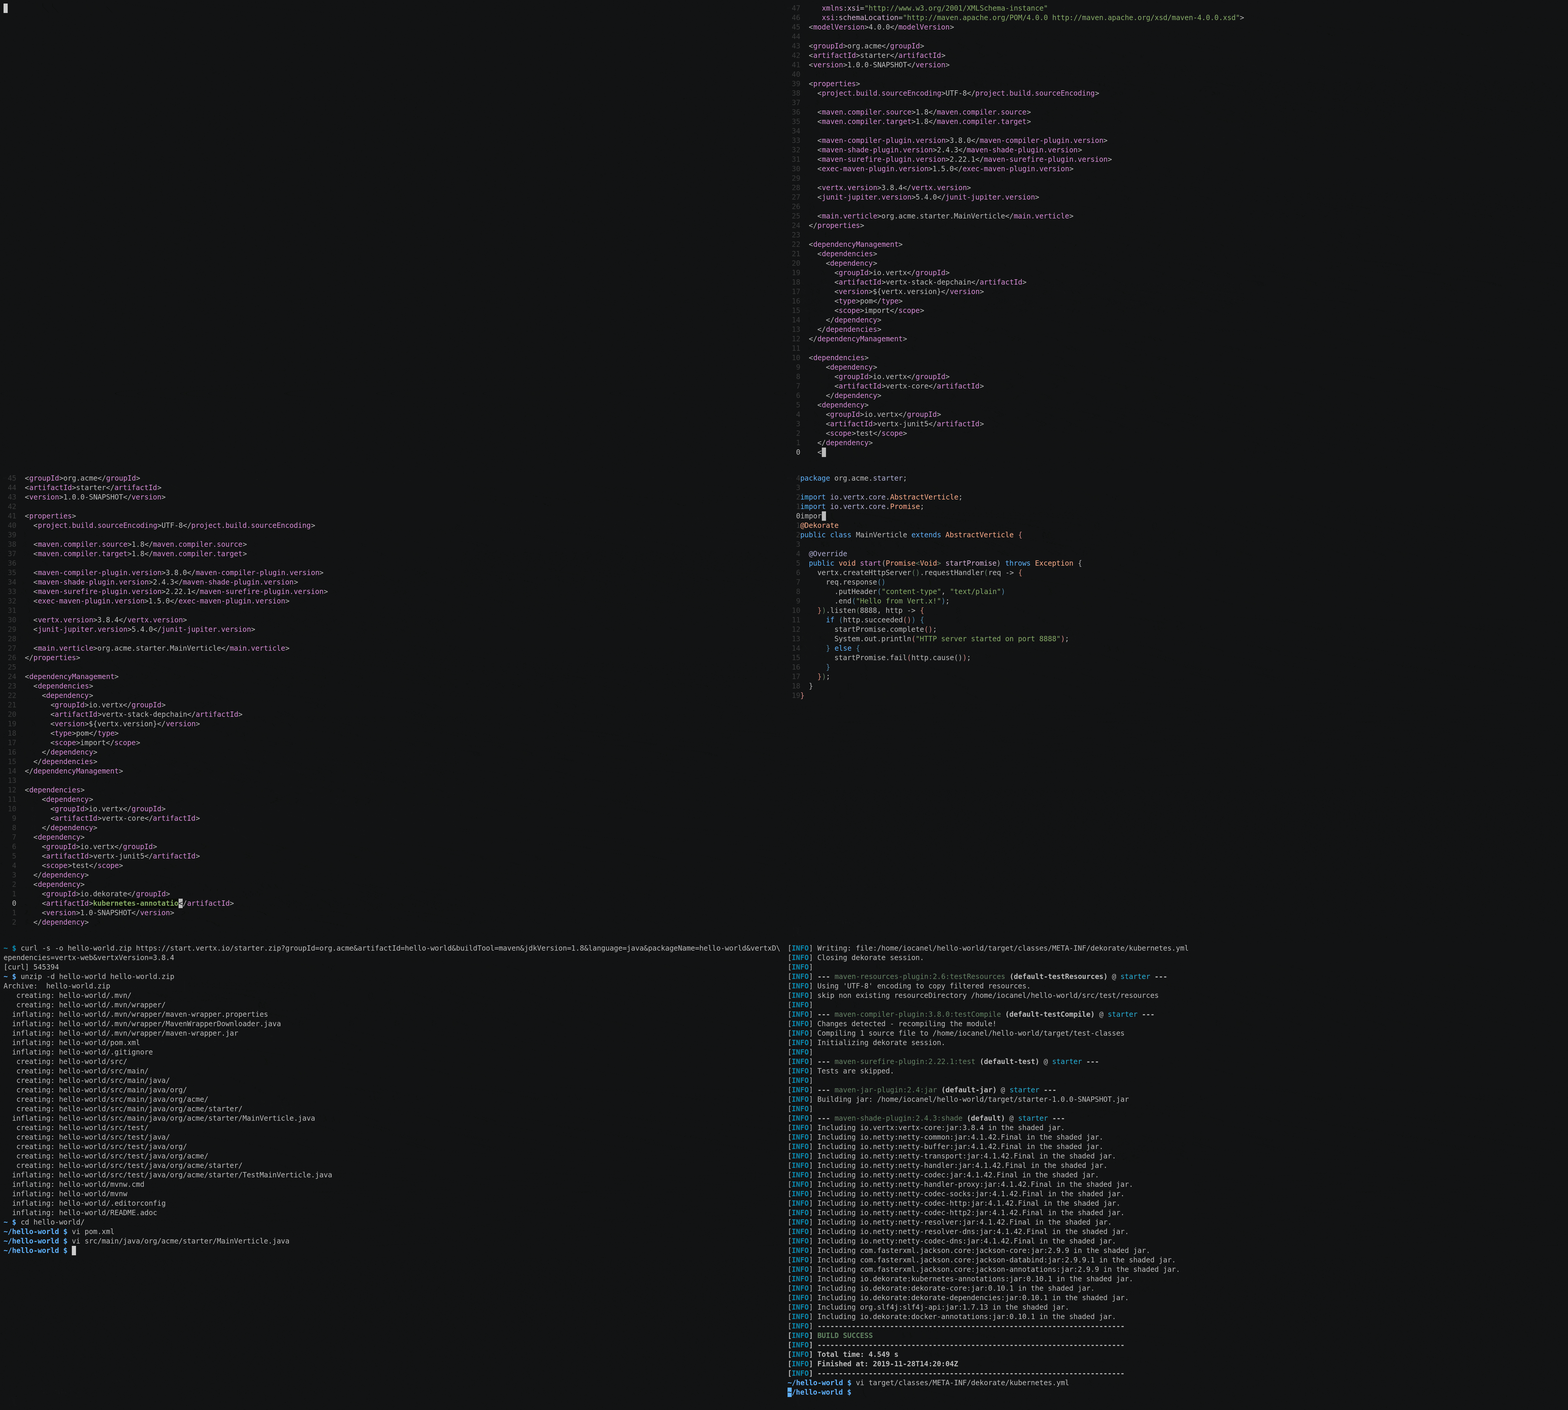
Then add the @Dekorate annotation to one of your Java source files.
package org.acme;
import io.dekorate.annotation.Dekorate;
@Dekorate public class Application { }
Note: It doesn't have to be the Main class. Next time you perform a build, using something like:
mvn clean package The generated manifests can be found under target/classes/META-INF/dekorate.
related examples
- vertx on kubernetes example - vertx on openshift exampleUsage
To start using this project you just need to add one of the provided dependencies to your project. For known frameworks like spring boot, quarkus, or thorntail that's enough. For generic java projects, we also need to add an annotation that expresses our intent to enable dekorate.
This annotation can be either @Dekorate or a more specialized one, which also gives us access to more specific configuration options. Further configuration is feasible using:
- Java annotations
- Configuration properties (application.properties)
- Both
Kubernetes
@KubernetesApplication is a more specialized form of @Dekorate. It can be added to your project like:
import io.dekorate.kubernetes.annotation.KubernetesApplication;
@KubernetesApplication public class Main {
public static void main(String[] args) {       //Your application code goes here.     } }
When the project gets compiled, the annotation will trigger the generation of a Deployment in both json and yml that will end up under 'target/classes/META-INF/dekorate'.
The annotation comes with a lot of parameters, which can be used in order to customize the Deployment and/or trigger the generations of addition resources, like Service and Ingress.
Adding the kubernetes annotation processor to the classpath
This module can be added to the project using:
<dependency>
  <groupId>io.dekorate</groupId>
  <artifactId>kubernetes-annotations</artifactId>
  <version>4.1.5</version>
</dependency>
Name and Version
So where did the generated Deployment gets its name, docker image etc from?
Everything can be customized via annotation parameters, application configuration and system properties. On top of that, lightweight integration with build tools is provided in order to reduce duplication.
Note, that part-of, name and version are part of multiple annotations / configuration groups etc.
When a single application configuration is found and no explict image configuration value has been used for (group, name & version), values from the application configuration will be used.
For example:
@KubernetesApplication(name="my-app")
@DockerBuild(registry="quay.io")
public class Main {
}
In the example above, docker is configured with no explicit value on name. In this case that name from @KubernetesApplication(name="my-app") will be used.
The same applies when property configuration is used:
io.dekorate.kubernetes.name=my-app
io.dekorate.docker.registry=quay.io
Note: Application configuration part-of corresponds to image configuration group.
Lightweight build tool integration
Lightweight integration with build tools, refers to reading information from the build tool config without bringing in the build tool itself into the classpath. The information read from the build tool is limited to:
- name / artifactId
- version
- output file
Supported build tools:
- maven
- gradle
- sbt
- bazel
application.properties:
dekorate.kubernetes.name=my-app dekorate.kubernetes.version=1.1.0.Final
or the core annotations:
@KubernetesApplication(name = "my-app", version="1.1.0.Final")
public class Main {
}@OpenshiftApplication(name = "my-app", version="1.1.0.Final")
public class Main {
}The information read from the build tool, is added to all resources as labels (name, version). They are also used to name images, containers, deployments, services etc.
For example for a gradle app, with the following gradle.properties:
name = my-gradle-app version = 1.0.0The following deployment will be generated:
apiVersion: "apps/v1" kind: "Deployment" metadata: name: "kubernetes-example" spec: replicas: 1 selector: matchLabels: app.kubernetes.io/name: "my-gradle-app" app.kubernetes.io/version: "1.0-SNAPSHOT" template: metadata: labels: app.kubernetes.io/name: "my-gradle-app" app.kubernetes.io/version: "1.0-SNAPSHOT" spec: containers: - env: - name: "KUBERNETES_NAMESPACE" valueFrom: fieldRef: fieldPath: "metadata.namespace" image: "default/my-gradle-app:1.0-SNAPSHOT" imagePullPolicy: "IfNotPresent" name: "my-gradle-app"JAVAAPPJAR an environment variable that points to the build jar.
Adding extra ports and exposing them as services
To add extra ports to the container, you can add one or more @Port into your @KubernetesApplication:
import io.dekorate.kubernetes.annotation.Port;
import io.dekorate.kubernetes.annotation.KubernetesApplication;
@KubernetesApplication(ports = @Port(name = "web", containerPort = 8080)) public class Main {
public static void main(String[] args) {     //Your code goes here   } }
This will trigger the addition of a container port to the Deployment but also will trigger the generation of a Service resource.
Everything that can be defined using annotations, can also be defined using application.properties. To add a port using application.properties:
dekorate.kubernetes.ports[0].name=web dekorate.kubernetes.ports[0].container-port=8080 NOTE: This doesn't need to be done explicitly, if the application framework is detected and support, ports can be extracted from there (see below).
IMPORTANT: When mixing annotations and application.properties the latter will always take precedence overriding values that defined using annotations. This allows users to define the configuration using annotations and externalize configuration to application.properties.
REMINDER: A complete reference on all the supported properties can be found in the configuration options guide.
Adding container environment variables
To add extra environment variables to the container, you can add one or more@EnvVar into your @KubernetesApplication :
import io.dekorate.kubernetes.annotation.Env;
import io.dekorate.kubernetes.annotation.KubernetesApplication;
@KubernetesApplication(envVars = @Env(name = "key1", value = "var1")) public class Main {
public static void main(String[] args) {     //Your code goes here   } }
Additional options are provided for adding environment variables from fields, config maps and secrets.
To add environment variables using application.properties:
dekorate.kubernetes.env-vars[0].name=key1 dekorate.kubernetes.env-vars[0].value=value1
Adding environment variables from ConfigMap
To add an environment variable that points to a ConfigMap property, you need to specify the configmap using the configmap property in the @Env annotation. The configmap key will be specified by the value property. So, in this case value has the meaning of value from key.
import io.dekorate.kubernetes.annotation.Env;
import io.dekorate.kubernetes.annotation.KubernetesApplication;
@KubernetesApplication(envVars = @Env(name = "key1", c, value = "key1")) public class Main {
public static void main(String[] args) {     //Your code goes here   } }
To add an environment variable referencing a config map using application.properties:
dekorate.kubernetes.env-vars[0].name=key1 dekorate.kubernetes.env-vars[0].value=key1 dekorate.kubernetes.env-vars[0].config-map=my-config
Adding environment variables from Secrets
To add an environment variable that points to a Secret property, you need to specify the configmap using the secret property in the @Env annotation. The secret key will be specified by the value property. So, in this case value has the meaning of value from key.
import io.dekorate.kubernetes.annotation.Env;
import io.dekorate.kubernetes.annotation.KubernetesApplication;
@KubernetesApplication(envVars = @Env(name = "key1", secret="my-secret", value = "key1")) public class Main {
public static void main(String[] args) {     //Your code goes here   } }
To add an environment variable referencing a secret using application.properties:
dekorate.kubernetes.env-vars[0].name=key1 dekorate.kubernetes.env-vars[0].value=key1 dekorate.kubernetes.env-vars[0].secret=my-config
Working with volumes and mounts
To define volumes and mounts for your application, you can use something like:
import io.dekorate.kubernetes.annotation.Mount; import io.dekorate.kubernetes.annotation.PersistentVolumeClaimVolume; import io.dekorate.kubernetes.annotation.KubernetesApplication;
@KubernetesApplication(pvcVolumes = @PersistentVolumeClaimVolume(volumeName = "mysql-volume", claimName = "mysql-pvc"),   mounts = @Mount(name = "mysql-volume", path = "/var/lib/mysql") ) public class Main {
public static void main(String[] args) {     //Your code goes here   } }
To define the same volume and mount via application.properties:
dekorate.kubernetes.pvc-volumes[0].volume-name=mysql-volume dekorate.kubernetes.pvc-volumes[0].claim-name=mysql-pvc dekorate.kubernetes.mounts[0].name=mysql-volume dekorate.kubernetes.mounts[0].path=/var/lib/mysql Currently, the supported annotations for specifying volumes are:
- @PersistentVolumeClaimVolume
- @SecretVolume
- @ConfigMapVolume
- @AwsElasticBlockStoreVolume
- @AzureDiskVolume
- @AzureFileVolume
Vcs Options
Most of the generated resources contain the kubernetes recommended annotations for specifying things like:- vcs url
- commit id
.git/config file (Currently only git is supported).
Out of the box, the url of the origin remote will be used verbatim.
Specifying remote
In some cases users may prefer to use another remote. This can be done with the use of @VcsOptions annotation:
import io.dekorate.options.annotation.JvmOptions;
import io.dekorate.options.annotation.GarbageCollector;
import io.dekorate.kubernetes.annotation.KubernetesApplication;
@KubernetesApplication @VcsOptions(remote="myfork") public class Main {
public static void main(String[] args) {     //Your code goes here   } }
myfork will be used as the remote. So, generated resources will be annotated with the url of the myfork remote.
For users that prefer using application.properties:
dekorate.vcs.remote=myfork
Converting vcs urls to https
The vcs related annotations are mostly used by tools. For public repositories its often simpler for tools, to access the repository anonymous access. This is possible when using git over https, but not possible when using git over ssh. So, there are cases where users would rather develop using git+ssh but have 3d-party tools use https instead. To force dekorate covnert vcs urls to https one case use the httpsPreferred parameter of @VcsOptions. Or using properties:
dekorate.vcs.https-preferred=true
Jvm Options
It's common to pass the JVM options in the manifests using theJAVAOPTS or JAVAOPTIONS environment variable of the application container.
This is something complex as it usually difficult to remember all options by heart and thus its error prone.
The worst part is that you usually don't realize the mistake until it's TOO
late.
Dekorate provides a way to manage those options using the @JvmOptions annotation, which is included in the options-annotations module.
import io.dekorate.options.annotation.JvmOptions;
import io.dekorate.options.annotation.GarbageCollector;
import io.dekorate.kubernetes.annotation.KubernetesApplication;
@KubernetesApplication @JvmOptions(server=true, xmx=1024, preferIpv4Stack=true, gc=GarbageCollector.SerialGC) public class Main {
public static void main(String[] args) {     //Your code goes here   } }
or via application.properties:
dekorate.jvm.server=true dekorate.jvm.xmx=1024 dekorate.jvm.prefer-ipv4-stack=true dekorate.jvm.gc=GarbageCollector.SerialGC
This module can be added to the project using:
<dependency>
  <groupId>io.dekorate</groupId>
  <artifactId>option-annotations</artifactId>
  <version>4.1.5</version>
</dependency>Note: The module is included in all starters.
Container Resources
Kubernets allwos setting rules about container resources:
- Request CPU: The amount of CPU the container needs.
- Request Memory: The amount of memory the container needs.
- Limit CPU: The maximum amount of CPU the container will get.
- Limit Memory: The maximum amount of memory the container will get.
Dekorate supports these options for both the application container and / or any of the side car containers.
Application Container resources
Using annotations
There are parameters availbe for@KubernetesApplication, @KnativeApplication and @OpenshiftApplication.
Using the @KubernetesApplication one could set the resources like:
import io.dekorate.kubernetes.annotation.ResourceRequirements;
import io.dekorate.kubernetes.annotation.KubernetesApplication;
@KubernetesApplication(requestResources=@ResourceRequirements(memory="64Mi", cpu="1m"), limitResources=@ResourceRequirements(memory="256Mi", cpu="5m")) public class Main { }
In the same spirit it workds for @KnativeApplication and @OpenshiftApplication.
Using properties
Users that prefer to configure dekorate using property configuration can use the following options:
dekorate.kubernetes.request-resources.cpu=1m
dekorate.kubernetes.request-resources.memory=64Mi
dekorate.kubernetes.limit-resources.cpu=5m
dekorate.kubernetes.limit-resources.memory=256Mi
In a similar manner works for openshift:
dekorate.openshift.request-resources.cpu=1m
dekorate.openshift.request-resources.memory=64Mi
dekorate.openshift.limit-resources.cpu=5m
dekorate.openshift.limit-resources.memory=256Mi
Init Containers
If for any reason the application requires the use of init containers, they can be easily defined using the initContainer property, as demonstrated below.
import io.dekorate.kubernetes.annotation.Container; import io.dekorate.kubernetes.annotation.KubernetesApplication;
@KubernetesApplication(initContainers = @Container(image="foo/bar:latest", command="foo")) public class Main {
public static void main(String[] args) {     //Your code goes here   } }
or via application.properties:
dekorate.kubernetes.init-containers[0].image=foo/bar:latest dekorate.kubernetes.init-containers[0].command=foo
The @Container supports the following fields:
- Image
- Image Pull Policy
- Commands
- Arguments
- Environment Variables
- Mounts
- Probes
Sidecars
Similarly, to init containers support for sidecars is also provided using the sidecars property. For example:
import io.dekorate.kubernetes.annotation.Container; import io.dekorate.kubernetes.annotation.KubernetesApplication;
@KubernetesApplication(sidecars = @Container(image="jaegertracing/jaeger-agent",                                              args="--collector.host-port=jaeger-collector.jaeger-infra.svc:14267")) public class Main {
public static void main(String[] args) {     //Your code goes here   } }
or via application.properties:
dekorate.kubernetes.sidecars[0].image=jaegertracing/jaeger-agent dekorate.kuberentes.args=--collector.host-port=jaeger-collector.jaeger-infra.svc:14267
As in the case of init containers the @Container supports the following fields:
- Image
- Image Pull Policy
- Commands
- Arguments
- Environment Variables
- Mounts
- Probes
Adding the kubernetes annotation processor to the classpath
This module can be added to the project using:
<dependency> <groupId>io.dekorate</groupId> <artifactId>kubernetes-annotations</artifactId> <version>4.1.5</version> </dependency>OpenShift
@OpenshiftApplication works exactly like @KubernetesApplication , but will generate resources in a file name openshift.yml / openshift.json instead. Also instead of creating a Deployment it will create a DeploymentConfig.
NOTE: A project can use both @KubernetesApplication and @OpenshiftApplication. If both the kubernetes and OpenShift annotation processors are present both kubernetes and OpenShift resources will be generated.
Adding the OpenShift annotation processor to the classpath
This module can be added to the project using:
<dependency>
  <groupId>io.dekorate</groupId>
  <artifactId>openshift-annotations</artifactId>
  <version>4.1.5</version>
</dependency>
Integrating with S2i
Out of the box resources for s2i will be generated.- ImageStream
- BuildConfig
import io.dekorate.openshift.annotation.OpenshiftApplication;
@OpenshiftApplication(name = "doc-example") public class Main {
public static void main(String[] args) {       //Your code goes here     } }
The same can be expressed via application.properties:
dekorate.openshift.name=doc-example IMPORTANT: All examples of application.properties demonstrated in the Kubernetes section can be applied here, by replacing the prefix dekorate.kubernetes with dekorate.openshift.
The generated BuildConfig will be a binary config. The actual build can be triggered from the command line with something like:
oc start-build doc-example --from-dir=./target --follow
NOTE: In the example above we explicitly set a name for our application, and we referenced that name from the cli. If the name was implicitly created the user would have to figure the name out before triggering the build. This could be done either by oc get bc or by knowing the conventions used to read names from build tool config (e.g. if maven then name the artifactId).
related examples
- spring boot on openshift example
- spring boot with groovy on openshift example
- spring boot with gradle on openshift example
Tekton
Dekorate supports generating tekton pipelines. Since Dekorate knows, how your project is build, packaged into containers and deployed, converting that knowledge into a pipeline comes natural.
When the tekton module is added to the project:
<dependency>
  <groupId>io.dekorate</groupId>
  <artifactId>tekton-annotations</artifactId>
  <version>4.1.5</version>
</dependency>
Two sets of resources will be generated, each representing a different configuration style the use user can choose from:
- Pipeline based
- Task based
Pipeline
This set of resources contains:
- Pipeline
- PipelineResource (git, output image)
- PipelineRun
- Task (build, package and push, deploy)
- RBAC resources
Task
This set of resources provides the some functionality as above, but everything is collapsed under a single task (for usability reasons), In detail it contains:
- PipelineResource (git, output image)
- Task
- TaskRun
- RBAC resources
Pipeline vs Task
If unsure which style to pickup, note that the task style has less configuration requirements and thus easier to begin with. The pipeline style is easier to slice and dice, once your are more comfortable with tekton.
Regardless of the choice, Dekorate provides a rich set of configuration options to make using tekton as easy as it gets.
Tekton Configuration
Git Resource
The generated tasks and pipelines, assume the project is under version control and more specifically git. So, in order to run the pipeline or the task a PiepelineResource of type git is required. If the project is added to git, the resource will be generated for you. If for any reason the use of an external resource is preferred then it needs to be configured, like:
dekorate.tekton.external-git-pipeline-resource=<<the name of the resource goes here>>Builder Image
Both the pipeline and the task based resources include steps that perform a build of the project. Dekorate, tries to identify a suitable builder image for the project. Selection is based on the build tool, jdk version, jdk flavor and build tool version (in that order). At the moment only maven and gradle are supported.
You can customize the build task by specifying:
- custom builder image:
dekorate.tekton.builder-image - custom build command:
dekorate.tekton.builder-command - custom build arguments:
dekorate.tekton.builder-arguments
Configuring a Workspace PVC
One of the main differences between the two styles of configuration, is that Pipelines require a PersistentVolumeClaim in order to share the workspace between Tasks. On the contrary when all steps are part of single bit fat Task (which is baked by a Pod) and EmptyDir volume will suffice.
Out of the box, for the pipeline style resources a PersistentVolumeClaim named after the application will be generated and used.
The generated pvc can be customized using the following properties:
- dekorate.tekton.source-workspace-claim.size (defaults to 1Gi) - dekorate.tekton.source-workspace-claim.storage-class (defaults to standard) The option to provide an existing pvc (by name) instead of generating one is also provided, using dekorate.tekton.source-workspace-claim.
Configuring the Docker registry for Tekton
The generated Pipeline / Task includes steps for building a container image and pushing it to a registry.
The registry can be configured using dekorate.docker.registry as is done for the rest of the resources.
For the push to succeed credentials for the registry are required. The user is able to:
- Provide own Secret with registry credentials
- Provide username and password
- Upload local
.docker/config.json
my-secret):
dekorate.tekton.image-builder-secert=my-secertTo provide username and password:
dekorate.tekton.registry-usernmae=myusername
dekorate.tekton.registry-password=mypassword
If none of the above is provided and a .docker/config.json exists, it can be used if explicitly requested:
dekorate.tekton.use-local-docker-config-json=trueKnative
Dekorate also supports generating manifests for knative. To make use of this feature you need to add:
<dependency>
  <groupId>io.dekorate</groupId>
  <artifactId>knative-annotations</artifactId>
  <version>4.1.5</version>
</dependency>
This module provides the @KnativeApplication works exactly like @KubernetesApplication , but will generate resources in a file name knative.yml / knative.json instead. Also instead of creating a Deployment it will create a knative serving Service.
Cluster local services
Knative exposes services out of the box. You can use the @KnativeApplication(expose=false) or the property dekorate.knative.expose set to false, in order to mark a service as cluster local.
Autoscaling
Dekorate provides access to both revision and global autoscaling configuration (see Knative Autoscaling.Global autoscaling configuration is supported via configmaps (KnativeServing is not supported yet).
Class
To set the autoscaler class for the target revision:
dekorate.knative.revision-auto-scaling.autoscaler-class=hpaThe allowed values are:
hpa: Horizontal Pod Autoscalerkpa: Knative Pod Autoscaler (default)
dekorate.knative.global-auto-scaling.autoscaler-class=hpaMetric
To select the autoscaling metric:
dekorate.knative.revision-auto-scaling.metric=rpsThe allowed values are:
concurrency: Concurrency (default)rps: Requests per secondcpu: CPU (requireshparevision autoscaler class).
Target
Metric specifies the metric kind. To sepcify the target value the autoscaler should aim to maintain, the target can be used:
dekorate.knative.revision-auto-scaling.target=100There is no option to set a generic global target. Instead specific keys per metric kind are provided. See below:
Requests per second
To set the requests per second:
dekorate.knative.global-auto-scaling.requests-per-second=100Target utilization
To set the target utilization:
dekorate.knative.global-auto-scaling.target-utilization-percentage=100Framework integration
Framework integration modules are provided that we are able to detect framework annotations and adapt to the framework (e.g. expose ports).
The frameworks supported so far:
- Spring Boot
- Quarkus
- Thorntail
Spring Boot
With spring boot, we suggest you start with one of the provided starters:
<dependency>
  <groupId>io.dekorate</groupId>
  <artifactId>kubernetes-spring-starter</artifactId>
  <version>4.1.5</version>
</dependency>
Or if you are on OpenShift:
<dependency>
  <groupId>io.dekorate</groupId>
  <artifactId>openshfit-spring-starter</artifactId>
  <version>4.1.5</version>
</dependency>
Automatic configuration
For Spring Boot application, dekorate will automatically detect known annotation and will align generated manifests accordingly.
Exposing services
Dekorate tunes the generated manifest based on the presence of web annotations in the project:
- Automatic service expose
- Application path detection
Ingress or Route (in case of Openshift) if the expose option is set to true.
Kubernetes
@KubernetesApplication(expose=true)An alternative way of configuration is via application properties:
dekorate.kubernetes.ingress.expose=trueOpenshift
@OpenshiftApplication(route=@Route(expose=true))An alternative way of configuration is via application properties:
dekorate.openshift.route.expose=trueThere are cases where the Ingress or Route host needs to be customized. This is done using the host parameter either via annotation or property configuration.
Kubernetes
@KubernetesApplication(expose=true, host="foo.bar.com")An alternative way of configuration is via application properties:
dekorate.kubernetes.ingress.expose=true
dekorate.kubernetes.ingress.host=foo.bar.com
Openshift
@OpenshiftApplication(route = @Route(expose=true, host="foo.bar.com"))An alternative way of configuration is via application properties:
dekorate.openshift.route.expose=true
dekorate.openshift.route.host=foo.bar.com
RequestMapping
When one RequestMapping annotation is added on a Controller or multiple RequestMapping that share a common path are added on multiple Controller classes, dekorate will detect the shortest common path and configure it so that its available on the expose Ingress or Route.
Annotation less configuration
It is possible to completely bypass annotations by utilizing already-existing, framework-specific metadata. This mode is currently only supported for Spring Boot applications (i.e. at least one project class is annotated with @SpringBootApplication).
So, for Spring Boot applications, all you need to do is add one of the starters (io.dekorate:kubernetes-spring-starter or io.dekorate:openshift-spring-starter) to the classpath. No need to specify an additional annotation. This provides the fastest way to get started using dekorate with Spring Boot.
To customize the generated manifests you can add dekorate properties to your application.yml or application.properties descriptors, or even use annotations along with application.yml / application.properties though if you define dekorate properties then the annotation configuration will be replaced by the one specified using properties.
Dekorate looks for supported configuration as follows in increasing order of priority, meaning any configuration found in an application descriptor will override any existing annotation-specified configuration:
- Annotations
application.propertiesapplication.yamlapplication.yml
io.dekorate:kubernetes-annotations, then:
application-kubernetes.propertiesapplication-kubernetes.yamlapplication-kubernetes.yml
openshift, kubernetes and knative modules are providing additional properties files.
Then, for Spring Boot applications, it will also take into account the Spring property spring.profiles.active if set:
application-${spring.profiles.active}.propertiesapplication-${spring.profiles.active}.yamlapplication-${spring.profiles.active}.yml
dekorate.options.properties-profile is set: - if property
dekorate.options.properties-profileis set, thenapplication-${dekorate.options.properties-profile}.properties - if property
dekorate.options.properties-profileis set, thenapplication-${dekorate.options.properties-profile}.yaml - if property
dekorate.options.properties-profileis set, thenapplication-${dekorate.options.properties-profile}.yml
Here's the full list of supported configuration options. Special attention should be paid to the path of these properties. The properties' path match the annotation properties and not what would end up in the manifest, meaning the annotation-less configuration matches the model defined by the annotations. More precisely, what is being configured using properties is the same model as what is configured using annotations. While there is some overlap between how the annotations are configured and the resulting manifest, the properties (or YAML file) still need to provide values for the annotation fields, hence why they need to match how the annotations are configured. Always refer to the configuration options guide if in doubt.
Generated resources when not using annotations
When no annotations are used, the kind of resources to be generated is determined by the dekorate artifacts found in the classpath.
| File | Required Dependency | |---------------------|------------------------------------| | kubernetes.json/yml | io.dekorate:kubernetes-annotations | | openshift.json/yml | io.dekorate:openshift-annotations |
Note: that starter modules for kubernetes and openshift do transitively add kubernetes-annotations and openshift-annotations respectively.
Quarkus
quarkus provides rich set of extensions including one for kubernetes. The kubernetes extension uses internally dekorate for generating and customizing manifests.
The extension can be added to any quarkus project:
mvn quarkus:add-extension -Dextensi After the project compilation the generated manifests will be available under: target/kubernetes/.
At the moment this extension will handle ports, health checks etc, with zero configuration from the user side.
It's important to note, that by design this extension will NOT use the dekorate annotations for customizing the generated manifests.
For more information please check: the extension docs.
Thorntail
With Thorntail, it is recommended to add a dependency on one of the provided starters:
<dependency>
  <groupId>io.dekorate</groupId>
  <artifactId>kubernetes-thorntail-starter</artifactId>
  <version>4.1.5</version>
  <scope>provided</scope>
</dependency>
Or, if you use OpenShift:
<dependency>
  <groupId>io.dekorate</groupId>
  <artifactId>openshfit-thorntail-starter</artifactId>
  <version>4.1.5</version>
  <scope>provided</scope>
</dependency>
Then, you can use the annotations described above, such @KubernetesApplication, @OpenShiftApplication, etc.
Note that the Thorntail annotation processor reads the thorntail.http.port configuration from the usual project-defaults.yml. It doesn't read any other project-*.yml profiles.
Experimental features
Apart from the core feature, which is resource generation, there are a couple of experimental features that do add to the developer experience.
These features have to do with things like building, deploying and testing.
Building and Deploying?
Dekorate does not generate Docker files, neither it provides internal support for performing docker or s2i builds. It does however allow the user to hook external tools (e.g. thedocker or oc) to trigger container image builds after the end of compilation.
So, at the moment as an experimental feature the following hooks are provided:
- docker build hook (requires docker binary, triggered with
-Ddekorate.build=true) - docker push hook (requires docker binary, triggered with
-Ddekorate.push=true) - OpenShift s2i build hook (requires oc binary, triggered with
-Ddekorate.deploy=true) - KiND docker images loading hook (requires
kind, triggered with-Ddekorate.kind.autoload=true)
Docker build hook
This hook will just trigger a docker build, using an existing Dockerfile at the root of the project. It will not generate or customize the docker build in any way.To enable the docker build hook you need:
- a
Dockerfilein the project/module root - the
dockerbinary configured to point the docker daemon of your kubernetes environment.
-Ddekorate.build=true as an argument to the build, for example:
mvn clean install -Ddekorate.build=truegradle build -Ddekorate.build=true@DockerBuild(registry="quay.io")
public class Main {
}mvn clean install -Ddekorate.docker.registry=quay.io -Ddekorate.push=trueNote: Dekorate will NOT push images on its own. It will delegate to the docker binary. So the user needs to make sure beforehand they are logged in and have taken all necessary actions for a docker push to work.
S2i build hook
This hook will just trigger an s2i binary build, that will pass the output folder as an input to the buildTo enable the docker build hook you need:
- the
openshift-annotationsmodule (already included in all OpenShift starter modules) - the
ocbinary configured to point the docker daemon of your kubernetes environment.
-Ddekorate.build=true as an argument to the build, for example:
mvn clean install -Ddekorate.build=truegradle build -Ddekorate.build=trueJib build hook
This hook will just trigger a jib build in order to perform a container build.In order to use it, one needs to add the jib-annotations dependency.
<dependency>
    <groupId>io.dekorate</groupId>
    <artifactId>jib-annotations</artifactId>
    <version>4.1.5</version>
</dependency>
Without the need of any additional configuration, one trigger the hook by passing -Ddekorate.build=true as an argument to the build, for example:
mvn clean install -Ddekorate.build=truegradle build -Ddekorate.build=trueJib modes
At the moment Jib allows you to create and push images in two different ways:
- using the docker daemon
- dockerless
@JibBuild(dockerBuild=false) or if using properties configuration dekorate.jib.docker-build=false.
In case of the dockerless mode, an openjdk-8 image is going to be used as a base image. The image can be changed through the from property on the @JibBuild annotation or dekorate.jib.from when using property configuration.
related examples
- spring boot on kubernetes with jib exampleJunit5 extensions
Dekorate provides two junit5 extensions for:
- Kubernetes
- OpenShift
dekorate aware and can read generated resources and configuration, in order to manage end to end tests
for the annotated applications.
Features
- Environment conditions
- Container builds
- Apply generated manifests to test environment
- Inject test with:
Kubernetes extension for JUnit5
The kubernetes extension can be used by adding the following dependency:
<dependency> <groupId>io.dekorate</groupId> <artifactId>kubernetes-junit</artifactId> <version>4.1.5</version> </dependency>By adding the annotation to your test class the following things will happen:
- The extension will check if a kubernetes cluster is available (if not tests will be skipped).
- If
@DockerBuildis present in the project, a docker build will be triggered. - All generated manifests will be applied.
- Will wait until applied resources are ready.
- Dependencies will be injected (e.g. KubernetesClient, Pod etc)
- Test will run
- Applied resources will be removed.
Dependency injection
Supported items for injection:
- KubernetesClient
- Pod (the application pod)
- KubernetesList (the list with all generated resources)
For example:
@Inject KubernetesClient client;hello-world then you can do something like: @Inject @Named("hello-world") Pod pod;maven-failsafe-plugin configuration so that integration tests only run in the integration-test phase. This is important since in the test phase the application is not packaged. Here's an example of how it you can configure the project: <plugin> <groupId>org.apache.maven.plugins</groupId> <artifactId>maven-failsafe-plugin</artifactId> <version>${version.maven-failsafe-plugin}</version> <executions> <execution> <goals> <goal>integration-test</goal> <goal>verify</goal> </goals> <phase>integration-test</phase> <configuration> <includes> <include>*/IT.class</include> </includes> </configuration> </execution> </executions> </plugin>related examples
- spring boot on kubernetes exampleOpenShift extension for JUnit5
Similarly, to using the kubernetes junit extension you can use the extension for OpenShift, by adding @OpenshiftIntegrationTest. To use that you need to add:
<dependency> <groupId>io.dekorate</groupId> <artifactId>openshift-junit</artifactId> <version>4.1.5</version> </dependency>- The extension will check if a kubernetes cluster is available (if not tests will be skipped).
- A docker build will be triggered.
- All generated manifests will be applied.
- Will wait until applied resources are ready.
- Dependencies will be injected (e.g. KubernetesClient, Pod etc)
- Test will run
- Applied resources will be removed.
related examples
- spring boot on openshift example - spring boot with groovy on openshift example - spring boot with gradle on openshift exampleConfiguration externalization
It is often desired to externalize configuration in configuration files, instead of hard coding things inside annotations.Dekorate provides the ability to externalize configuration to configuration files (properties or yml). This can be done to either override the configuration values provided by annotations, or to use dekorate without annotations.
For supported frameworks, this is done out of the box, as long as the corresponding framework jar is present. The frameworks supporting this feature are:
- spring boot
- thorntail
- Each annotation property is expressed using a key/value pair.
- All keys start with the
dekorate.<annotation kind>.prefix, whereannotation kindis the annotation class name in lowercase, stripped of theApplicationsuffix. - The remaining part of key is the annotation property name.
- For nesting properties the key is also nested following the previous rule.
@Dekorate annotation.
The presence of this annotation will trigger the dekorate processes. Dekorate will then look for application.properites or application.yml resources.
If present, they will be loaded. If not the default configuration will be used.
Examples:
The following annotation configuration:
@KubernetesApplication(labels=@Label(key="foo", value="bar")) public class Main { } Can be expressed using properties:
dekorate.kubernetes.labels[0].key=foo dekorate.kubernetes.labels[0].value=bar or using yaml:
dekorate: kubernetes: labels: - key: foo value: bar In the examples above, dekorate is the prefix that we use to namespace the dekorate configuration. kubernetes defines the annotation kind (its @KubernetesApplication in lower case and stripped of the Application suffix). labels, key and value are the property names and since the Label is nested under @KubernetesApplication so are the properties.
The exact same example for OpenShift (where @OpenshiftApplication is used instead) would be:
@OpenshiftApplication(labels=@Label(key="foo", value="bar")) public class Main { } Can be expressed using properties:
dekorate.openshift.labels[0].key=foo dekorate.openshift.labels[0].value=bar or using yaml:
dekorate: openshift: labels: - key: foo value: bar
Spring Boot
For spring boot, dekorate will look for configuration under:
- application.properties
- application.yml
- application.yaml
- application-kubernetes.properties
- application-kubernetes.yml
- application-kubernetes.yaml
Vert.x & generic Java
For generic java, if the @Dekorate annotation is present, then dekorate will look for confiugration under:
- application.properties
- application.yml
configFiles property on the @Dekorate annotation.
For example:
A generic java application annotated with @Dekorate:
import io.dekorate.annotation.Dekorate;

    @Dekorate
    public class Main {
        //do stuff
    }
During compilation kubernetes, OpenShift or both resources will be generated (depending on what dekorate jars are present in the classpath). These resources can be customized using properties:
dekorate.openshift.labels[0].key=foo dekorate.openshift.labels[0].value=bar or using yaml:
dekorate: openshift: labels: - key: foo value: bar
related examples
- Vert.x on kubernetes example - Vert.x on openshift exampleTesting Multi-Module projects
The Dekorate testing framework supports multi-module projects either using the OpenShift JUnit 5 extension or using the Kubernetes JUnit 5 extension.
A multi-module project consist of multiple modules, all using Dekorate to generate the cluster manifests and a tests module that will run the integration tests:
multi-module-parent
└───module-1
└───module-2
└───tests
In the tests module, we can now specify the location of the additional modules via the field additionalModules which is part of the @OpenshiftIntegrationTest and @KubernetesIntegrationTest annotations:
@OpenshiftIntegrationTest(additionalModules = { "../module-1", "../module-2" })
class SpringBootForMultipleAppsOnOpenshiftIT {
@Inject   private KubernetesClient client;
@Inject   @Named("module-1")   Pod podForModuleOne;
@Inject   @Named("module-2")   Pod podForModuleTwo;
// ... }
Doing so, the test framework will locate the Dekorate manifests that have been previously generated to build and deploy the application for each integration test.
related examples
Prometheus annotations
The prometheus annotation processor provides annotations for generating prometheus related resources. In particular, it can generate ServiceMonitor which are used by the Prometheus Operator in order to configure prometheus to collect metrics from the target application.
This is done with the use of @EnableServiceMonitor annotation.
Here's an example:
import io.dekorate.kubernetes.annotation.KubernentesApplication; import io.dekorate.prometheus.annotation.EnableServiceMonitor;
@KubernetesApplication @EnableServiceMonitor(port = "http", path="/prometheus", interval=20) public class Main {     public static void main(String[] args) {       //Your code goes here     } }
/actuator/prometheus.
related examples
Jaeger annotations
The jaeger annotation processor provides annotations for injecting the jaeger-agent into the application pod.
Most of the work is done with the use of the @EnableJaegerAgent annotation.
Using the Jaeger Operator
When the jaeger operator is available, you set the operatorEnabled property to true. The annotation processor will automatically set the required annotations to the generated deployment, so that the jaeger operator can inject the jaeger-agent.
Here's an example:
import io.dekorate.kubernetes.annotation.KubernentesApplication; import io.dekorate.jaeger.annotation.EnableJaegerAgent;
@KubernetesApplication @EnableJaegerAgent(operatorEnabled = true) public class Main {     public static void main(String[] args) {       //Your code goes here     } }
Manually injection the agent sidecar
For the cases, where the operator is not present, you can use the @EnableJaegerAgent to manually configure the sidecar.
import io.dekorate.kubernetes.annotation.KubernentesApplication;
import io.dekorate.jaeger.annotation.EnableJaegerAgent;
@KubernetesApplication @EnableJaegerAgent public class Main {     public static void main(String[] args) {       //Your code goes here     } }
related examples
ServiceBinding CRD
Service Binding Operator enables the application developers to bind the services that are backed by Kubernetes operators to an application that is deployed in kubernetes without having to perform manual configuration. Dekorate supports generation of ServiceBinding CR. The generation of ServiceBinding CR is triggered by annotating one of your classes with@ServiceBinding annotation and by adding the below dependency to the project and when the project gets compiled, the annotation will trigger the generation of ServiceBinding CR in both json and yml formats under the target/classes/META-INF/dekorate. The name of the ServiceBinding CR would be the name of the applicationName + "-binding", for example if the application name is sample-app, the binding name would be sample-app-binding <dependency> <groupId>io.dekorate</groupId> <artifactId>servicebinding-annotations</artifactId> </dependency>README truncated. View on GitHub


