
🔥 The Complete Customizable Software Developer Portfolio Template which lets you showcase your work and provides each and every detail about you as Software Developer.

Software Developer Master Portfolio 🔥
A clean, beautiful, responsive, and 100% customizable portfolio
template for Software Developers!










If you want to discuss about something, you can ask on my Discord Server.
:star: Star us on GitHub — it helps!
Sections 📚
✔️ Summary and About me\ ✔️ Skills \ ✔️ Open Source Projects Connected with Github\ ✔️ Experience\ ✔️ Certifications 🏆\ ✔️ Blogs\ ✔️ Education\ ✔️ Contact me\ ✔️ Resume Viewer
To view a live example, click here
Table of Contents
- Clone and Use - Customizing - Choose Theme - Deployment - Technologies Used - Illustrations - License - Contributors - ReferencesClone and Use 📋
- The website is completely built on
react-jslibrary ofjavascriptand that's why we neednodejsandnpminstalled - While installing
nodejsandnpm, try to install versions which are equal or greater than the versions mentioned in badges above - In case you want to help developing it or simply saving it, you can fork the repository just by clicking the button on the top-right corner of this page
- After the successful installation of
nodejsandnpm, clone the repository into your local system using below command:
git clone https://github.com/ashutosh1919/masterPortfolio.git- To download required dependencies to your system, navigate to the directory where the cloned repository resides and execute following command:
npm install- Now the project is ready to use
- You can check it using
npm start, it will open the website locally on your browser.
Customize it to make your own portfolio ✏️
In this project, there are basically 4 things that you need to change to customize this to anyone else's portfolio: package.json, Personal Information, Github Information and Splash Logo.
package.json
Open this file, which is in the main cloned directory, choose any "name" and change "homepage " to https://<your-github-username>.github.io. Do not forget the https://, otherwise fonts will not load.
Personal Information
You will find src/portfolio.js file which contains the complete information about the user. The file looks something like below:
// Home Page
const greeting = {
    ...
}
// Social Media const socialMediaLinks = {     ... }
...
You can change the personal information, experience, education, social media, certifications, blog information, contact information etc. in src/portfolio.js to directly reflect them in portfolio website.
How to change the icons on homepage under what i do section?
- This section pulls data from
skillsin portfolio.js file. - Visit this website: https://icon-sets.iconify.design/
- Search for the skill you are looking to add.
- Select the icon of your choice.
- Copy the text beside Selected Icon and replace it with
fontAwesomeClassNameof that particular softwareSkill.
How to use custom images instead of Iconify Icons?
- Add a valid image file into the
public/skillsfolder - Insert the image name into the
imageSrcattribute of the particular softwareSkill - Remove the
fontAwesomeClassNameproperty or leave it empty because it takes precedence overimageSrc - Add custom styling to the
imgusing thestyleProperty
How to Change the Icons on Education page under Basic Qualification and Certifications?
- The icons for this section are pulled from the
competitiveSitesarray in theportfolio.jsfile. - Visit the Simple Icons website.
- Search for the competitive site you want to add an icon for.
- Select the icon you want to use.
- Copy the text beside Selected Icon and replace it with iconifyClassname of that particular competitive site.
How to Use Custom Images Instead of Simple Icons for Competitive Sites
- Place the custom image file in the
public/skillsfolder. - Update the
imageSrcattribute of the corresponding competitive site with the name of your custom image (e.g.,imageSrc: "customImage.png"). - Remove the
iconifyClassnameproperty or leave it empty, as theimageSrcproperty takes precedence overiconifyClassname. - Optionally, add custom styling to the
<img>tag using thestyleproperty to adjust size, positioning, etc.
Github Information
You will find gitdatafetcher.mjs file in the main directory of the repository. This file is used to fetch the data (Pull requests, Issues, Organizations, Pinned projects etc.) from your github.
In the project you will see a env.example file, create a new file named .env and copy contents of env.example into it. In that file, you will see the following environment variables
GITHUBTOKEN = yourtoken;
GITHUBUSERNAME = yourusername;
You can get a github token as described here. Give all permissions while generating token. Add your github username and the token generated in GITHUBUSERNAME and GITHUB_TOKEN variables in the .env file.
Now, you need to run following command. (Make sure you executed npm install before this)
Warning: Treat your tokens like passwords and keep them secret. When working with the API, use tokens as environment variables instead of hardcoding them into your programs.
node gitdatafetcher.mjsThis will fetch all the data from your github and it will automatically replace my data with yours. Whenever you want to update the github related information on the website you need to run this command.
Splash Logo
Note here that if you click my portfolio, you can see animating the logo at the beginning. I have designed that logo in Figma and then animated it using css. Therefore, this part of portfolio is not customizable. But don't worry we have a solution to this problem. You have below two alternatives:
- If you want to design your own logo, then you can design it using
FigmaorAdobe XDorAdobe IllustratororInkscape. If you want to animate it, you can refer to./src/components/Loaderdirectory which containsjsandcssfiles which animates the logo - If you don't want Splash screen or you don't know how to design logo, then this option is for you
src/portfolio.js file and at the top of this file you will see settings component as below:
// Website related settings
    const settings = {
      isSplash: true,
};isSplash from true to false
- Now, if you see your website using npm start, it will directly open home rather than animating logo splash screen
- If you design your logo in future, then edit the files in ./src/components/Loader and then revert isSplash to true in src/portfolio.js.
Other
- You need to change the website title and other descriptions in
public/index.html - You can define your own favicon in
public/iconsdirectory. If you don't have a favicon, you can generate favicons from Favicon Generator and Favicon IO - You can also edit your website preview (known as description image). Run your site locally, take a screenshot and replace with
public/icons/desc.png. Note that your screenshot should be 1280x640 for better preview.
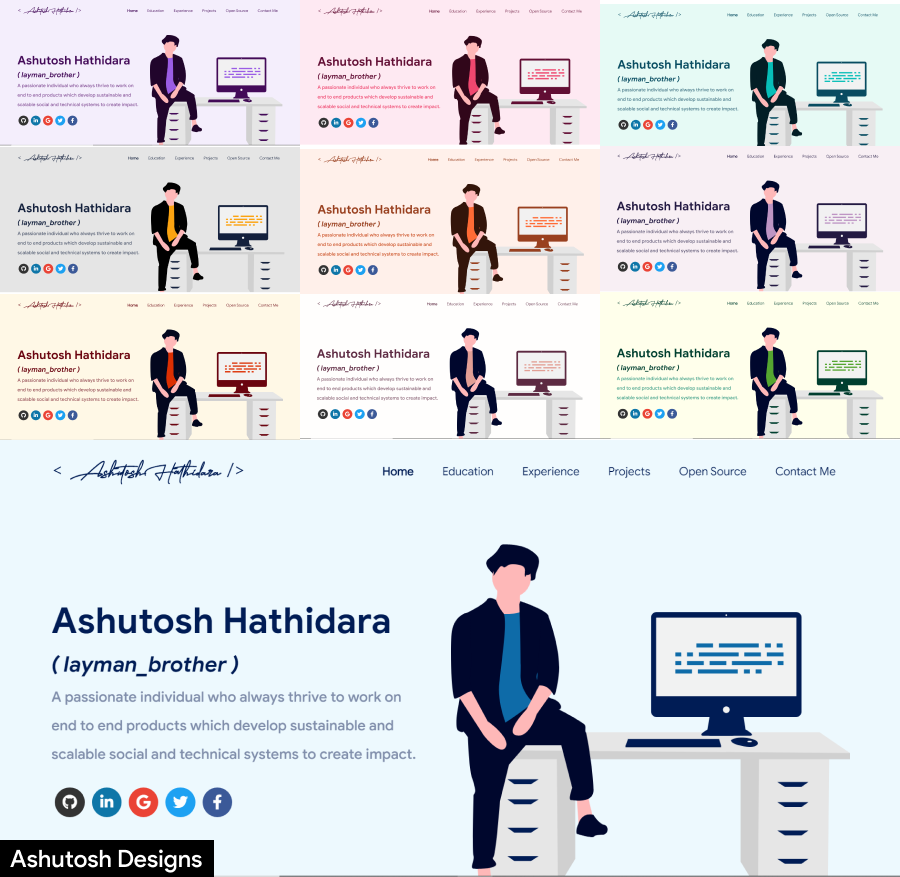
Choose Theme 🌈
- You can take a look at
src/theme.jsfile where all available themes are mentioned with their respective color codes - At the bottom of this file you will see the below code:
export const chosenTheme = blueTheme;
- You need to change the name from blueTheme to whatever theme you want to set your website to
- You can define new theme similarly as other themes and you can assign name of that new defined theme to chosenTheme
- That's it. You just need to change the theme name and the code will take care of everything else
- Run
npm startto check if everything is ok.
Resume 📃
- If you want to display your resume, go to the /src/assets/docs/ directory.
- Paste your resume there and copy your resume's file name.
- Also, keep in mind that your resume must be in A4 size.
- Now, go to /src/pages/resume/Resume.js.
- In the import section, find:
import myResumePdf from "../../assets/docs/AshutoshHathidaraResume_ML.pdf"- and replace "AshutoshHathidaraResume_ML.pdf" with your resume file name.
- Launch the project and go to the route
/resumeto view your resume.
Deployment 📦
- Once you are done with your setup and have successfully completed all steps above, you need to put your website online!
- I highly recommend using Github Pages to achieve this the EASIEST WAY.
- To deploy your website, you have two options. First you need to create a github repository with the name
<your-github-username>.github.io. Please don't give it any other name. - Now, you need to generate a production build and deploy the website.
- Run
npm run buildto generate the production build folder. - Enter the build folder,
git initand push the generated code to themasterbranch of your new repository on github. That's it. It's Done. - You may need to
git initand force push at every new build.
- Run
npm run deployto build and create a branch calledgh-pages. It will push thebuildfiles to that branch. - The last step in deploying is to enable
Github Pagesin settings of the repository and selectgh-pagesbranch.
<your-github-username>.github.io.
If you are stuck somewhere and want to observe the deployment process in depth, then please watch below video.

Technologies used 🛠️
illustrations 🍥
License 📄
This project is licensed under the MIT License - see the LICENSE.md file for details.
Contributors ✨


References 👏🏻
- Some Design and Implementation Ideas are taken from Saad Pasta's Portfolio Project.
- The Logo of MasterPortfolio is inspired from prettier-logo for prettier designed by @ianstormtaylor.


