
Smart DNS proxy to watch Netflix



TL;DRfind a (recent)n19 Debian or Ubuntu box with root on a clean public IP and run:
apt-get update\ && apt-get -y install vim dnsutils curl sudo\ && curl -fsSL https://get.docker.com/ | sh || apt-get -y install docker.io\ && mkdir -p ~/netflix-proxy\ && cd ~/netflix-proxy\ && curl -fsSL https://github.com/ab77/netflix-proxy/archive/latest.tar.gz | gunzip - | tar x --strip-components=1\ && ./build.sh
See the Wiki page(s) for some common troubleshooting ideas.
... or subscribe to Unzoner VPN service to un-block:

about
netflix-proxy is a smart DNS proxy to stream Netflix, Hulu[[n2]](#footnotes), HBO Now and others out of region. It is deployed using Docker containers and uses dnsmasq[[n18]](#footnotes) and sniproxy[[n1]](#footnotes) to provide SmartDNS services. It works for some blocked sites, such as PornHub and YouTube. Subscribe to the mailing list and be notified of new features, updates, etc.
supported services
The following are supported out of the box, however adding additional services is trivial and is done by updatingdnsmasq.conf file and running docker restart dnsmasq:
- Netflix
- Hulu[[n2]](#footnotes)
- HBO Now
- Amazon Instant Video
- Crackle
- Pandora
- Vudu
- blinkbox
- BBC iPlayer[[n5]](#footnotes)
- NBC Sports and potentially many more
license
This project is free, covered by the MIT License. It is provided without any warranty and can be used for any purpose, including private and commercial. However, if you are planning to use it for commercial purposes (i.e make money off it), please do not expect free support, as it would be unfair. A commercial support model can always be negotiated, if required. Please contact me if this is something that interests you.instructions
The following paragraphs show how to get this solution up and running with a few different Cloud providers I've tried so far. If you prefer a video tutorial, here is one prapared by one of the users. Note, OpenVZ won't work[[n15]](#footnotes), make sure to get a proper virtual machine using KVM or Xen.
(Netflix is blocked[[n16]](#footnotes)) The following is based on a standard Ubuntu Docker image provided by DigitalOcean, but should in theory work on any Linux distribution with Docker pre-installed.
- Head over to Digital Ocean to get $10 USD credit
- Create a Droplet in a geographic location of interest using the latest Docker image (find in under
One-click Appstab). - SSH to your server and run:
mkdir -p ~/netflix-proxy\
  && cd ~/netflix-proxy\
  && curl -fsSL https://github.com/ab77/netflix-proxy/archive/latest.tar.gz | gunzip - | tar x --strip-components=1\
&& ./build.sh- Make sure to record the URL and credentials for the
netflix-proxyadmin site. - Set your DNS server to the IP given at the end of the script, then go to this site to make sure the same IP is displayed.
- Finally, enjoy
Netflixand others out of region. - Enjoy or try
#netflix-proxyon freenode for help.
authorising additional IPs
If you want to share your system with friends and family, you can authorise their home IP address(s) using thenetflix-proxy admin site, located at http://<ipaddr>:8080/, where ipaddr is the public IP address of your VPS. Login using admin account with the password you recorded during the build. If you've forgotten your admin credentials, reset.
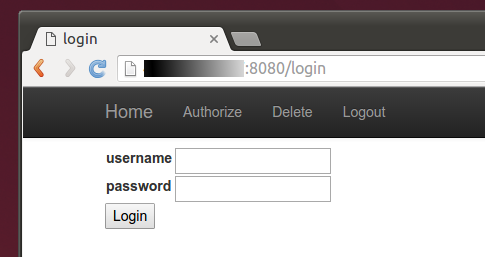
The admin account does not restrict the entry or removal of IPs. If you want to restrict the entry of IPs to the current client IP using an automatically populated drop-down, create a standard user account using the account-creator.sh script located in the auth directory, which will prompt you for the input and create the user account.
dynamic IPs
You can also use thenetflix-proxy admin site to update your IP address, should your ISP assign you a new one (e.g. via DHCP). If your IP address does change, all HTTP/HTTPS requests will automatically be redirected to the admin site on port 8080. All DNS requests will be redirected to dnsmasq instance running on port 5353. You will most likely need to purge your browser and system DNS caches after this. On Windows, run ipconfig /flushdns. On OS X, run:
sudo killall -HUP mDNSResponder\
&& sudo dscacheutil -flushcache</code></pre>
Then restart the browser (e.g
chrome://restart) and/or reboot the relevant devices. This mechanism should work on browsers, but will most likely cause errors on other devices, such as Apple TVs and smart TVs. If you Internet stops working all of a sudden, try loading a browser and going to netflix.com.
scripted authorization of IPs
- to automatically authorise client IP using a script (where
ipaddr is the public IP address of your VPS), substitute admin credentials and run:
<pre><code class="lang-">curl -L http://<ipaddr>:8080/autoadd?username=<admin-username>&password=<admin-password></code></pre>
- to manually authorise a specific IP, substitute admin credentials and run:
<pre><code class="lang-">curl -L http://<ipaddr>:8080/autoadd?ip=<your-public-ipaddr>&username=<admin-username>&password=<admin-password></code></pre>
automatic IP authorization
WARNING: do not do enable this unless you know what you are doing.
To enable automatic authorization of every IP that hits your proxy, set
AUTOAUTH = True in auth/settings.py and run service netflix-proxy-admin restart. This setting will effectively authorize any IP hitting your proxy IP with a web browser for the first time, including bots, hackers, spammers, etc. Upon successful authorization, the browser will be redirected to Google.
The DNS service is configured with recursion turned on by default, so after a successful authorization, anyone can use your VPS in DNS amplification attacks, which will probably put you in breach of contract with the VPS provider. You have been WARNED.
security
The build script automatically configures the system with DNS recursion turned on. This has security implications, since it potentially opens your DNS server to a DNS amplification attack, a kind of a DDoS attack. This should not be a concern however, as long as the iptables firewall rules configured automatically by the build script for you remain in place. However if you ever decide to turn the firewall off, please be aware of this.
command line options
The following command line options can be optionaly passed to build.sh for additional control:
<pre><code class="lang-">Usage: ./build.sh [-b 0|1] [-c <ip>] -b grab docker images from repository (0) or build locally (1) (default: 0) -c specify client-ip instead of being taken from ssh_connection</code></pre>
updates
In order to update your existing database schema, please run the provided update.sh script. Alternatively you can run the schema updates manually (e.g. if you skipped a version).
other cloud providers
locale issues
The build script has been designed to work on Ubuntu and Debian. It will most likely fail on all other distributions. Some pre-requisites require the locale to be set correctly and some provider OS images need extra help. If you get
locale issues reported by Python and/or pip during the build, try running the following first:
<pre><code class="lang-">export LANGUAGE=en_US.UTF-8\ && export LANG=en_US.UTF-8\ && export LCALL=enUS.UTF-8\ && export LCCTYPE="enUS.UTF-8"\ && locale-gen en_US.UTF-8\ && sudo apt-get -y install language-pack-en-base\ && sudo dpkg-reconfigure locales</code></pre>

(Netflix is blocked[[n16]](#footnotes)) The following is based on a Debian image provided by
Vultr, but should in theory work on any Debian distribution.
- For a limited time, head over to Vultr to create and account and get $20 USD credit.
- Create a compute instance in a geographic location of interest using Debian or Ubuntu image.
- SSH to your server and run:
<pre><code class="lang-">apt-get update\
&& apt-get -y install vim dnsutils curl sudo\
&& curl -fsSL https://get.docker.com/ | sh || apt-get -y install docker.io\
&& mkdir -p ~/netflix-proxy\
&& cd ~/netflix-proxy\
&& curl -fsSL https://github.com/ab77/netflix-proxy/archive/latest.tar.gz | gunzip - | tar x --strip-components=1\
&& ./build.sh</code></pre>
- Make sure to record the credentials for the
netflix-proxy admin site.
Set your DNS server to the IP given at the end of the script, then go to this site to make sure the same IP is displayed.
Finally, enjoy Netflix and others out of region.
Enjoy or try #netflix-proxy on freenode for help.

(Netflix is blocked[[n16]](#footnotes)) The following is based on a standard Ubuntu image provided by
Kamatera.
- Head over to Kamatera to start your 30 Day Free Trial.
- Create a new server in a geographic location of interest using Ubuntu or Debian image.
- SSH to your server and run:
<pre><code class="lang-">apt-get update\
&& apt-get -y install vim dnsutils curl sudo\
&& curl -fsSL https://get.docker.com/ | sh || apt-get -y install docker.io\
&& mkdir -p ~/netflix-proxy\
&& cd ~/netflix-proxy\
&& curl -fsSL https://github.com/ab77/netflix-proxy/archive/latest.tar.gz | gunzip - | tar x --strip-components=1\
| tar x --strip-components=1\
&& ./build.sh</code></pre>
- Make sure to record the URL and credentials for the
netflix-proxy admin site.
Set your DNS server to the IP given at the end of the script, then go to this site to make sure the same IP is displayed.
Finally, enjoy Netflix and others out of region.
Enjoy or try #netflix-proxy on freenode for help.

(Netflix is blocked[[n16]](#footnotes)) The following is based on a Debian or Ubuntu images provided by
RamNode.
- Head over to RamNode to create an account and buy a KVM VPS in a geographic location of interest (OpenVZ won't work).
- Log into the
VPS Control Panel and (re)install the OS using Ubuntu or Debian image.
SSH to your server and run:
<pre><code class="lang-">apt-get update\
&& apt-get -y install vim dnsutils curl sudo\
&& curl -fsSL https://get.docker.com/ | sh || apt-get -y install docker.io\
&& mkdir -p ~/netflix-proxy\
&& cd ~/netflix-proxy\
&& curl -fsSL https://github.com/ab77/netflix-proxy/archive/latest.tar.gz | gunzip - | tar x --strip-components=1\
&& ./build.sh</code></pre>
- Make sure to record the credentials for the
netflix-proxy admin site.
Set your DNS server to the IP given at the end of the script, then go to this site to make sure the same IP is displayed.
Finally, enjoy Netflix and others out of region.
Enjoy or try #netflix-proxy on freenode for help.

(Netflix is blocked[[n16]](#footnotes)) The following is based on a standard Ubuntu image provided by
Linode, but should work on any Linux distribution without Docker installed.
- Head over to Linode and sign-up for an account.
- Create a new
Linode in a geographic location of interest and deploy an Ubuntu image into it.
SSH to your server and run:
<pre><code class="lang-">apt-get update\
&& apt-get -y install vim dnsutils curl sudo\
&& curl -fsSL https://get.docker.com/ | sh || apt-get -y install docker.io\
&& mkdir -p ~/netflix-proxy\
&& cd ~/netflix-proxy\
&& curl -fsSL https://github.com/ab77/netflix-proxy/archive/latest.tar.gz | gunzip - | tar x --strip-components=1\
&& ./build.sh</code></pre>
- Make sure to record the credentials for the
netflix-proxy admin site.
Set your DNS server to the IP given at the end of the script, then go to this site to make sure the same IP is displayed.
Finally, enjoy Netflix and others out of region.
Enjoy or try #netflix-proxy on freenode for help.

(untested) The following is based on a standard Ubuntu image provided by
DreamHost, but should work on any Linux distribution without Docker installed and running under non-root user (e.g. Amazon Web Services[[n13]](#footnotes)).
- Head over to DreamHost and sign-up for an account.
- Find the
DreamCompute or Public Cloud Computing section and launch an Ubuntu instance in a geographic location of interest.
Make sure to add an additional firewall rule to allow DNS: Ingress - IPv4 - UDP - 53 - 0.0.0.0/0 (CIDR)
Also add a Floating IP to your instance.
SSH to your server and run:
<pre><code class="lang-">sudo apt-get update\
&& sudo apt-get -y install vim dnsutils curl\
&& curl -fsSL https://get.docker.com/ | sh || apt-get -y install docker.io\
&& sudo usermod -aG docker $(whoami | awk '{print $1}')\
&& mkdir -p ~/netflix-proxy\
&& cd ~/netflix-proxy\
&& curl -fsSL https://github.com/ab77/netflix-proxy/archive/latest.tar.gz | gunzip - | tar x --strip-components=1\
&& ./build.sh</code></pre>
- Make sure to record the credentials for the
netflix-proxy admin site.
Set your DNS server to the IP given at the end of the script, then go to this site to make sure the same IP is displayed.
Finally, enjoy Netflix and others out of region.
Enjoy or try #netflix-proxy on freenode for help.

The following is based on Ubuntu image provided by
Gandi using root login with SSH key only (no password). For default non-root admin login, adjust step 6 to use sudo where necessary.
- Head over to Gandi to create a virtual server in a geographic location of interest.
- SSH to your server and run:
<pre><code class="lang-">apt-get update\
&& apt-get -y install vim dnsutils curl sudo\
&& curl -fsSL https://get.docker.com/ | sh || apt-get -y install docker.io\
&& mkdir -p ~/netflix-proxy\
&& cd ~/netflix-proxy\
&& curl -fsSL https://github.com/ab77/netflix-proxy/archive/latest.tar.gz | gunzip - | tar x --strip-components=1\
&& ./build.sh</code></pre>
- Make sure to record the credentials for the
netflix-proxy admin site.
Set your DNS server to the IP given at the end of the script, then go to this site to make sure the same IP is displayed.
Finally, enjoy Netflix and others out of region.
Enjoy or try #netflix-proxy on freenode for help.
Microsoft Azure (advanced)
The following has not been tested and is based on a standard Ubuntu image provided by Microsoft Azure using cloud-harness automation tool I wrote a while back and assumes an empty Microsoft Azure subscription. Also, because Azure block ICMP thorough the load-balancer and don't offer native IPv6 support, IPv6 isn't going to work.
- Head over to Microsoft Azure and sign-up for an account.
- Get Python.
- On your workstation, run
git clone https://github.com/ab77/cloud-harness.git ~/cloud-harness.
Follow cloud-harness Installation and Configuration section to set it up.
Create a storage account.
Create a new hosted service.
Add a hosted service certificate for SSH public key authentication
Create a reserved ip address.
Create a virtual network.
Create a Ubuntu virtual machine as follows:
<pre><code class="lang-">./cloud-harness.py azure --action createvirtualmachine_deployment \
--service <your hosted service name> \
--deployment <your hosted service name> \
--name <your virtual machine name> \
--label 'Netflix proxy' \
--account <your storage account name> \
--blob b39f27a8b8c64d52b05eac6a62ebad85_Ubuntu-1404-LTS-amd64-server-20140414-en-us-30GB \
--os Linux \
--network VNet1 \
--subnet Subnet-1 \
--ipaddr <your reserved ipaddr name> \
--size Medium \
--ssh_auth \
--disablepwdauth \
--verbose</code></pre>
- Use the Azure Management Portal to add
DNS (UDP), HTTP (TCP) and HTTPS (TCP) endpoints and secure them to your home/work/whatever IPs using the Azure ACL feature.
SSH to your VM as azureuser using custom public TCP port (not 22) and use any non-root user Ubuntu instructions to build/install netflix-proxy.
automated tests
test build
This project is linked with Travis CI to deploy and test the project automatically. The Python script testbuild.py is used to deploy and test netflix-proxy. This script deploys a test Droplet and then runs a serious of tests to verify (a) that all Docker containers start; (b) the built.sh script outputs the correct message at the end; (c) all the relevant services survive a reboot; and (d) proxy is able to comunicate with Netflix over SSL.
The
testbuild.py script can also be used to programatically deploy Droplets from the command line:
<pre><code class="lang-">usage: testbuild.py digitalocean [-h] --apitoken APITOKEN [--clientip CLIENTIP] [--fingerprint FINGERPRINT [FINGERPRINT ...]] [--region REGION] [--branch BRANCH] [--create] [--destroy] [--list_regions] [--name NAME]
optional arguments: -h, --help show this help message and exit --apitoken APITOKEN DigitalOcean API v2 secret token --clientip CLIENTIP client IP to secure Droplet --fingerprint FINGERPRINT [FINGERPRINT ...] SSH key fingerprint --region REGION region to deploy into; use --list_regions for a list --branch BRANCH netflix-proxy branch to deploy (default: master) --create Create droplet --destroy Destroy droplet --list_regions list all available regions --name NAME Droplet name</code></pre>
Note, you will need a working
Python 2.7 environment and the modules listed in tests/requirements.txt (run pip install -r tests/requirements.txt).
test video playback
Video playback tests are currently disabled due to provider blocking.
Netflix
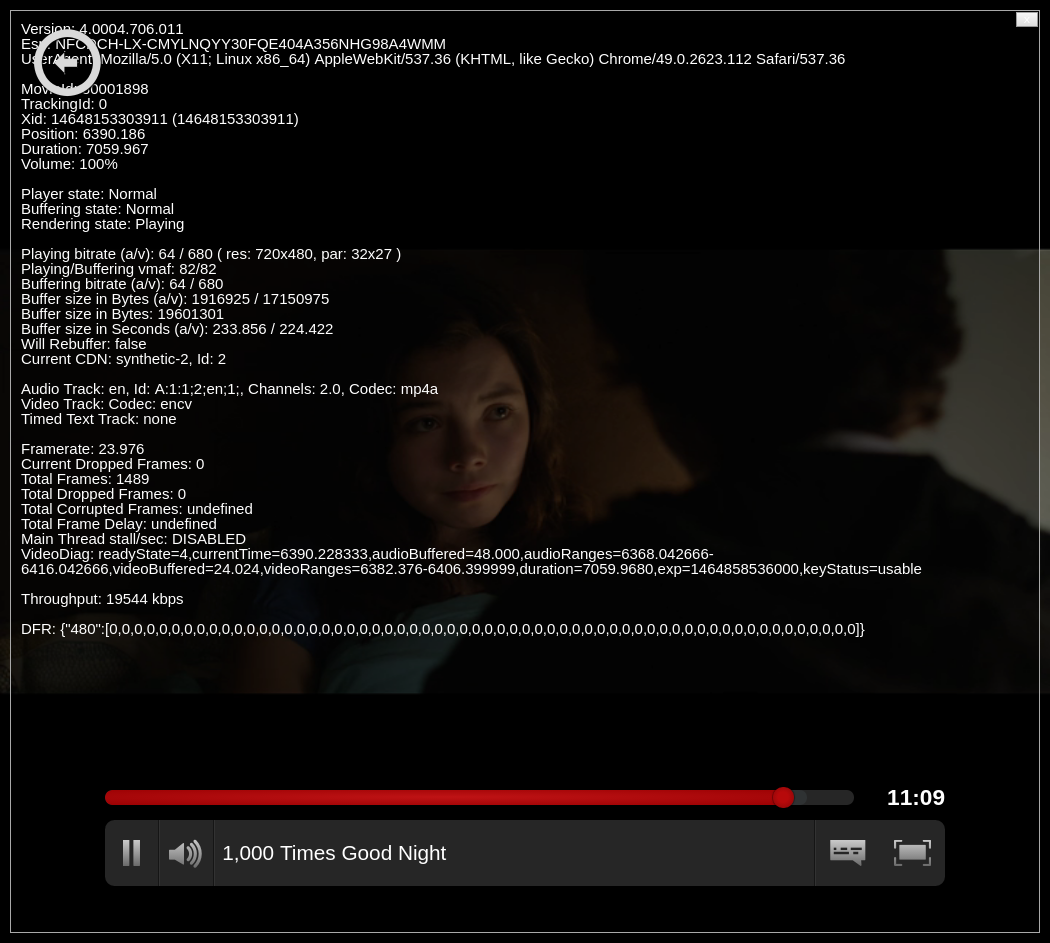
After a successful build deployment, testvideo.py is executed to test Netflix video playback. This is done by playing back 60 seconds of a title known to only be available in the US region (e.g. 1,000 Times Good Night).
<pre><code class="lang-">usage: testvideo.py netflix [-h] --email EMAIL --password PASSWORD [--seconds SECONDS] [--titleid TITLEID] [--tries TRIES]
optional arguments: -h, --help show this help message and exit --email EMAIL Netflix username --password PASSWORD Netflix password --seconds SECONDS playback time per title in seconds (default: 60) --titleid TITLEID Netflix title_id to play (default: 80001898) --tries TRIES Playback restart attempts (default: 4)</code></pre>
A screenshot is saved at the end of the test and uploaded to the
gh-pages branch.
Hulu
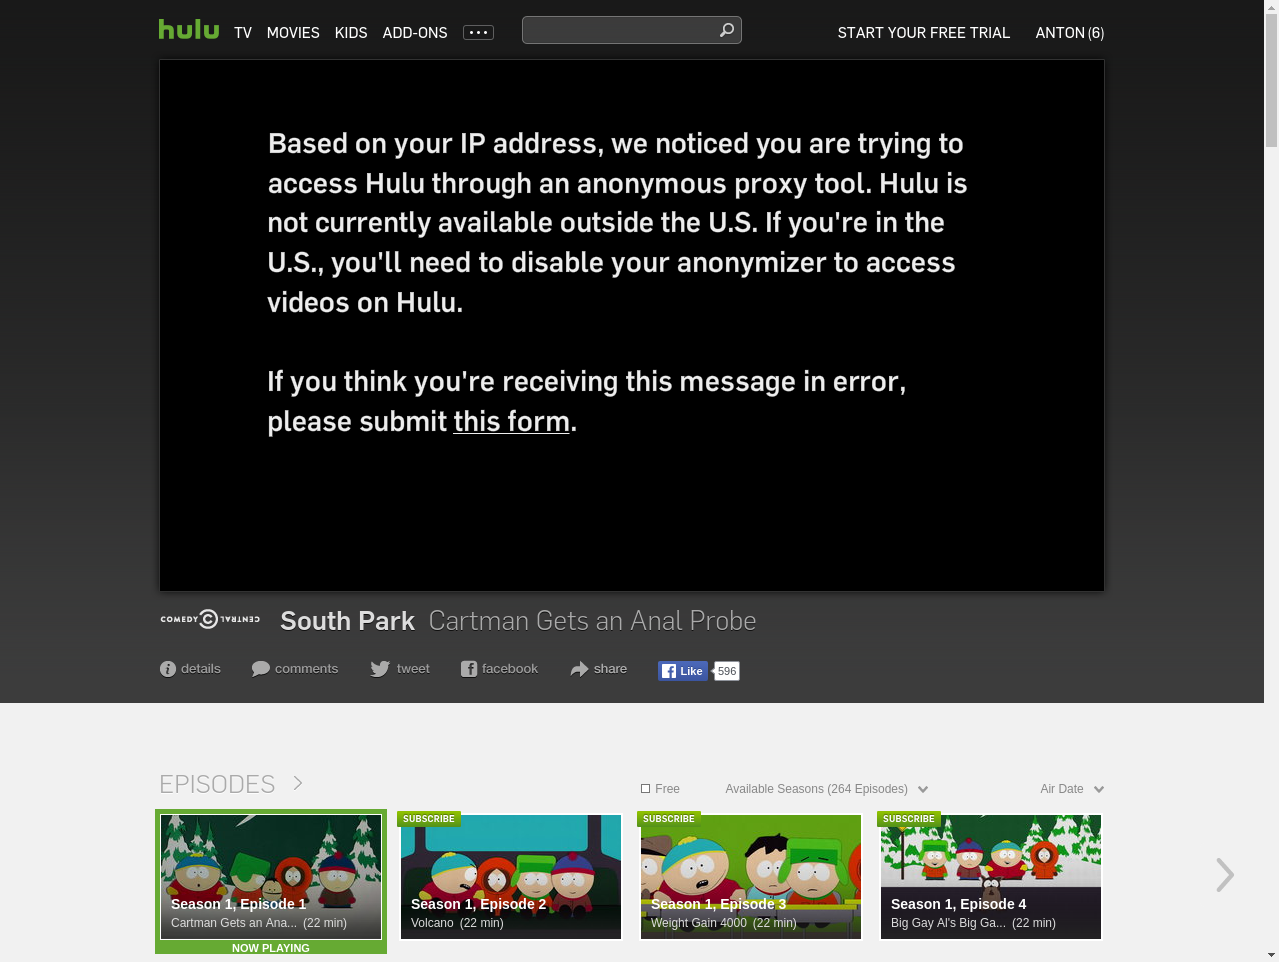
Similarly, testvideo.py is executed to test Hulu video playback using one of the free titles (e.g. South Park S01E01: Cartman Gets an Anal Probe). The build is configured not to fail in the event of Hulu test failing. This is because Hulu is almost cetrtainly blocked from Digital Ocean.
IPv6
This solution uses IPv6 downstream from the proxy to unblock IPv6 enabled providers, such as Netflix. No IPv6 support on the client is required for this to work, only the VPS must have public IPv6 connectivity. You may also need to turn off IPv6 on your local network (and/or relevant devices).[[n6]](#footnotes)
<pre><code class="lang-">+----------+ +-----------+ +-----------------+ | | | | | | | client | +--------------> | proxy | +-------------> | Netflix, etc. | | | (ipv4) | | (ipv6) | | +----------+ +-----------+ +-----------------+</code></pre>
contributing
If you have any idea, feel free to fork it and submit your changes back to me.
donate
If you find this useful, please feel free to make a small donation with PayPal or Bitcoin.
| Paypal | Bitcoin | | ------ | ------- | | |
| 1GUrKgkaCkdsrCzb4pq3bJwkmjTVv9X7eG|
footnotes
- SNIProxy by Dustin Lundquist
dustin@null-ptr.net; this solution will only on devices supporting Server Name Indication (SNI)[[n7]](#footnotes) and only if they use DNS to resolve names.
Hulu is heavily geo-restricted from most non-residential IP ranges and doesn't support IPv6.
You can now specify your home/office/etc. IP manually using -c option to build.sh.
See, serverfault post.
See, this and this. The following four hosts all need to resolve to different public IPs.
If you have a working IPv6 stack, then your device may be preferring it over IPv4, see this issue.
See, article.
See, post.
See, Using NDP proxying. Both the caching resolver and Docker dual-stack support are disabled by default due to differences in IPv6 configurations provided by various hosting providers (i.e. RamNode).
See, post.
See, https://www.facebook.com/GetflixAU/posts/650132888457824, Netflix Geoblocking - Part 2 and read How Netflix is blocking VPNs and Wiki.
Bypass Netflix Geoblocks with IPv6.
See, IPv6 on Amazon AWS EC2.
If Netflix still thinks you are in a wrong country, try a different tunnel server (e.g. in a US location).
See, article.
Netflix have most definitely blocked this service provider network ranges, so following the process is unlikely to yield an unblocking solution. If you own a compatible device, you could try black.box unzoner.
GFW is probably re-writing DNS responses for certain very sensitive domains (i.e. facebook.com), so unfortunately a simple proxy solution like this won't work. VPN technology is required to bypass, try black.box unzoner.
dnsmasq by simon@thekelleys.org.uk`.
Python3 (latest) release won't work on Ubuntu16/Debian9, upgrade to a more recent distribution (Python2 EOL Jan/2020).
© 2016-2019 ab1


